
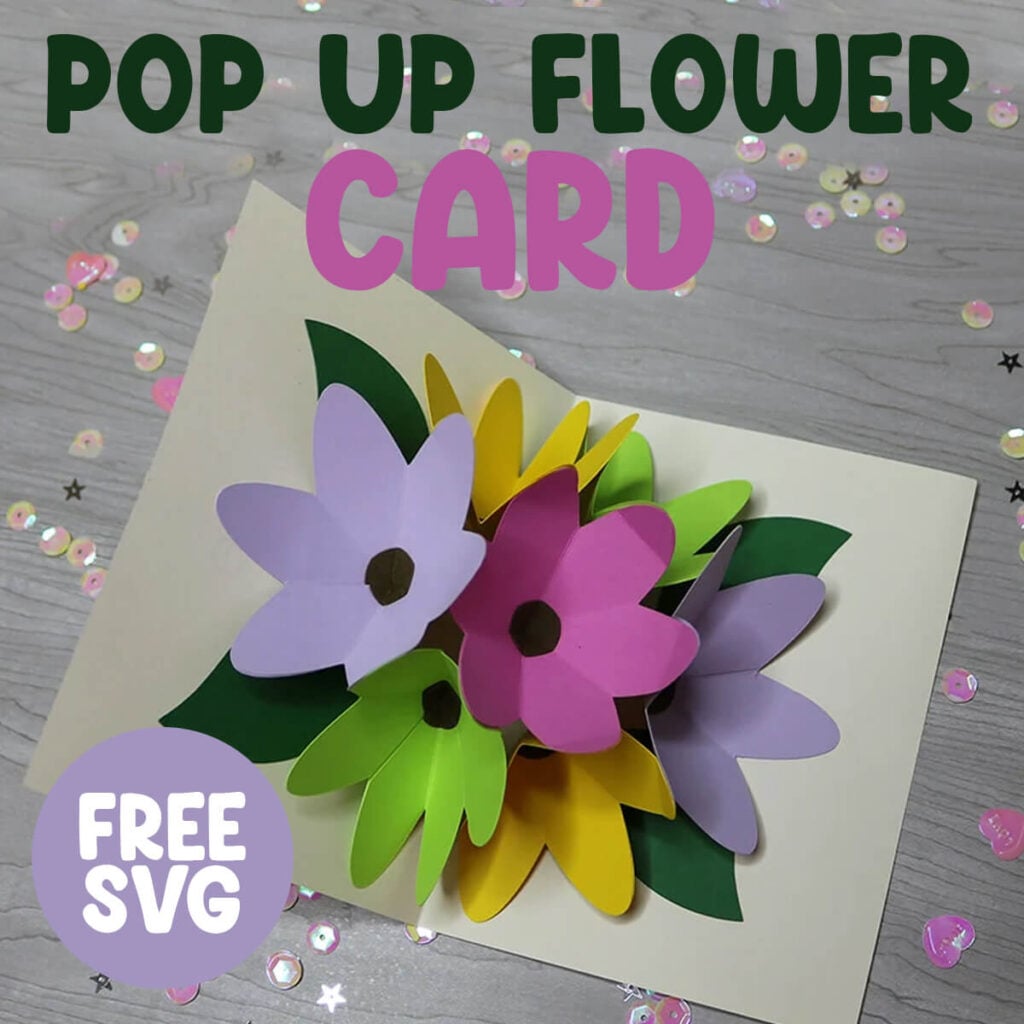
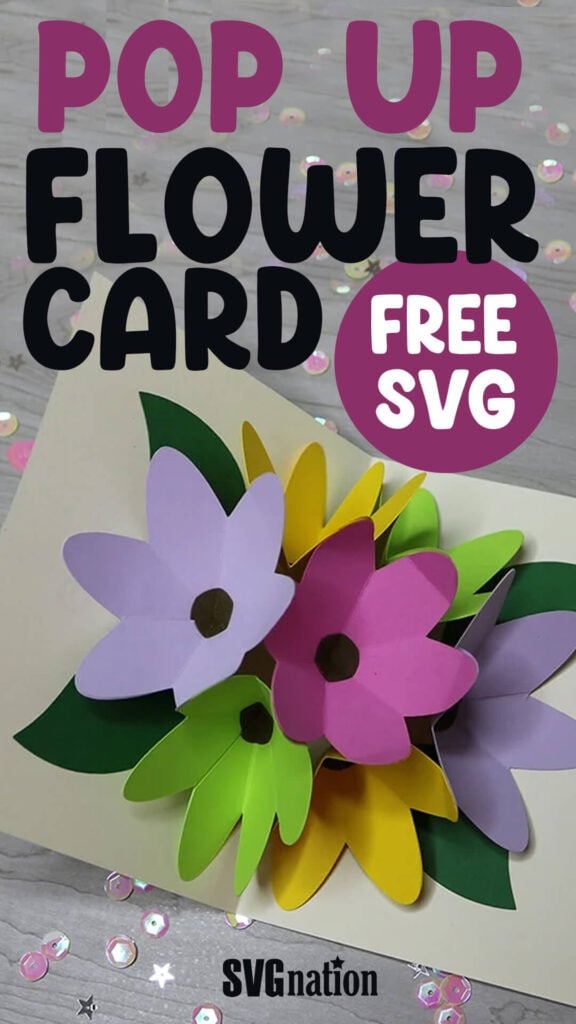
Pop Up Flower Card Template

If you’re looking for a card that has that “wow factor”, then you’ll love this pop up flower card template. Use this with a Cricut or Silhouette to make a blooming 3D surprise. It’s perfect for Mother’s Day, birthdays, thank-you cards or just because.
This post contains some affiliate links for your convenience. (Which means if you make a purchase after clicking a link I will earn a small commission but it won’t cost you a penny more)! Read my full disclosure policy.
If you love paper crafts then make sure to check out all of my Cricut paper crafts for more projects you’ll love. You can also find more Card SVG Templates for other holidays and occasions.
Learn how to make a Pop Up Flower Card
What I love about this pop up flower card template is you can use it for any season. Just mix and match the colors to match any season or celebration. It’s also great for using leftover cardstock.

Pop Up Flower Card
This flower pop up card easily comes together with the use of your Cricut or Silhouette. But, if you don’t have a cutting machine, there is a flower template included in the files. Just print this out and use it to create your flowers following along with this step-by-step tutorial.
You can also easily edit “Happy Mother’s Day” on the front of the card for any text that you want. So you can personalize and customize this card for any occasion.
Watch the full step-by-step video tutorial to learn how to make these flower pop up cards here:

To Make this Pop Up Flower Card, You Will Need:
- Light or Medium weight Cardstock/Paper – this is a great variety pack if you need multiple colors.
- Cricut Maker or Explore Cutting Machine and your standard cutting mat.
- Glue – This Bearly Art craft glue is my favorite glue for paper crafts.
- Scoring Stylus (which is what I will be using in this tutorial) or Scoring Wheel (Maker only). If your cutting machine doesn’t have the scoring feature, this scoring board and stylus is great to use.
- Cricut pens
- 4×6 envelope or you can make your own envelope with my free envelope templates.
Download The Pop Up Flower Card Template
You can download this free Pop Up Flower Card Template from my members only free library (design #8 under Card Templates or search “Pop Up Flower Card SVG”).
Don’t have a password? Unlock my free members library here.
Share the love and easily come back to this tutorial anytime just by saving this on Pinterest… Plus this helps to keep my SVG files and Cricut tutorials free!
Step 1: Upload Pop Up Flower Card Template to Cricut Design Space
Create a new project in Cricut Design Space, upload the flower pop up card template and add it to your canvas.
Step 2: Modify and Customize the Card Layers
To modify the card, first you need to ungroup the card layers. Click on the card and click “ungroup”.
If you are using a scoring tool (recommended), then click on the vertical line and change the operation to “score”. If you are not using a scoring tool, then delete the line.

Select your text layers together (hold down shift to select multiple layers at a time) and change the operation to “pen”. If you want to modify the colors, then go ahead and do this.
You can also delete the text and add your own if you are using this flower card template for something other than Mother’s Day. Check out my Cricut pens tutorial for help with writing with your Cricut and for free writing font recommendations.

Select all of your pen layers, your score line and your card and select “attach”. These will need to be attached for your Cricut to score and write in the correct places.

Step 3: Modifying the Flower Templates
For the flower templates, you will need to change the lines on top to score lines. If you are not using a scoring tool (not recommended), then delete these lines.
Click on a flower and then click on the group with the lines. Change the operation for these lines to “score”.

Then click the flower above the group of lines. This will select the group with both the flower and score lines together. Select “attach” to attach these together.

Repeat these steps for EACH flower. You will also repeat these same steps for EACH of the round middle flower parts. Once you have done this, your project is ready to cut.
Step 4: Cut Everything Out
When it comes to cutting your project, you’re just going to follow the prompts in Cricut Design Space so you know when to add your pen and when to add your scoring tool.
But before you cut your pop up flower card, check your mat preview and make sure everything looks correct. The pen/text should be exactly where you want it to write on your card and the score lines should be lined up on top of the card and flowers in the correct places. If anything is not in the correct spot, then you need to go back and attach it.

Step 5: Assemble the Flowers
Glue each of the circles on your flowers. When gluing these on, make sure that you line up the score lines for the circle and the flower.
You also want the side where you can see the score lines better which is the side your Cricut scored on facing up for both the flower and the circle piece when you glue it on.
Glue these on for all 7 of your flowers.

Take one of your flowers and fold on all of the score lines. When you fold on the score lines, fold them inward so the circle that you glued down is on the inside of the flower.
After folding each of the flower petals in on the score lines, glue the 2 outside flower petals together to close in the flower. It doesn’t matter which petal you glue on it. Repeat this for all 7 of the flowers.

To assemble the flower bouquet, start by folding all of your flowers in half.
Note: When gluing the flowers together, make sure that you only use a small amount of glue at the tip of the flower petals. If you glue too much of the petal, the petals will not open as well.
You can locate a picture for each step in the graphic below.
- Add a drop of glue to the right flower petal.
- Then attach another flower on top by lining up the flower petals.
- Repeat this for the left side.
- With the cut out area facing the bottom and the flowers you just glued on facing the top, add glue to the tips of the middle 3 flower petals.
- Attach another flower on top. This flower is your middle flower (in case you are planning colors accordingly).
- With the flower facing up, place a dot of glue on the tip of the middle 2 right petals.
- Attach another flower on top where the glue is, lining it up with the flower underneath.
- Repeat this for the left side as well and then add glue to the tips of the flower pets to the middle 3 petals.
- Attach your last flower on top and set aside to let dry.

Step 6: Attach Flowers to the Inside of the Card
To assemble the flower pop up card, fold the card base in half on the score line. Then glue your heart to the front.
Open the card so the inside of the card is face up. The first and last flower that you assembled in your flower bouquet are the sides that will get glued to the inside of the card. Add glue to only the middle petal of one of these side flowers.

Then attach the petal to the inside of the card. When you attach this, line the flower up in the middle of the card and almost lined up with the center fold. Leave just enough space by the center fold so you can still easily close the card.

Then glue just the middle flower petal for the other side flower (for me this is that purple flower on top) and close the card to attach it to the other side of the card.
Note: You need to wait for this to dry before opening the card.
Once the flowers have dried, open your card! And as you do, the flowers will magically bloom. If you want to glue some leaf pieces to the inside of your card, go ahead and do this.

When you close the card, the flowers will automatically fold in on the fold lines and you won’t have to force them. The card is not going to stay closed all the way because the flowers will push it open a little. But it will fully close when held together and will fit inside a 4×6 envelope.
Thanks so much for checking out this pop up flower card tutorial. When you’re done, make sure to post these in my crafting group here or tag me if you post them on social media. I absolutely love seeing your crafts and can’t wait to see how yours turn out!