
Butterfly Gift Box
Use your Cricut or Silhouette cutting machine to create your own Butterfly Gift Box! These are perfect for small gifts. Or to use as favors for weddings, showers, etc. Learn how to make these super cute butterfly boxes (and download the free Butterfly Gift Box SVG) with this step-by-step tutorial.

The other week, I made these butterfly gift card holders and you guys loved them! So, I figured a gift box would look just as cute with this design (and I was right!). This butterfly gift box is almost as quick and easy to put together as the gift card holder, it just needs a little glue.

How to Make a Butterfly Box with Your Cricut:
To make this butterfly box, you will need:
- Medium or Heavy Weight Cardstock in your color choices – I recommend this glitter cardstock or this textured cardstock.
- Cricut Maker or Explore Cutting Machine and your standard cutting mat.
- Scoring Stylus (which is what I will be using in this tutorial) or Scoring Wheel (Maker only). If your cutting machine doesn’t have the scoring feature, this scoring board and stylus is great to use.
- Glue (I prefer using a hot glue gun)
- Butterfly Gift Box SVG – Download at the bottom of the post
Step-by-Step Tutorial
Watch the full step-by-step video tutorial on how to make this Cricut gift box:

Upload Box Template & Add Score Lines
Upload the butterfly gift box SVG to Cricut Design Space. If needed, this tutorial will show you how to upload files to Cricut Design Space.
Before cutting your gift box, you will need to add your score lines. Click on the layer with the group of 4 lines and then change your operation from “basic cut” to “score”.
Note: If you are not using a scoring wheel or stylus, then delete these layers.

Next, select all of your layers together by holding down shift. Select “attach” to attach your score lines to your box layer.

Cut & Assemble Your Gift Box
You are now ready to cut your project. Click on “Make It.” You should see your score lines on top of your gift box template as shown in the picture below. If you do not, then go back and make sure you have attached your score lines to the gift box layer.

Follow the prompts on your computer to cut your butterfly gift box. If you are using your scoring tool, then make sure to insert this first.
Once you remove your cardstock from the mat, you can begin to assemble your gift box. Start by folding on all of the score lines, folding the pieces inward.
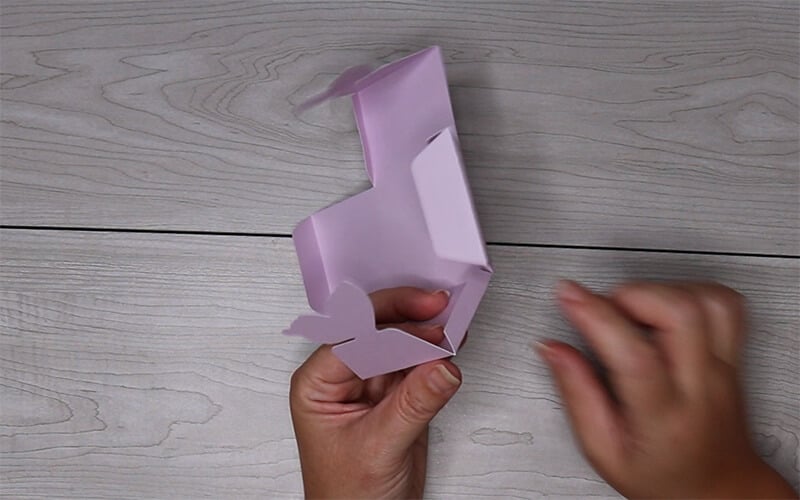
Next, glue all 4 tabs to the inside of the box. Once all 4 tabs are glued, you will have a box shape.
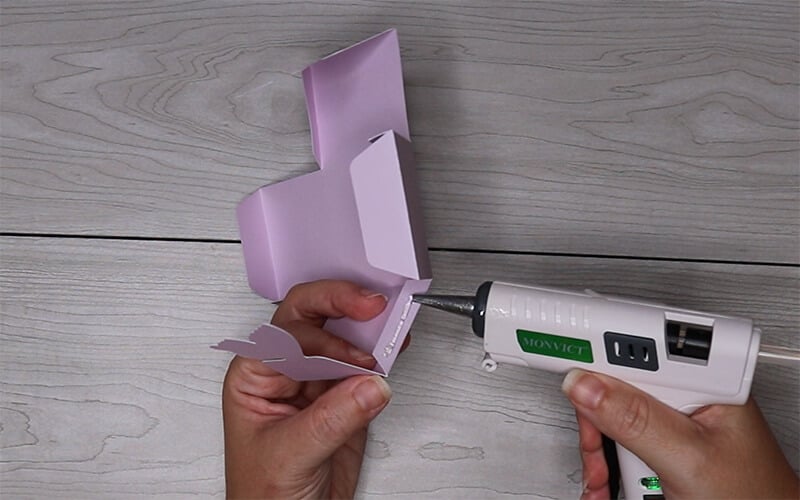
To close your box, you just need to fold the 2 tabs in and then attach the butterfly together. There is a cutout on each butterfly piece. Just line up the cutouts to create your butterfly. Fold the wings up when you are done for more of a 3-dimensional effect.
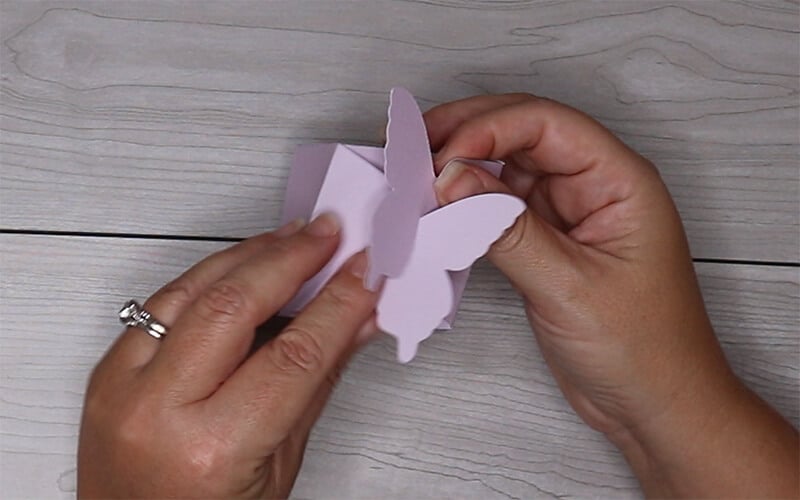
And that’s all there is to it! You can easily open and close the gift box with the butterfly wings. This also looks really good with glitter cardstock.

This butterfly gift box is so simple to put together. It’s already sized to fit perfectly on a 12×12 sheet of paper but can easily be resized if needed. If you enjoyed making this gift box, then you’ll love these Cricut box templates as well.
Before downloading, please share this design on Pinterest – it’s quick to do and makes a HUGE impact to keep SVG Nation’s designs free to you.

To get this Butterfly Gift Box SVG, enter your name and email into the form below and then click the “Get It Now!” button!
Please remember these are for personal use only. If you’re looking to sell products using these designs, please purchase a Commercial Use License here.