
Christmas Advent Calendar
Count down the days until Christmas with your very own Cricut advent calendar! The best part about making your own Christmas advent calendar is that you can customize what goes inside for each day. Which makes these perfect for any age.
Whether you have young kids or teens, advent calendars make the countdown to Christmas such an enjoyable time. We have done advent calendars throughout the years, but this year I wanted something different. I really wanted to customize the calendars for each kid with something they will love.

So, I turned my Cricut and design software and got to work. And after A LOT of hours (you may have noticed I have been slow to post the past 2 weeks and this is why), I created a Cricut advent calendar that I am so super proud of and excited to share with you guys!!
And as always, you’ll be able to download this Christmas advent calendar SVG for free. The folder will contain 2 different files. A full version for all 24 days. And a version for just 12 days. You can expect to spend about 3-4 hours on the full version and about 1-2 hours on the 12-day version. And if you use a heavy weight white cardstock for the base, these are super sturdy so you can continue to reuse your Cricut advent calendar over the years.

You will also be able to personalize your Cricut advent calendar and I will show you how in this step-by-step tutorial. So, let’s get started!
How to Make a Cricut Advent Calendar:
To make this Christmas advent calendar with your Cricut, you will need:
- Cardstock and Christmas patterned paper (see the breakdown below for specific amounts of paper)
- Cricut Maker or Explore Cutting Machine and your standard cutting mat.
- Scoring Stylus (which is what I will be using in this tutorial) or Scoring Wheel (Maker only). If your cutting machine doesn’t have the scoring feature, this scoring board and stylus is great to use.
- Glue – I highly recommend this Bearly Art Craft Glue. I do not recommend using hot glue as this is a thicker glue and dries too quick to assemble.
- Advent Calendar SVG – Download at the bottom of the post
Cardstock Recommendations
While you do not have to use each color as I have, I will list them here so you know how much cardstock you will need to make a Christmas advent calendar with your Cricut. The paper amount listed is for the full 24-day advent calendar. If you are making a 12-day advent calendar, then you will only need half of the amount of paper.
If the paper that I used was ordered from Amazon, I will leave a link for it so you can see what I am using.
- 11 sheets of 100lb Weight White Cardstock
- 2 sheets of white glitter cardstock (or you can use the regular white cardstock)
- 1 sheet of gold glitter cardstock (used for the numbers)
- 5 sheets of light green 65lb weight cardstock (if you want the front a different color than the inside, then you will split this between 2 colors using 2 sheets for the inside and 3 sheets for the outside)
- 1 sheet of the following colors in a medium or light weight cardstock (black, yellow, dark green, light blue, purple and red)
- 5 sheets of patterned Christmas scrapbook paper. This is optional if you want the prints on the front of the doors. You can also use more or less prints depending on your personal preference. I picked mine up from Hobby Lobby, but Amazon does have some really cute Christmas paper here.
Step-by-Step Tutorial
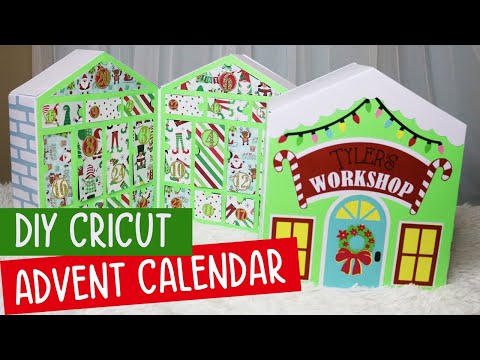
Watch the full step-by-step video tutorial on how to make this DIY Cricut advent calendar:
Step 1 – Cut and Assemble the Base
Start by uploading the first advent calendar SVG file to Cricut Design Space. Click on “ungroup” to ungroup your layers. Go down each layer and change the cut line to a score line. Then, attach the score line to the design underneath it.

Cut each of these pieces using the 100lb Weight White Cardstock. After they are cut, fold on all of the score lines and then begin to assemble the base.
For the base, you will need the house cut out with the cut outs in it and the pieces below. Organize your pieces as you see in the picture so that you know which each piece is. You will have double the number of pieces if you are making the 24-day calendar. But this is how many you will need for each base.

Glue the bottom piece to the bottom of your base with the flat side facing the bottom. Then attach one of the middle pieces to the next layer. For this piece, make sure the flat side is up so that it is like a shelf.
Using the 3 bottom pieces, glue them between your two layers. The side without the tab will go up. It does not matter which way the bottom tab faces.

Then continue to repeat these steps by adding the next shelf layer and then the 3 middle pieces. Then add the next shelf layer and the 2 top pieces. Always make sure the shelf layer has the flat side facing up. And add the shelf layer before adding the pieces in between.
This is just your base layer, so don’t worry if any glue leaks. This will all be covered up later.

Then glue on each of the sides and the roof. You will glue the bottom tab piece of the sides to the bottom and the top tab pieces to the roof.

If you are making the 12 Days of Christmas advent calendar, then your base if finished. However, if you are making a 24-day calendar, then you will need to repeat these steps with the rest of the pieces that you cut out.
Then using the tall cutout that is left, attach the 2 bases together. Fold the piece down the middle. Then line both of your bases up perfectly with each other. Glue the attachment piece to both sides and press it down well while it dries.

Step 2 – Cut and Personalize the Advent Calendar
Next, upload the second advent calendar SVG file to Cricut Design Space. If you are making the 12 days of Christmas calendar, both the 2 and 3 files are combined.
Start by selecting “ungroup” to ungroup your layers. Then change the group of lines on top of the green house to score instead of cut. Then attach them to the house. Repeat this step for the other house. Then change the cut line on the white roof piece to score and attach it to the roof piece. Repeat this step for the other roof piece.

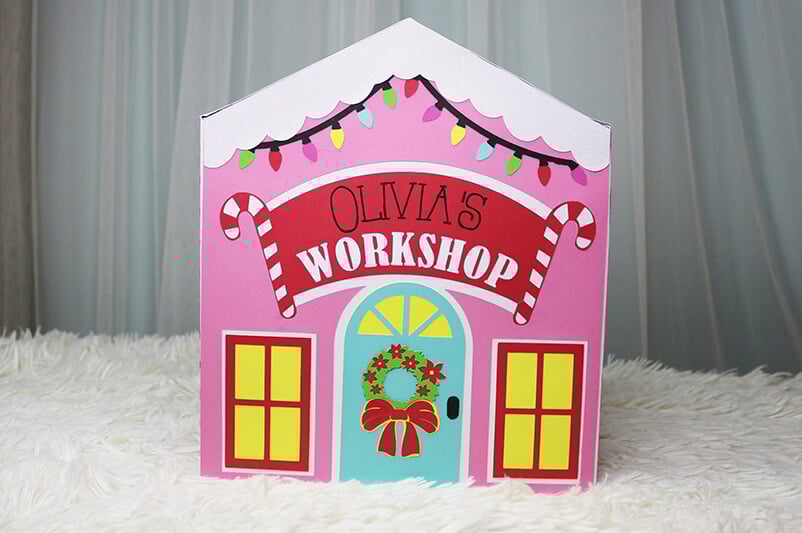
Cut out all of your pieces and then upload the third advent calendar SVG file to Cricut Design Space. There are no modifications that need to be made to this file. However, make sure to personalize the “workshop” piece with the recipient’s name. You can also use “Santa’s” if you want to keep it generic.
For ideas on how to personalize this piece, make sure to watch the video as it shows you 3 different ways that you can do this. I am using my Cricut to write on this piece. If you need help using the writing feature with your Cricut, make sure to check out my full Cricut writing tutorial (or if you need free writing font suggestions).

Then cut your remaining pieces.
Step 3 – Assemble the Christmas Advent Calendar
Glue the patterned door fronts onto the door pieces. If you are not using the patterned pieces, then skip this step. Then glue the numbers to the matching circle piece. These are meant to be completely random, so the colors and numbers do not matter. Just match them by size.
Randomly glue a number to each door. There are 3 different sizes for the numbers. You can place the larger numbers on the larger doors or make them all completely random.

Once this is dry, glue this to the front of the base that you assembled. The front of the base is the side with the front outline.

Next, take the 2 white house pieces and assemble those. You will assemble the front of the workshop and the brick back. If you are doing the 12 days of Christmas, you will not need to assemble the back brick wall.

For the final step, you will glue these pieces to the front and back of your Cricut advent calendar. Then glue the brick pieces to each side of your building and you are done!

Just fill these Christmas advent calendars which a bunch of goodies and they are ready to gift!
Ideas to Fill Your Christmas Advent Calendar
The great thing about these DIY advent calendars is that you can REUSE them each year. But you can also fill them with items specific for each recipient. So, these are fun for any age! Including the teens or even gifts for teachers. If you have a lot of teachers, I recommend doing the 12 days of Christmas version.
There are so many different things that you can fill these Cricut advent calendars with. But, to help get the ideas flowing, here are some suggestions:
- Christmas Character Beauty Face Masks
- Chapstick/Lip Balm
- Gift Cards
- Single Servings of Pre-Workout (for the health conscious)
- Ty Beanie Boo Keychains
- Christmas fake acrylic nails (and other Christmas jewlery)
- Nail Polish
- Beef Jerkey
- Mini Bottles
- Treats and Other Snacks
Before downloading this Cricut Advent Calendar, please share this design on Pinterest – it’s quick to do and makes a HUGE impact to keep SVG Nation’s designs free to you.

To get this Advent Calendar SVG File, enter your name and email into the form below and then click the “Get It Now!” button!
Please remember these are for personal use only. If you’re looking to sell products using these designs, please purchase a Commercial Use License here.