
Envelope SVG Templates – Make & Address Envelopes with Cricut
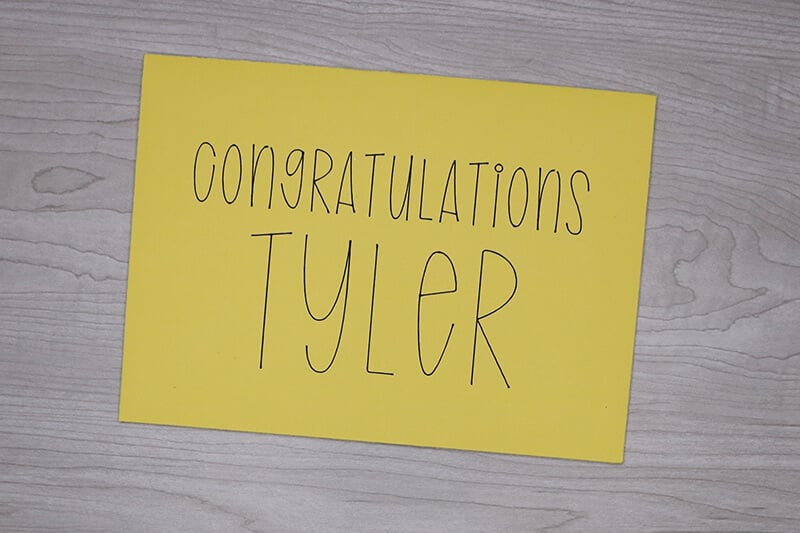
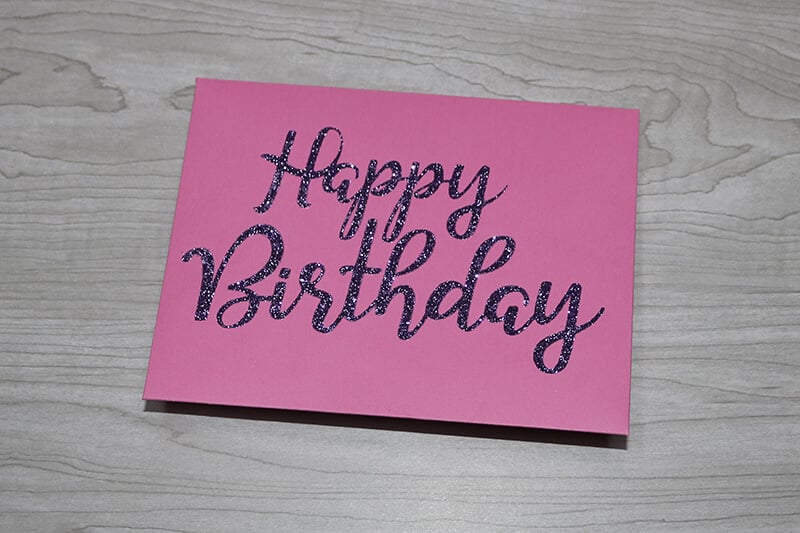
I love making handmade cards with my Cricut. And if you’re going to make handmade cards, then you might as well personalize it with a handmade envelope. In this tutorial, you will learn how to make and address envelopes with your Cricut.
Plus, get my free envelope templates! And make sure to stick around because I’ll share different ways that you can customize these envelope SVG files to create super cute envelopes. As well as what type of paper works best for making envelopes with your Cricut.
I recommend that you read this tutorial from the beginning because it builds as it goes.
In this tutorial, I will cover:
- Materials for making Cricut envelopes
- Adding score lines for a perfect fold
- Resizing the envelope SVG templates for any card size
- Addressing Envelopes with your Cricut using Cricut Pens
- Using iron on vinyl to address/decorate envelopes
- Create cut-outs for super fun envelope designs
- Free SVG templates (download at the bottom of this post)
Let’s get started!
Materials for Cricut Envelopes
I tested several different paper and cardstocks throughout this tutorial. My favorite envelopes are the ones where I used a lightweight (65lb) cardstock (found here) for the envelope and decorative scrapbook paper for the liner. And also, using just decorative scrapbook paper for the envelope.
When using cardstock for both the liner and envelope, the envelopes felt too stiff and bulky, although they still work. Heavy cardstock will not work for envelopes.
Materials Needed for Making Cricut Envelopes:
- Cricut Maker/Explorer and Fine Point Blade
- Green Cutting Mat
- Scoring Wheel (Maker only) or Scoring Stylus (this is the scoring stylus that I use)
- Paper (see notes above)
- Glue and Double-Sided Tape
- Cricut Pens
- Iron on Vinyl and the EasyPress Mini
- Envelope SVG Templates (download at the bottom of this post)

Making Envelopes with your Cricut
Start by uploading the envelope SVG template that you want to use to Cricut Design Space. Learn how to do this here.
You’ll notice that there is an envelope template and a separate design which is to use for the envelope liner. You will need to ungroup these layers. To do this, select your image and then click on “UnGroup”.

Adding Score Lines to Your Envelope
If you look at your designs, you’ll notice that there are cut lines where you will fold your envelope and liner. It’s important that you change these to score lines! If you do not, your Cricut will cut where you are supposed to fold.
If you do not have a scoring stylus (this is the scoring stylus that I use) or scoring wheel, you will need to delete these layers and fold the envelope by hand. You will get a much more precise fold using a scoring tool though.
Select your first score line and then change your operation from “Basic Cut” to “Score”.
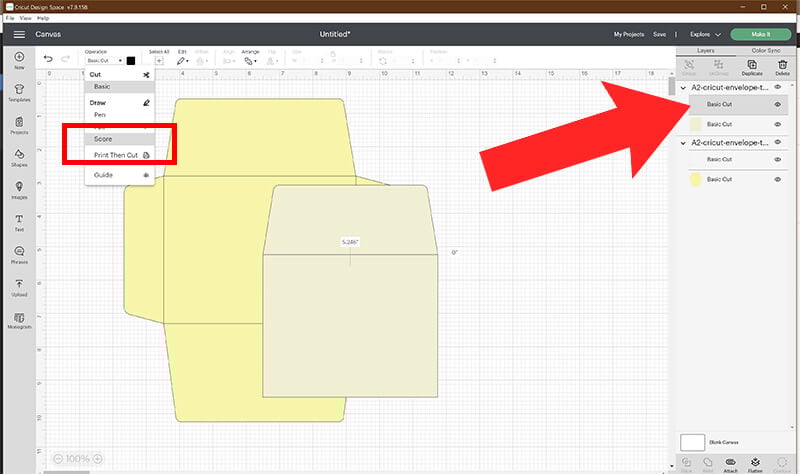
You will then need to attach to the score line back to your liner layer. This will tell your Cricut where to score your paper in relation to where it cuts it.
To attach your layers, select both your score line and liner layer together by holding down shift. Then select “Attach”.

You will need to repeat these steps to change the score lines for your envelope layer as well. Don’t forget to attach your score lines to your envelope layer when you are done! So, your Canvas should look like the picture below.

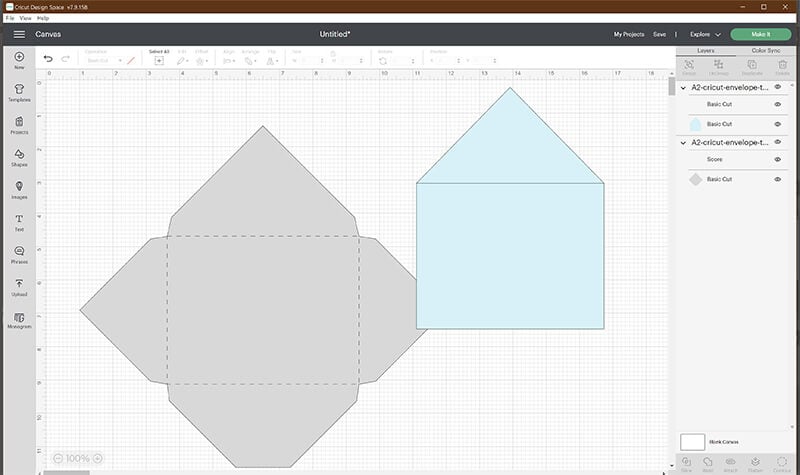
**NOTE** Some of the envelope templates may upload with a box over your envelope layer instead of lines (like the image below).

Just select this box layer and change the operation to “Score” the same as we did for the cut lines. It will work the same as you can see from the results below.
Resizing Envelopes in Cricut Design Space
When you download these Cricut envelope templates, you will find 2 different templates for each of these sizes:
- A2 envelope – Fits Cricut insert cards (and other cards) sized 4.25″ x 5.5″. This is also the size of my Cricut Birthday Cards and other card templates on my blog.
- A7 envelope – Fits up to 5″ x 7″ sized cards which is also the size for my pop-up card designs.
- Square envelope – Fits cards sized 5″5″.
- 4.75″ x 6.5″ – Fits 4×6 cards
If these sizes aren’t what you are looking for, you can EASILY resize them and I’m going to show you how!
First, measure the card size that you are making an envelope for. Then create a square (or rectangle) the same size in your Cricut Design Space Canvas area.
If you are making a rectangle, make sure to unlock the “Lock Proportions” icon. You can then use the W and H options in your top tool bar to enter the size of your card. For this example, I am making an envelope to fit a 4″x6″ photo invitation.
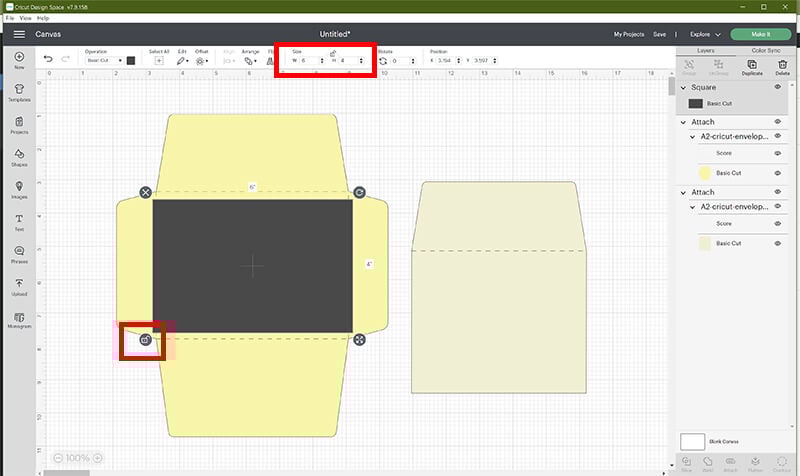
When resizing your envelope, you need to resize both the envelope and liner together so the proportions will still fit properly. Select both layers together by holding down shift and then resize the envelope so your square/rectangle shape fits within the square score lines, making sure to leave a little padding. You may need to unlock the “Lock” so that you can resize as needed.
Keep in mind that your envelope template still needs to fit within the cutting mat dimensions. This is 11.5″ x 11.5″ for a standard mat and 11.5″ x 23.5″ for the longer mat.

Addressing Envelopes with Cricut
Addressing envelopes with your Cricut is super easy and a great way to personalize your envelopes. This is great for when you want to use a calligraphy font for addressing formal invitations, or if you want something different than your own handwriting.
Addressing Envelopes using Cricut Pens
I absolutely love using Cricut pens! I just think this is such a cool feature and so helpful for someone like me with terrible handwriting.
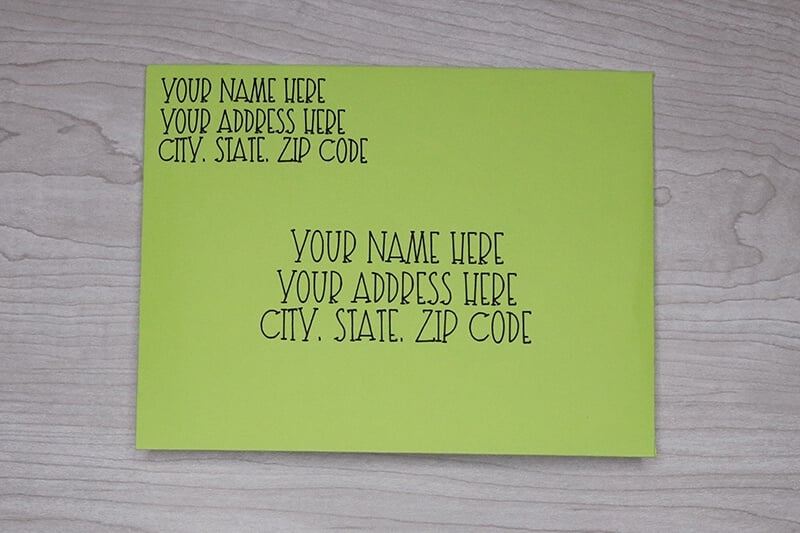
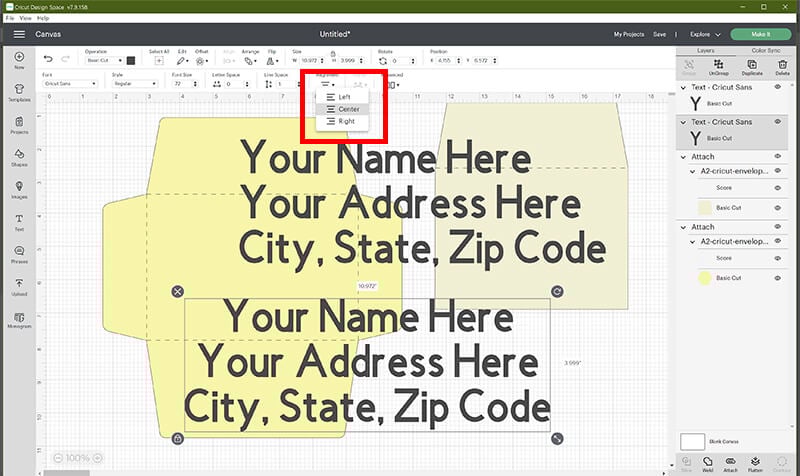
To use this feature, start by adding your text. You will need to create a text box for your return address and a second one for the mailing address. You can use the alignment tool bar to align your return address to the left and to center your mailing address.
Tips for Selecting Your Font
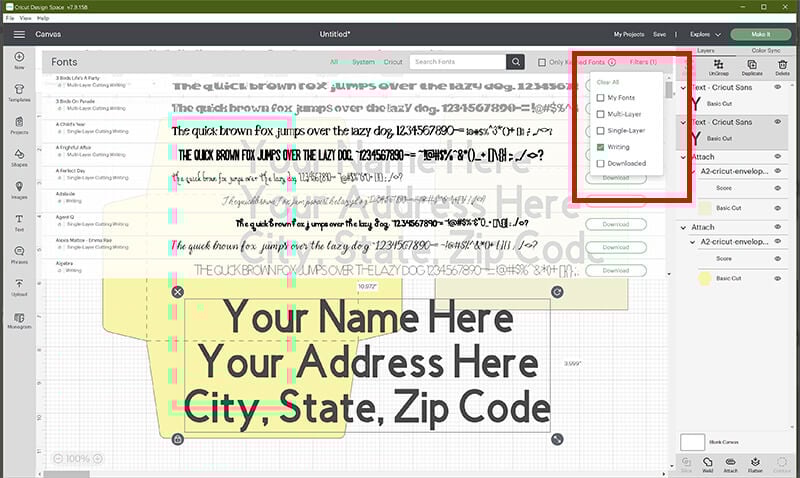
Next, select the font and choose a writing font. It is important that you use a writing font when addressing envelopes to mail. You can use other fonts with your Cricut pens, but if they are not a single layer writing font, they will be harder to read.
You can filter the fonts to show you just the writing fonts by clicking on “Filters” and then check “Writing”. Unfortunately, Cricut does not offer any free writing fonts. If you don’t want to pay for the font and do not have Cricut Access, you can download and use this single layer font which is free for personal use.
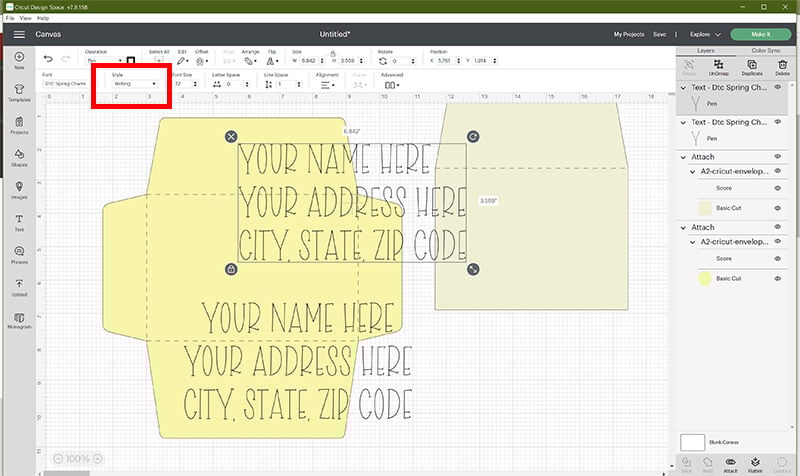
Make sure that the style for both of your text blocks says “Writing.” If not, then change this to “Writing.”
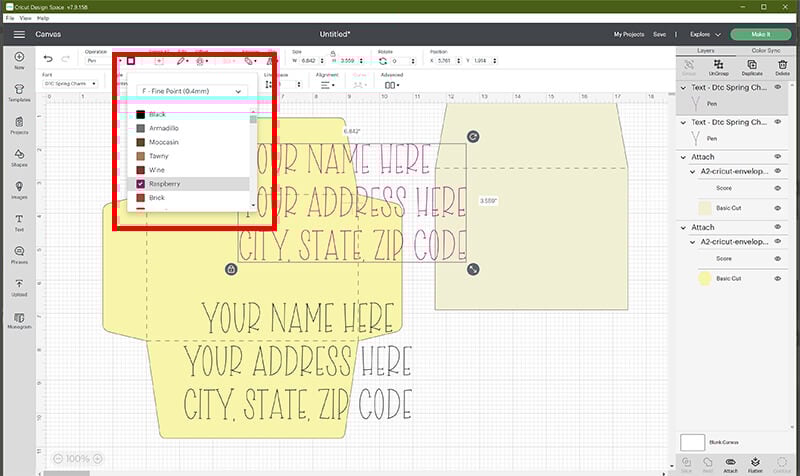
If you would like to use more than one color to write with, you need to assign your colors exactly as you would like this to look when it writes. To do this, select the color fill and then select your pen type and color.
For addressing cards to mail, I recommend using a Fine Point black Cricut pen.
Resize your text blocks and place them on your envelope template where they need to go. Make sure to keep them within your score lines as this is the front of your envelope.
When everything is in place, you need to attach your writing layers to your envelope layer. This is very important. If you do not do this, your Cricut will not write in the correct spot. Select your writing layers and your envelope layer together by holding down shirt, then select “Attach.”

When you click on “Make It” to cut your envelope, you should see your score lines and your text in the correct place. If you do not, you need to go back and make sure they are attached to your envelope layer.

Writing on Envelopes with Your Cricut
You can also use the Cricut pens to write messages or names on the front of your envelopes. When doing this, you can use any of the fonts. Just make sure to change the operation to the “Pen” tool.
This is super helpful if you don’t have the best handwriting like me.
Addressing Envelopes with Iron on Vinyl
If you don’t have Cricut pens on hand, you can also address and decorate envelopes using Iron on Vinyl!!
When using iron on vinyl with paper, you want to use a lower heat than usual. I also recommend using the EasyPress Mini for this. The size of this makes it easier to control so you don’t have to put direct heat onto your paper which can distort the paper.
When applying glitter iron vinyl on to paper, I use the medium heat setting. For regular iron on vinyl, I use the lowest setting.
To find the exact temperature and directions, go to Cricut’s Heat Guide here.
When cutting iron on vinyl, make sure to mirror your design and place the shiny side of your material face down on your mat. If you have never used iron on vinyl, make sure to read my full tutorial on working with iron on vinyl.
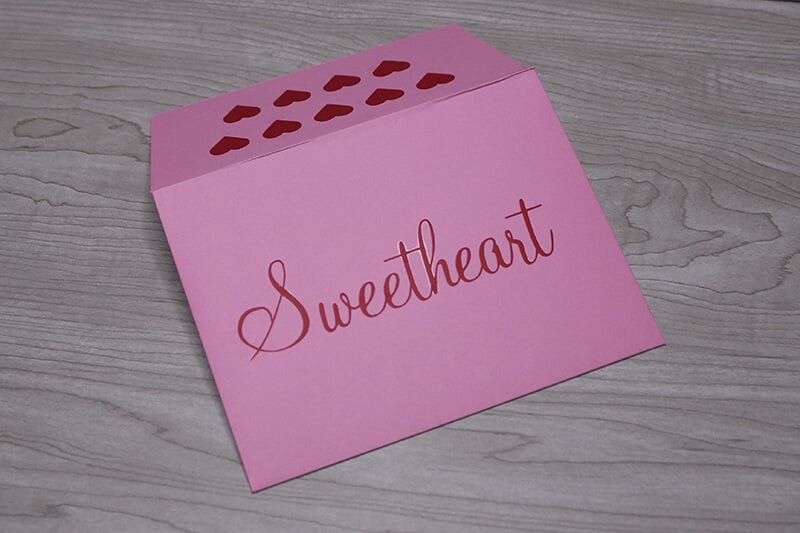
Customize Cricut Envelope Templates with Cut Out Designs
Since the envelopes have liners, you can customize the envelopes by cutting out cute designs. To do this, add a design or graphic to the top envelope flap. Since this will fold down, you will need to flip your image. Select “Flip Vertical”.
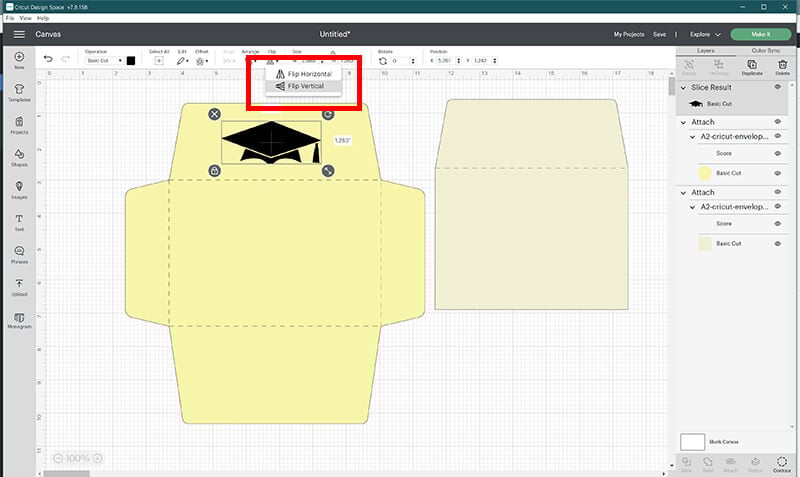
Next you will need to slice the design from your envelope layer. To do this, select your image and your cricut envelope template together by holding down shift. Then, select “Slice”.

Remove and delete the sliced images that you no longer need. If you are new to using the slice tool, you can learn all about the slice feature here.

This is such a cute way to customize the envelope SVG files for birthdays, holidays and occasions.

You can also use shapes to create a fun pattern for your cricut envelope templates.
Cutting Envelopes
When you are ready to cut your envelopes, click on “Make It”. Select that you will be using a Mat for your project. If you are using score lines or pens, make sure that your score lines and writing are on top of the envelope in the correct spot.
If they are not, then you need to go back and attach those layers to your envelope layer.

Click on “Continue” and then connect your Cricut Machine. Select the material that you are using and insert either your scoring wheel or scoring stylus. If you are using the scoring wheel and also writing on your envelope, add your pen as well. If you are using the scoring stylus, you will add the pen later.
Note: If you are using the Scoring Wheel, you will need to install it first, then install the blade when your Cricut is done with the score lines.
Add your cardstock to your mat and then load your mat by pressing the flashing arrow button. And then press the flashing Cricut button to begin.

How to Write on Envelopes with Cricut
If you are using the scoring stylus, your Cricut will stop when it’s done scoring and prompt you to add your pen. Once you swap these out, press the flashing Cricut button again to continue with the writing process.

If you are using multiple pen colors, your Cricut will stop after each color and prompt you to switch them out. When you are done with the last color, your Cricut will automatically finish and cut out your envelope.

Assemble Your Envelopes
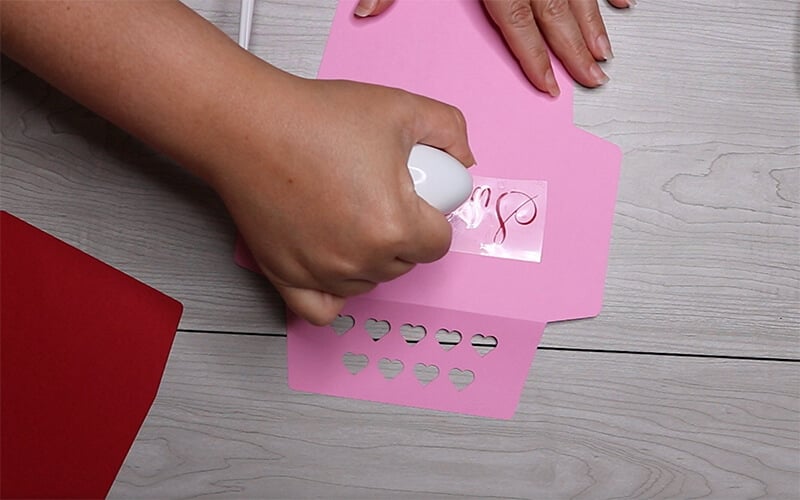
It’s so easy to assemble your envelopes. If you are using the liner, glue the liner on first. Make sure to line the score lines up together for this.
Note: Use the Brayer Tool to really flatten the liner to your envelope.
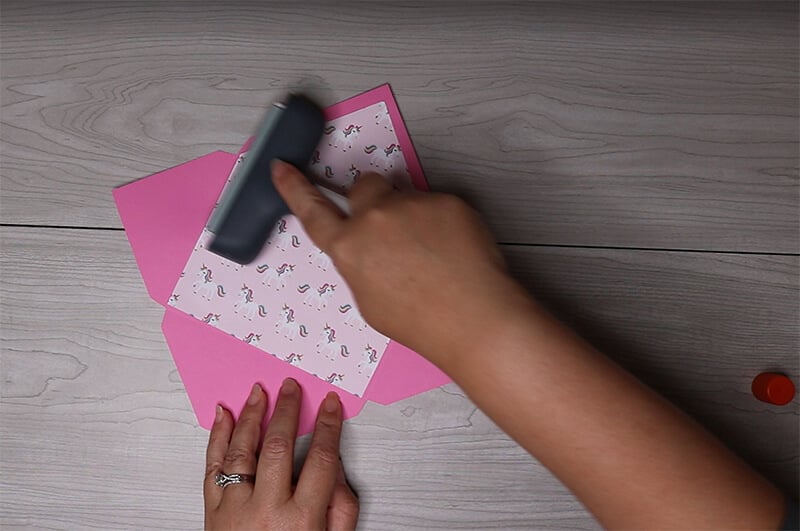
Fold on the rest of the score lines. Then fold in the side pieces and glue the bottom piece on top to create your envelope. Use the brayer again to smooth all of this together really well.

I use double-sided tape to seal the envelopes closed. But you can also use stickers for this. You can learn how to make stickers with your Cricut here.
Free Envelope SVG Templates
As you can see, making envelopes with your Cricut is super easy to do! And there are so many ways that you can customize these templates to create personalized (and pretty) envelopes for any holiday or occasion.
And if you love making cards as much as I do, search through cricut card ideas here.
Before downloading these Cricut Envelope Templates, please share this design on Pinterest – it’s quick to do and makes a HUGE impact to keep SVG Nation’s designs free to you.

To get these Envelope SVG Files, enter your name and email into the form below and then click the “Get It Now!” button!
Please remember these are for personal use only. If you’re looking to sell products using these designs, please purchase a Commercial Use License here.