
Cricut Graduation Card {Customize Any Year}
Are you looking for graduation card ideas to make with your Cricut? Then you will love this graduation pop-up card! It can easily be customized for any graduating year as well. Just follow along with this step-by-step tutorial as I walk you through the steps to make this Cricut Graduation Card (and how to edit the year).

This Cricut Graduation card tutorial progresses as it goes. So, I recommend reading this post from top to bottom.
Materials to Make a Pop-Up Graduation Card
Cardstock
Cardstock is the main material that you will need to make this Cricut Graduation card. I recommend using a medium weight cardstock because anything heavier will make this card difficult to assemble. Here are some cardstocks that I recommend for this pop-up card:
- Neenah Assorted Starter Pack – This is a great starter pack! It’s a medium weight which I recommend for this project and will give you all the colors needed to customize this with your school colors.
- Neenah Premium White Cardstock – This is the cardstock that I use in this tutorial. It’s a great shade of white and is easy to fold and assemble for this graduation card.
Cutting Machine
This Cricut graduation card can be made using a Cricut Explore, Maker, Silhouette or other cutting machines that use SVG file types.
Scoring Stylus
If you are using the Cricut Explore or Maker, I highly recommend that you use a Scoring Stylus or Scoring Wheel (Maker only). This will ensure that you have perfect fold lines so that your pop-up graduation card comes together perfectly. This Scoring Stylus is very inexpensive but will make such a huge difference when making cards, boxes and other paper crafts with your Cricut.
If your cutting machine does not have the scoring option, you can fold the cards by hand or with a scoring board and stylus after you cut it.
Graduation Card SVG
Please remember these are for personal use only. If you’re looking to sell products using these designs, please purchase a Commercial Use License here.
Cricut Graduation Card Step-by-Step Tutorial
Watch the full step-by-step video tutorial on how to make these pop-up Cricut Graduation cards:

Upload Graduation Card SVG File & Modify Score Lines
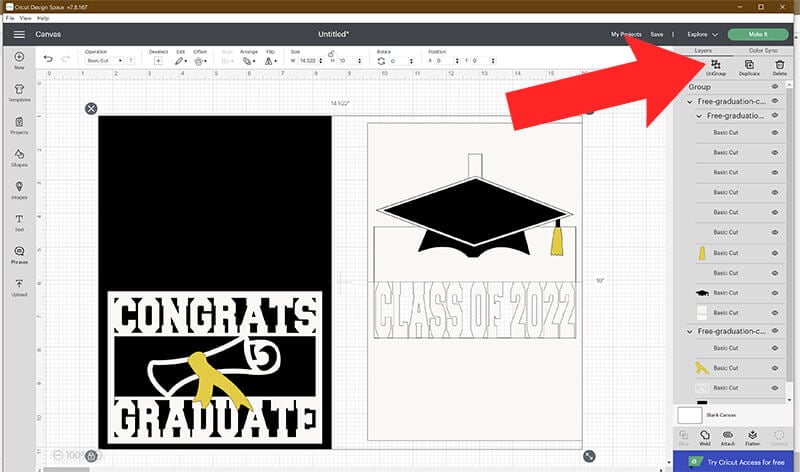
First, upload the Cricut Graduation card SVG file to Cricut Design Space. Before adding your score line (or making any edits), you will need to Ungroup your Layers. With all your layers selected, click on “ungroup”.
You will also need to click on each individual card piece and ungroup those layers. So, just click on the black card piece and click “ungroup”. Then, click on the white card piece and click “ungroup.”
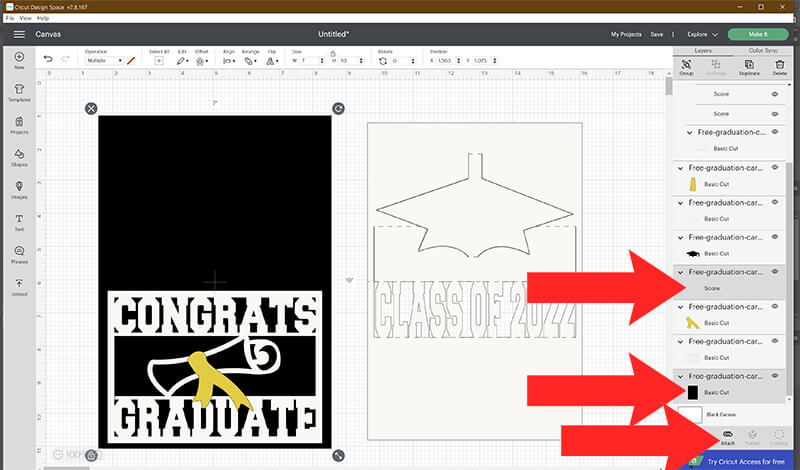
Next, you will need to change your cut lines to score lines. Select the top layer of cut lines that are grouped together (it should have 6 cut layers). In the operations menu, change the lines from cut to score.

While holding down shift, select your grouped layer with the score lines and your white card piece together. Then select “Attach” to attach your score lines to your card.

Next, you will need to change your other line (on top of the black card) to score as well. Select your cut line and in the operations menu, select score.

Attach your score line to the black card piece. To do this, hold down shift and select your card layer and your score line. Then, select “Attach.”
If you want to adjust any of your colors, you can do this by selecting the layer you want to change and then open the Color Fill menu.

How to Edit the Graduation Year
If you don’t need to change the year, you can skip this step and jump to cutting your graduation card. Otherwise, to change the year, continue to follow along. If you have already attached your score lines to your card, you need to unattached those before we get started.
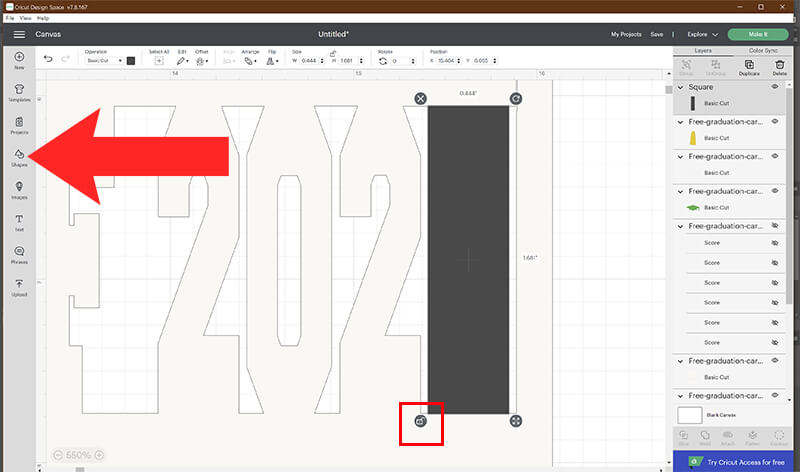
- From the shapes menu, select the square.
- Click on the lock to unlock the proportions.
- Create a rectangle perfectly around the “2”. You will want to zoom in so you can line this up perfectly (see the image below).
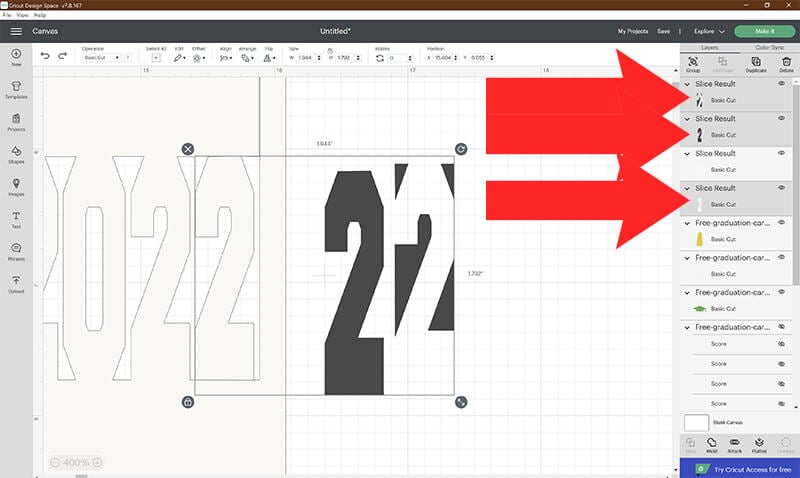
Select your rectangle and the card layer together by holding down shift as you select them. Then, select “Slice”.

Remove the slice results that you don’t need. Just select on the layer and select delete. You can see the layers that you need to delete in the image below.
Next, use the text icon to add your new number. Select the font menu to change your font. I am using the Freshman font which you can download for free here.

After changing your font, click on the lock to unlock your proportions. Add your new number where the 2 used to be. Resize it until it fits in the empty space. Make sure to slightly overlap the top and bottom of the number to the card.
Select both your number and the card layer together by holding down shift and select “weld.”
Don’t forget to reattach your score lines to the card before cutting your graduation card.

Cut Your Graduation Card
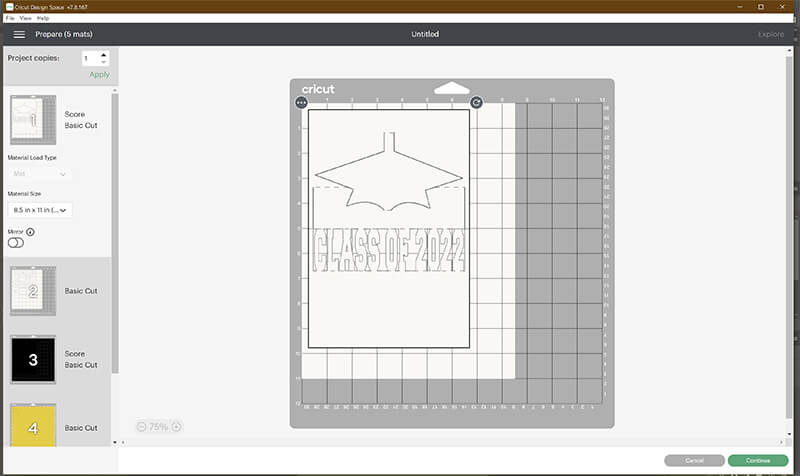
Once you have your card ready to go, select Make It. Then select the standard mat for cutting and click continue.
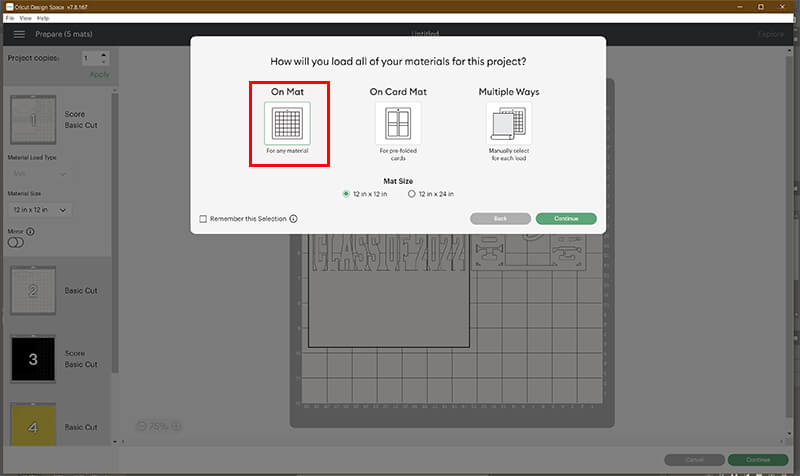
If you are using a different size paper than 12×12, change your paper size. In the mat preview, you want to make sure that your score lines are on top of your card. If they are not there, then go back and make sure you attach the score lines to your card.
Insert your scoring stylus (or wheel) and continue to cut each design, following the prompts on your Cricut.

Assemble Your Pop-Up Card
Once your pieces are cut, remove them from the mat. It’s helpful to roll the mat off of your cardstock. This will keep any pieces from tearing or folding.
Note: If you have new mats, you may want to use your light grip blue mat with cardstock. My standard mats have lost a lot of their stickiness, so I’ve passed them down to use for paper projects.
Fold your paper with “Class of 2022” on it on all of the score lines. Using a glue stick, spread glue on the back of the design. Do not glue class of 2022, the graduation hat or the folded area above class of 2022.

Glue your design to the inside of the card. The fold above class of 2022 and the fold on the outside of the card should align together. It helps to fold the card in half and let your design flatten while attaching all the areas.
When you close the card, the top part of the graduation hat will begin to fold. Allowing it to fold where it’s natural for it and create a crease for it. It’s ok that the tip is folded because we will cover this in the next step.

Glue the tassel to your graduation hat. Then glue the graduation hat to your pop-up card and glue the white trim on top.
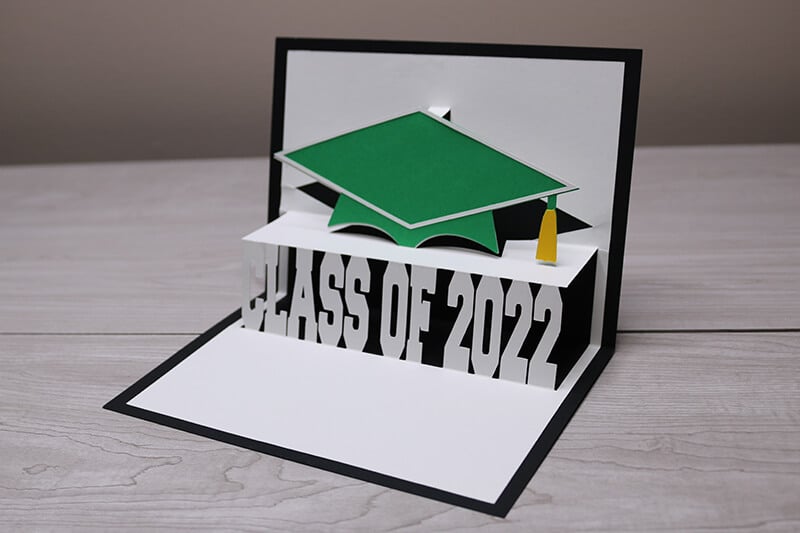
Close your card by folding it in half. Glue your Congrats Graduate Design to the front of the card. Glue the colored tassel on top and your card is ready to go!

I hope your graduate will love their pop-up card made with love by YOU! Stick around and check out some other fun Graduation crafts to make with your Cricut.
You May Also Like These Cricut Graduation Ideas:
Graduation Cap Gift Card/Money Holder
Senior 2022 SVG
Graduation Cake Topper
The Tassel Was Worth the Hassle Tumbler
Senior 2022 Squad
Proud Mom/Dad of a Graduate Shirts
Please share this design on Pinterest – it’s quick to do and makes a HUGE impact to keep SVG Nation’s designs free to you.
