
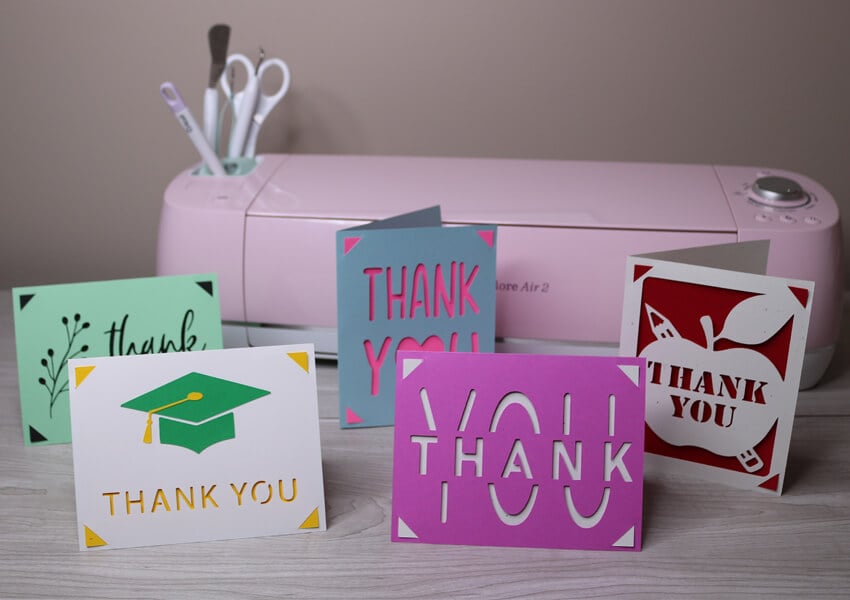
Cricut Thank You Cards
I am back with another Cricut Card tutorial! You guys have been absolutely loving these tutorials and cards, so I am going to keep them coming. Today I will be sharing 5 different SVGs for making your own Cricut Thank You Cards. I will also show you how to use any of my card designs with your Cricut Joy or with the new Cricut Card Cutting Mat.
It’s always a good day to send a thank you card. Whether you want to send a card for teacher appreciation week, thank you cards for a graduation, wedding, baby shower, etc. you’ll find cute designs to use for any occasion here.
Material for Making Thank You Cards with Cricut
Cardstock – Cardstock is the main material that you will need to make these Cricut Thank You Cards. I recommend using a medium weight cardstock. Here are some of my favorite cardstocks to use for cards and other paper crafts:
- Neenah Assorted Starter Pack – Great starter pack! This will give you the colors needed for just about any cardstock project.
- White Diamond Glitter Cardstock – My absolute favorite cardstock! I always keep this in stock because it turns a simple cardstock project into something fabulous. You can also print on this.
- Glitter Assorted Cardstock Paper – Glitter cardstock looks great for accessorizing cards or for using to add color to the cutouts.
- White Cardstock – Sometimes you just need a good, plain white cardstock. A lot of white cardstocks are yellowish, but this Neenah Premium cardstock is a great shade of white.
- Assorted Foam Sheets – Using crafting foam is going to give you a fun 3-dimensional effect for your cards. If you really want to impress with your Cricut Thank You Cards, adding foam accents is the way to go. This variety pack has both regular and glitter foam pieces.
Cutting Machine – The thank you card SVG files are 4.25″ x 5.5″ so you can use them with your Cricut Joy, Explore or Maker machines. But they will also work will a Silhouette and other similar cutting machines.
Thank You Card SVG Files – You will find the form at the bottom of this post to download the card templates. Just enter your name and email and a zipped folder with all 5 card templates will be emailed to you. Make sure to extract the files from the folder before uploading to Cricut Design Space.

How to Make Cricut Thank You Cards with Cricut Joy or the Cricut Card Mat
Since I don’t have a Cricut Joy, I make my card designs a little different. I create them so they are compatible to use with the Explore and Maker series using the standard cutting mat. But, with just a couple quick edits in Cricut Design Space, you can easily use all of my card designs with your Cricut Joy or with the Card Cutting Mat using Cricut’s already made blank cards and inserts.
Since Cricut’s new card mat can cut 4 cards at the same time, it really comes in handy when you need to make a lot of cards… which can easily be the case with thank you cars.
This quick tutorial will also work for all of my Cricut birthday cards and all other Cricut cards that you will find on my blog.
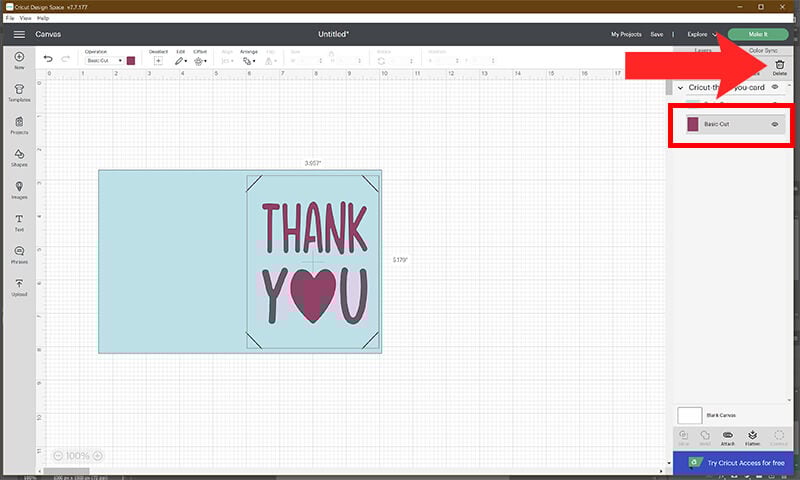
Upload Card File & Delete Insert Layer
First, start by uploading your card SVG file to Cricut Design Space. Since the Cricut card packs already come with card inserts, you will need to delete the card insert layer from my files. Just select the card insert layer and select delete.
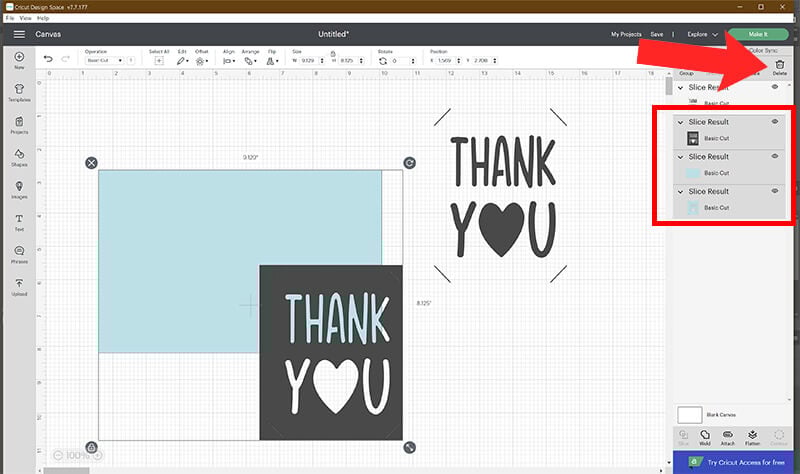
Use Slice to Remove the Card Design
From your shapes menu icon, select the square graphic. Click on the lock to unlock the set proportions. Drag your square on top of the design elements that you want to keep, keeping your rectangle inside of the card design. Make sure to include the cut outs for placing your insert as part of the design.

Once the rectangle is in place, select both your rectangle and card layer together by holding down shift. Then, select slice.

You only need to keep the layer from your slice results (the layer which has your design). Select your other 3 layers and select delete.
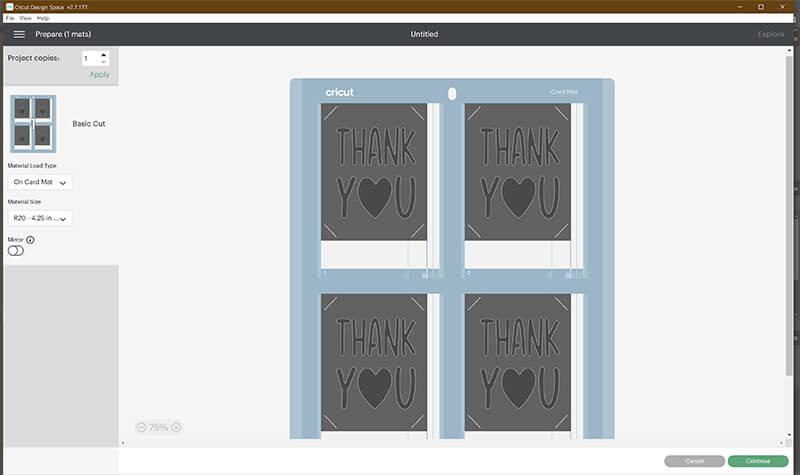
Cut Your Cricut Thank You Cards using Blank Pre-Made Cards
If you are using your Cricut Joy, select “Make It” and then select the “On Card Mat” option. And then prepare your mat with your blank card and cut your card.

If you are using the Cricut card mat with your Explore or Maker, you have the option to cut 4 cards at a time! You can either duplicate this design and cut 4 of the same cards or bring in 4 different designs to cut together.
Select “Make It” and then select “On Card Mat”.

Prepare your card mat and continue to cut your cards with your Cricut.
How to Make a Thank You Card with Cricut Standard Cutting Mat
These Cricut Thank You Cards can all be cut and assembled in just minutes! Each of these designs are ready to go. All you need to do is upload the SVG file and add your score line. Then, follow the prompts on your Cricut to cut your cards.

Scoring Cards with Your Cricut
If you would like to use your Cricut Explore or Maker to score the cards for you (recommended), follow the steps below.
If your cutting machine does not have the scoring option, you can fold the cards by hand or with a scoring board and stylus after you cut it. The scoring feature is really useful when making paper crafts like cards and boxes. So, if you don’t have a Scoring Stylus or Scoring Wheel (Maker only), I definitely recommend getting one.
How to Score with Your Cricut
First, upload the thank you card svg file to Cricut Design Space. Before adding your score line (or making any edits), you will need to Ungroup your Layers. With all your layers selected, click on “ungroup”.

Select the Shapes Icon and then select your line tool. Drag your line from the top of the card to the bottom. Don’t worry if the line is centered as we will fix this in the next step.

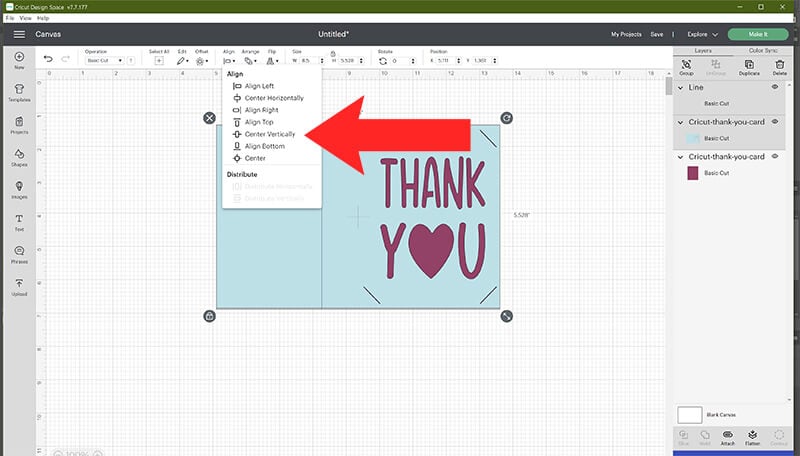
Select your line and your card layer together by holding down shift while selecting. Click on the Align tool and select “Center Horizontally.” If the card is flipped as a horizontal card, then choose “Center Vertically” instead.
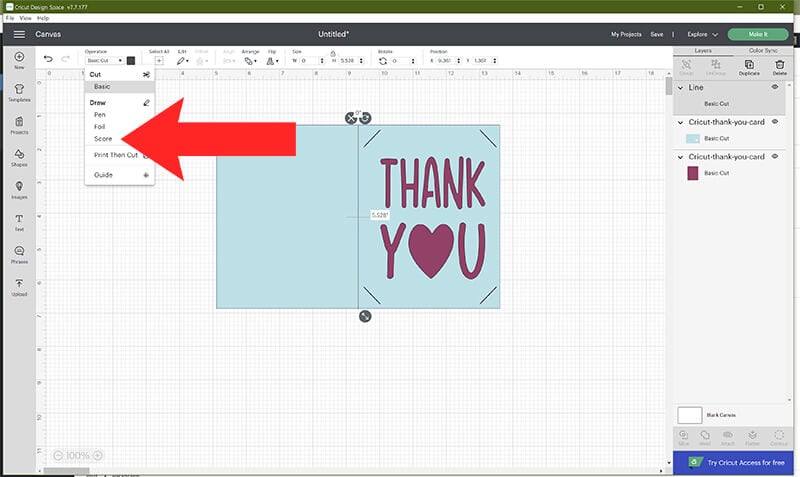
Next, make sure that your line is set to score. You can change this by clicking on the drop-down menu on the Operations tap and then select “Score”.
Before you cut your card, you need to attach your score line with your card layer. If you do not do this, the score feature will not work correctly. To do this, select your score line and card layer together by holding down shift and select “Attach.”

Cricut Graduation Thank You Card

If you have recently graduated and are looking for a way to say thank you for all the love and gifts you received, then this card is perfect! Once all of your pieces are cut out, all you need to do is glue your cap and tassel to the front of your card.
If you prefer just a cut out card, you can slice the graduation cap and tassel out of the card in Cricut Design Space.
Teacher Thank You Card

Let your teacher know how much you appreciate them with this apple thank you card. This is perfect for Teacher Appreciation Week.
Cricut Thank You Cards

These thank you card designs are perfect for any occasion.
Before downloading these Thank You Card SVG Files, please share this design on Pinterest – it’s quick to do and makes a HUGE impact to keep SVG Nation’s designs free to you.

Please remember these are for personal use only. If you’re looking to sell products using these designs, please purchase a Commercial Use License here.