
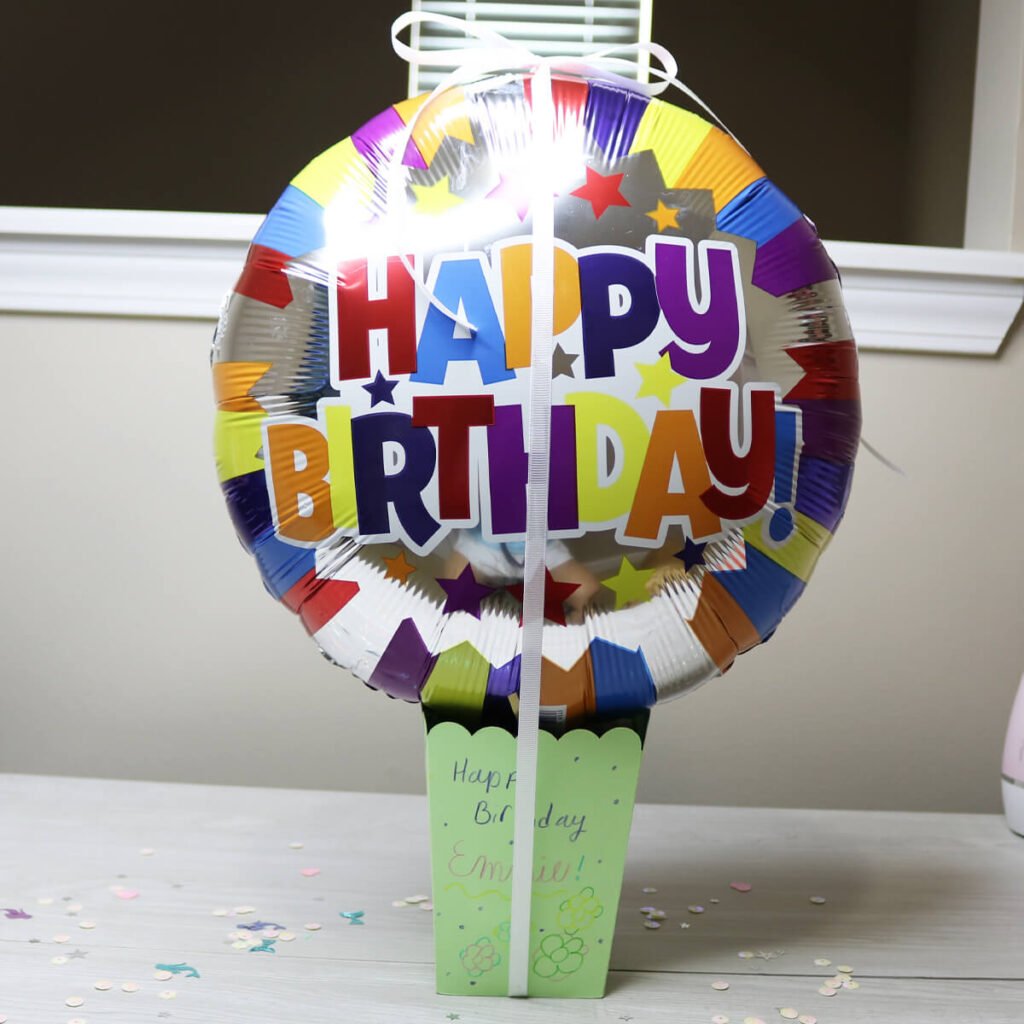
DIY Money Balloon Gift Idea
If you’re looking for a fun and exciting way to surprise someone, then you’ll love this DIY money balloon gift idea. This gift can also be used as a centerpiece and the balloon is great for celebration photos.
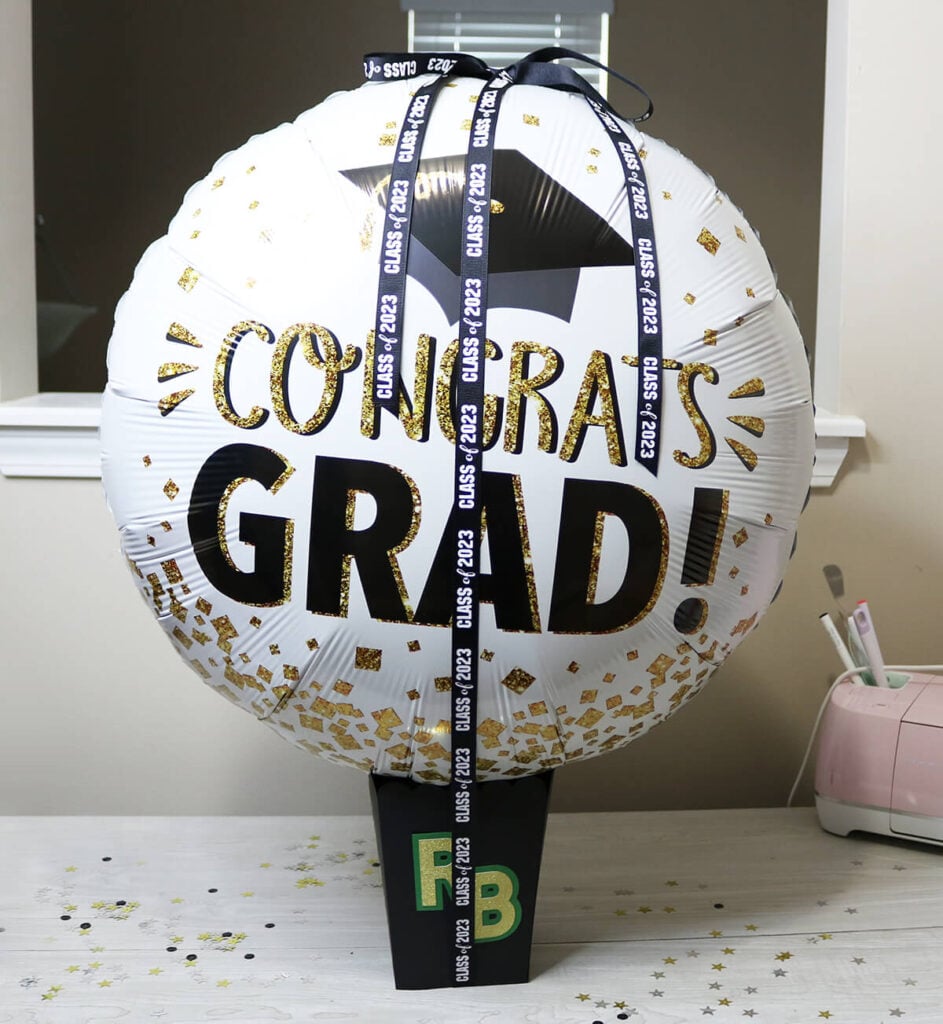
This money balloon can be made in 2 different sizes and is great for multiple holidays or occasions. And it’s super easy to make. Just follow along with this step-by-step tutorial to learn how to a money balloon surprise!
DIY Money Balloon
To make this money balloon gift, you’ll need a few supplies. You can either make the bottom box yourself with your Cricut or purchase one already made (link in the supplies below). The nice thing about making your own box is that you can customize or personalize it however you want.
Note: If you would like to attach more than 3 bills to your money balloon, make sure to go with the large size helium balloon and large size container/template. The large balloon will hold up to 10 bills!
Supplies Needed:
This post contains some affiliate links for your convenience (which means if you make a purchase after clicking a link I will earn a small commission but it won’t cost you a penny more)! Read my full disclosure policy.
- 1 Small or Large size helium balloon (make sure to read the post so you know which size is going to be best for you!)
- Balloon weight
- Ribbon or curling ribbon
- Large clear plastic scalloped container or small clear plastic scalloped container (if you don’t want to make your own)
- Heavy weight cardstock or glitter cardstock (if you are making your own container)
- Cricut Maker or Explore Cutting Machine and your standard cutting mat for making your own container.
- Tape
Download the Free Money Balloon Container Template
If you are making your own container, then you’ll grab the free templates for this here. To get this Money Balloon Container Template, enter your name and email into the form below and then click the “Get It Now!” button! If you have any issues with the form, then click here to open the form in a new window.
Please remember these are for personal use only. If you’re looking to sell products using these designs, please purchase a Commercial Use License here
Money Balloon Step-by-Step Tutorial:
Watch the full step-by-step video tutorial to learn how to make this DIY money balloon gift:
1. Start by gluing or taping a long piece of ribbon to the bottom of your container. This ribbon should be long enough to tie a bow around the container and your balloon.
2. Line up your money and tape the bills together in a line. Then tape your money train to your balloon string. Decide how long you want the balloon to float up and then tie the balloon weight to the bottom part of your balloon string.
3. Add the balloon weight to your box and top if with candy. If you don’t have a balloon weight, you can also tape the balloon string to the bottom of your box.
4. Place the money train part of your balloon into the container making sure that this part is on top of the candy or additional items added into the box. And pull the ribbon from the bottom of the box up over the balloon and tie it in a bow to hold it in place. You can add an additional ribbon going the other direction if you want the balloon to be more secure.
Watch the Fun Surprise!
And your money balloon gift is ready to go! You’ll love watching your friends or loved ones open this fun surprise. As soon as they untie the ribbon, the balloon will float in the air leaving a trail of money.
This money balloon surprise is great for so many different occasions, and the balloon makes a great decoration and photo prop. So, there’s so many reasons to love this fun gift.

How to Make Your Own Money Balloon Container
If you have a Cricut, Silhouette or similar type cutting machine then you can make your own container. I prefer to make my own container because it’s quick and easy, but also because I can personalize it. To make your own, make sure you scroll up to download the free container template first.
There are 2 sizes to choose from. If you are attaching more than 3 bills, then you will need to go with the large container template and the large helium balloon. The small helium balloon isn’t strong enough to lift more than 3 bills like it’s supposed to.
After you cut your container pieces, use the tab piece to glue the 2 pieces together. You can also cut out additional items to glue to your box or use Cricut pens to decorate the box when cutting it. Here is a full tutorial on using Cricut pens if you need help with this. When we made this for a friend’s birthday party, my daughter decorated the container herself.

Continue to glue each of the tab pieces to the inside of the container to finish assembling the box. And that’s all there is to it!

More Cricut Party Crafts You’ll Love!
If you are excited about making this money balloon gift surprise, then make sure to check out these other fun Cricut party related crafts: