
Halloween Photo Booth Props {Free Printable & SVG}
Get ready to smile because I’m back with more free photo booth prop designs. Add a photo backdrop to use with these Halloween photo booth prop printable designs. Or grab the free SVG file and let your Cricut cut these spooky characters out for you.

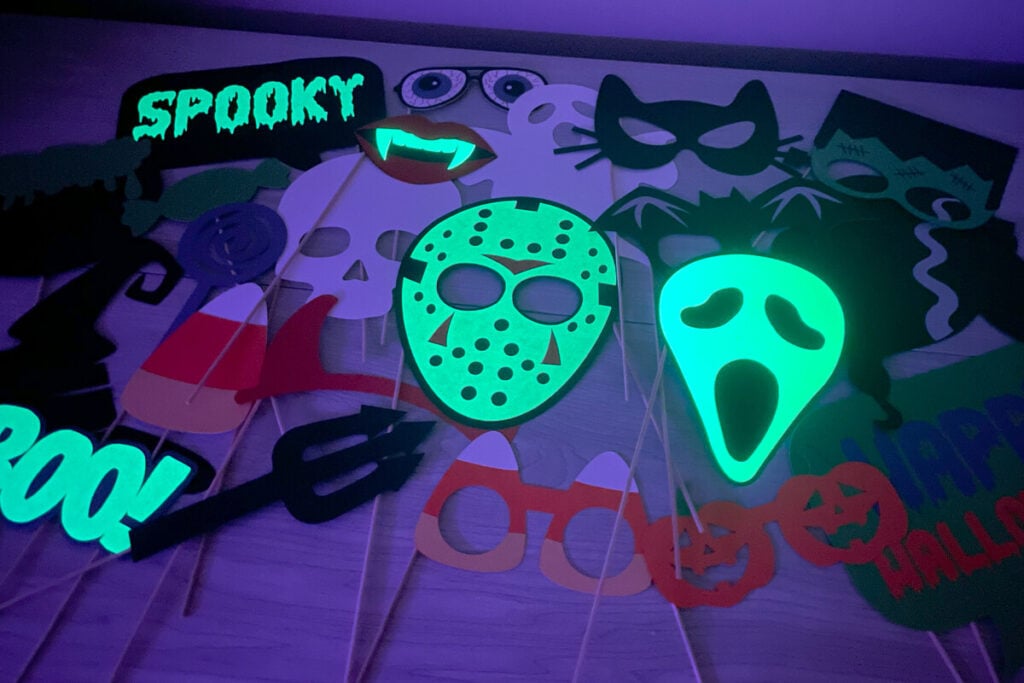
When you add a photo booth to any celebration, you’re sure to get lots of pictures to remember the night. Just print the designs out on cardstock or layer them using the SVG file. Feeling a little extra? Try adding glow in the dark HTV to your Halloween photo booth props to really surprise your guests.
If you’re still looking for decorations for your Halloween party, these floating candles are perfect for setting mood. And if you need something spookier, try these bloody handprints or these Halloween adult drink pouches.
Download the Halloween Photo Booth Props Printable or SVG
You can download these free Halloween Photo Booth Props from my members only free library (design #2 under Photo Booth Props or search “Halloween Photo Booth Props”).
Don’t have a password? Unlock my free members library by entering your name and email in the form below or click here.
Supplies Needed
If you are printing the photo booth props, I recommend using a white heavy or medium weight cardstock. I use this medium weight cardstock for printing photo booth props. You will also need cake pop sticks or wooden skewers to attach to the back.
If you are making layered photo booth props with your Cricut, then you will need:
- 12×12 Medium Weight Cardstock in a variety of colors. This is a great variety pack for all the colors you will need.
- Optional – Glow in the Dark HTV
- Cake Pop Sticks or wooden skewers
- A good paper craft glue – this Bearly Art craft glue is what I am using.
- Cricut Maker or Explore Cutting Machine and a cutting mat.
Step-By-Step Instructions
There are 3 different ways that you can make photo booth props with these templates:
- Use the PDF file to print the Halloween photo booth props and cut around them using scissors.
- Use the SVG file to use the print then cut method with your Cricut (print them and then the Cricut cuts them for you).
- Use the SVG file to make layered photo booth props with your Cricut or Silhouette cutting machine. There is also a DXF file if your Silhouette uses this type of file.
Video Tutorial For Halloween Photo Booth Props
Watch the step-by-step video tutorial to learn how to make these photo booth props here:
Making Layered Photo Booth Props
To make layered Halloween Photo Booth Props, start by uploading the SVG file to Cricut Design Space. For help with uploading SVG files, check out my tutorial here.
The files are already the perfect size, but you can resize them if you prefer a different size. Just make sure to click on “ungroup” to ungroup all the files before you modify them. Once they are ready to go, select “Make It” and cut everything out.
Assemble the photo props just as they are in Cricut Design Space, add the stick to the back (I use hot glue for this) and they are ready to go!

How to to Make Photo Booth Props Glow in the Dark
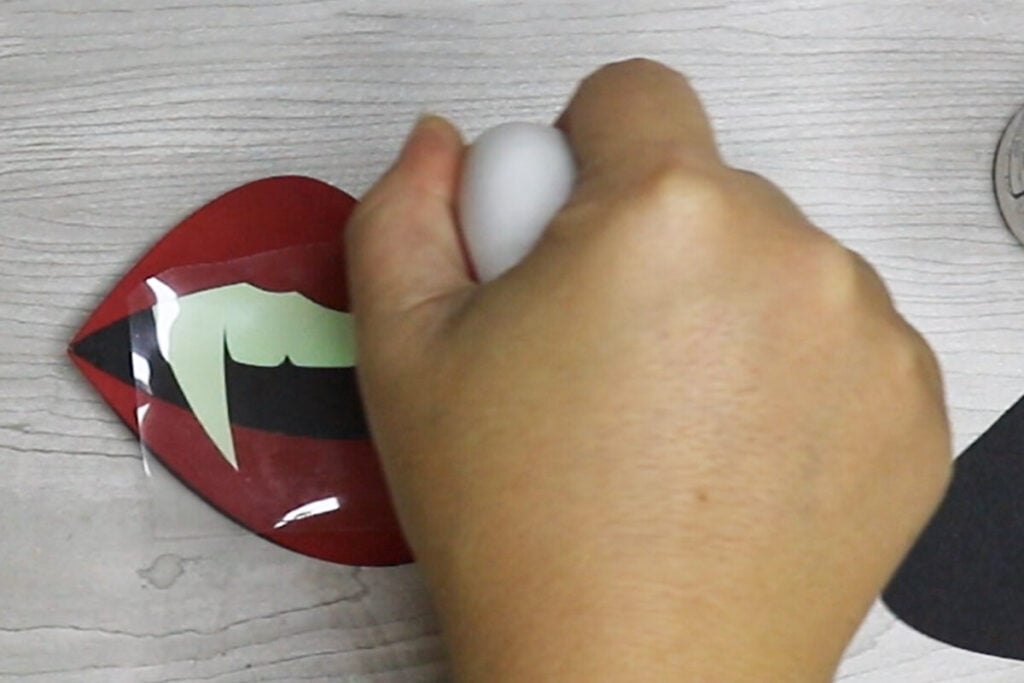
To make glow in the dark photo booth props, you’ll need to use glow in the dark HTV for the layers that you want to glow. You will need to use the glow in the dark vinyl on top of a cardstock layer. This won’t work if the photo booth prop is a single layer prop unless you cut out 2 layers; one in cardstock and a glow vinyl layer to place on top.

In Cricut Design Space, change the color of the layers that you want to use with glow in the dark vinyl and then cut those out using that vinyl. Using a heat press, press the vinyl onto the cardstock at 305 degrees (this is the middle heat setting if you have the mini) for 10 seconds.
Note: If the vinyl pulls up when you remove the carrier sheet, press down and add more heat until the carrier sheet is easily removed.
Using Cricut Print Then Cut to Make Photo Booth Props
To print and cut the Halloween photo booth props with your Cricut, start by uploading the SVG file to Cricut Design Space. Click on “Ungroup” to ungroup the photo booth props.
If you want to make any color changes to the designs, do this first. Click on the layer of the color that you want to change and change the color using the layers panel. Then click on each design layer and select “flatten”. You will need to repeat this step for each of the layers that are grouped (have the arrow next to them).

For the layers that are a single layer (don’t have the arrow to the left), click on the layer and change the operation to print then cut.
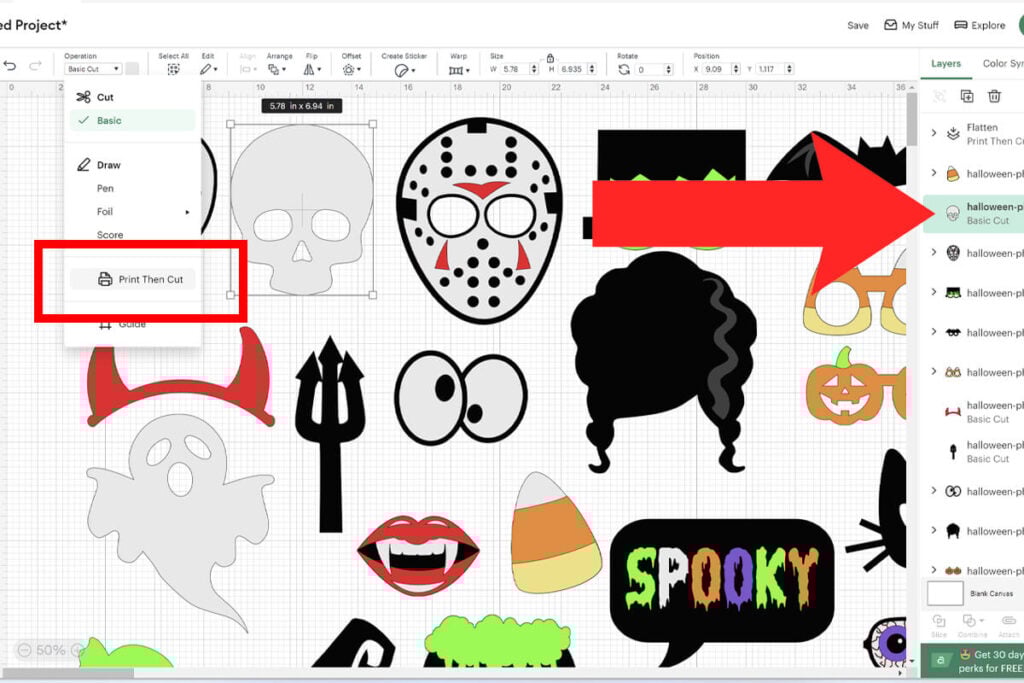
After flattening or changing to Print Then Cut, some of the images will be too large. Scroll the layers and look for the layers with a red explanation point. Then slightly resize the image smaller by dragging on the image using the corner selection on the image. Resize this until the red explanation point goes away.

Once all of your layers are done, click on “Make” and then “Continue”. Select “Send to Printer” and print the first sheet of your photo booth props.

After you print the sheet, add it to your cutting mat, just as you see it in the mat preview. Load the mat in your Cricut and press the flashing Cricut button. Your Cricut will first scan the sheet and then cut around the designs.
Note: If your Cricut has issues cutting around the design, make sure that the design is facing the same direction and in the same position as on the mat preview. Also, make sure you are in a well lit area as poorly lit areas can cause the Cricut to not sense the design correctly.

Repeat these steps for each mat layer. Once everything is printed and cut, glue the sticks to the back and your Halloween photo booth props and then they are ready to go!

When you’re done, make sure to post these in my crafting group here or tag me if you post them on social media. I would love to see how yours come out!
Share the love and easily come back to this tutorial anytime just by saving this on Pinterest by clicking the picture below and then hitting “Save”… Plus this helps to keep my SVG files and Cricut tutorials free 🙂
