
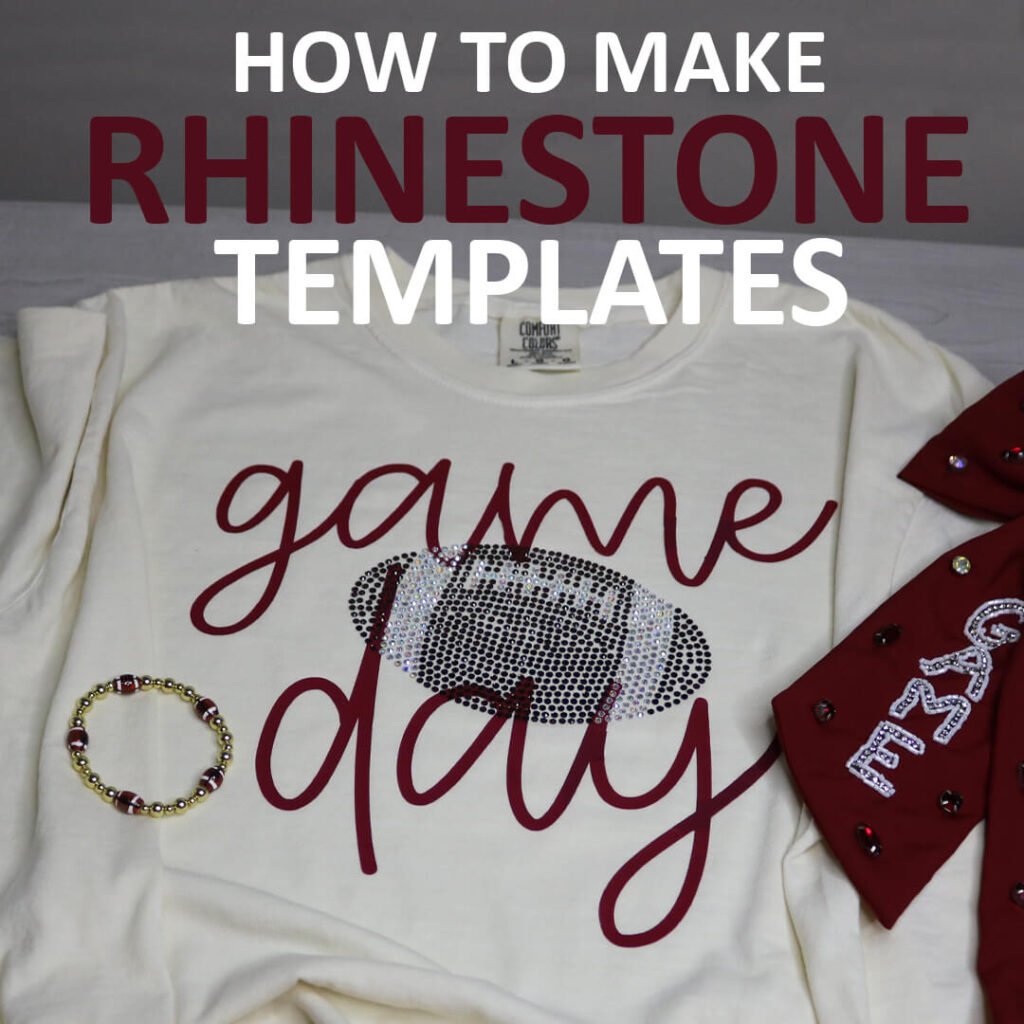
How to Make Rhinestone Templates in Cricut Design Space

Have you been seeing all the fabulous shirts and decals covered in rhinestones lately? What you probably didn’t know, is how easy you can accomplish making rhinestone shirts and templates with your Cricut and I’m going to show you how to do that today.
This post contains some affiliate links for your convenience (which means if you make a purchase after clicking a link I will earn a small commission but it won’t cost you a penny more)! Read my full disclosure policy.
For more shirt ideas, check out 300+ free SVG files for t-shirts that you can make with your Cricut or Silhouette.
Instead of gluing each rhinestone on one by one, you can use your Cricut and heat press to do this quickly and easily. And in today’s tutorial, I’m going to show you how to make rhinestone shirts with your Cricut, and walk you through step-by-step how to make your own rhinestone templates in Cricut Design Space.
This tutorial builds as it goes, so make sure to start at the beginning and go from there.
Learn How to Make Rhinestone Templates in Cricut Design Space
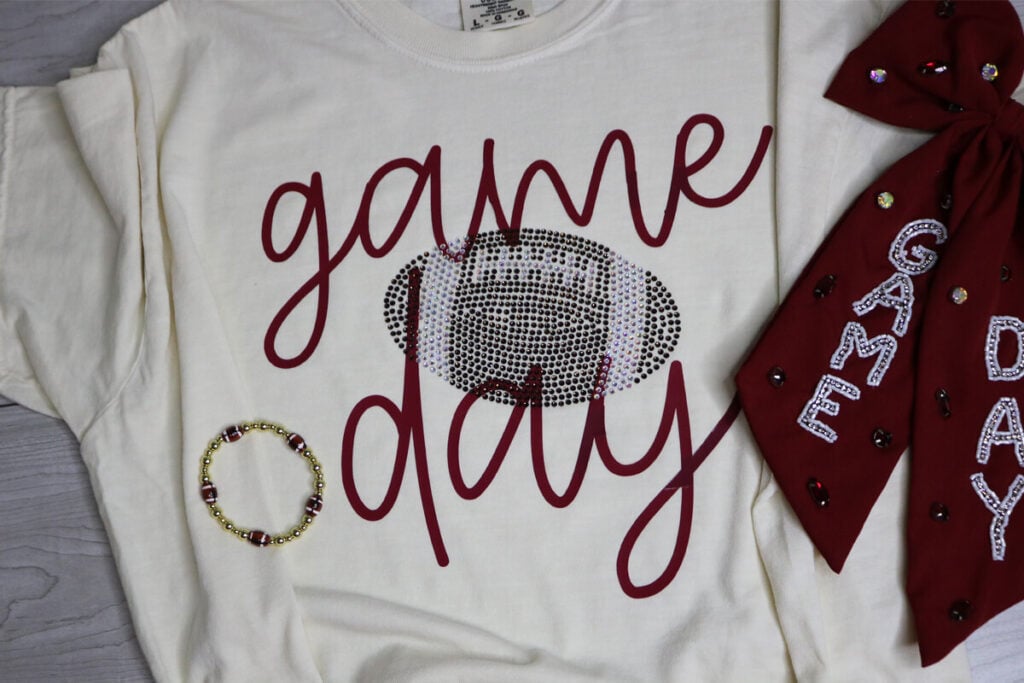
Before getting started with making rhinestone templates, you need to have a plan for what design you want to create. In this tutorial, I’ll be creating a Game Day shirt with a rhinestone football. So I’ve created a football SVG that I’ll be using as a template. If you don’t know how to create your own SVG files, you can use an existing SVG file or find an image to use as your template.
If you would like to use this football SVG template, you can find it in my free member library here. Or search over 600 free SVG files for Cricut to use as templates. Don’t have a password? Unlock my free members library here.
Watch the step-by-step video tutorial to learn how to make a rhinestone template and rhinestone shirt with Cricut:

Share the love and easily come back to this tutorial anytime just by saving this on Pinterest… Plus this helps to keep my SVG files and Cricut tutorials free!

Step 1: Create a Mock-Up of Your Design
First you want to create your design in Cricut Design Space. For this design, I’ll be using heat transfer vinyl for “Game Day” and creating the football with rhinestones. Like I mentioned before, you don’t have to have an SVG for your rhinestone design, you can use an image instead. It’s fine if it has a background because the image is only being used as a template and will not be cut.
*Important* Make sure your mock up design is the size that you want for your final design. Once you begin to create the rhinestone template, you cannot resize the design.

Step 2: Determine Which Rhinestones to Use
Next, you need to know which rhinestones you will use. I am using the Beadsland hotfix rhinestones in Crystal AB (SS10) and Smoked Topaz (SS10). So I am using the same size rhinestone for both colors, but you can use different size stones if you want. The size of your stone will determine the size for your template as follows:
- SS6 – .102″
- SS10 – .12″
- SS16 – .17″
- SS20 – .21″
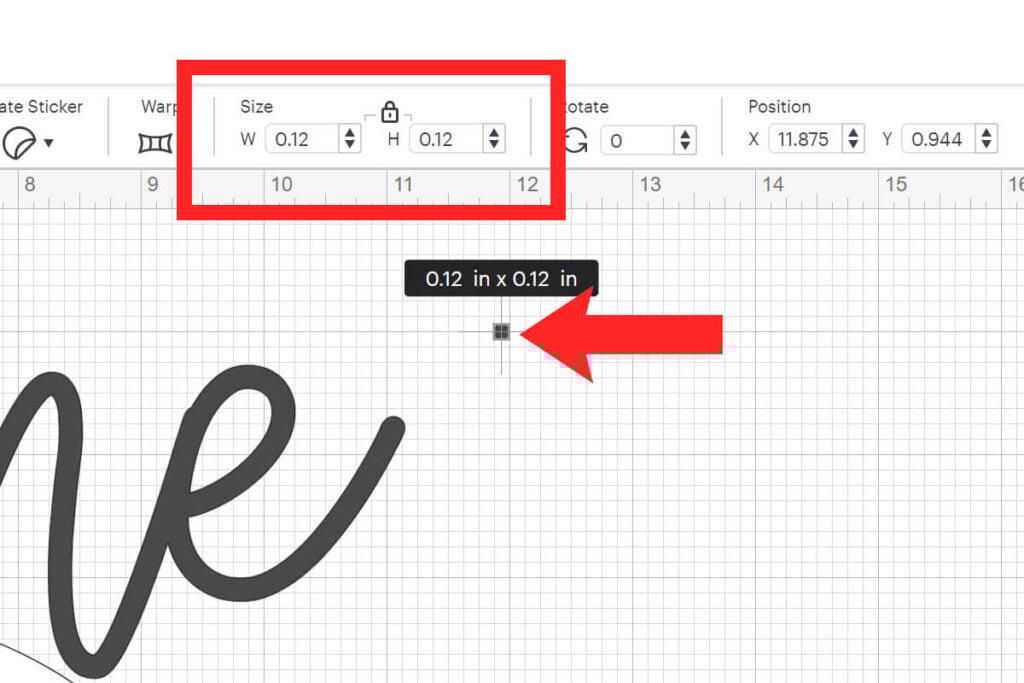
Step 3: Create a Template for Your Rhinestone
To begin creating your rhinestone template, start off by creating a circle in Cricut Design Space and size it according to the size stone you are using. Since I am using SS10 stones, I will resize my circle to .12″.
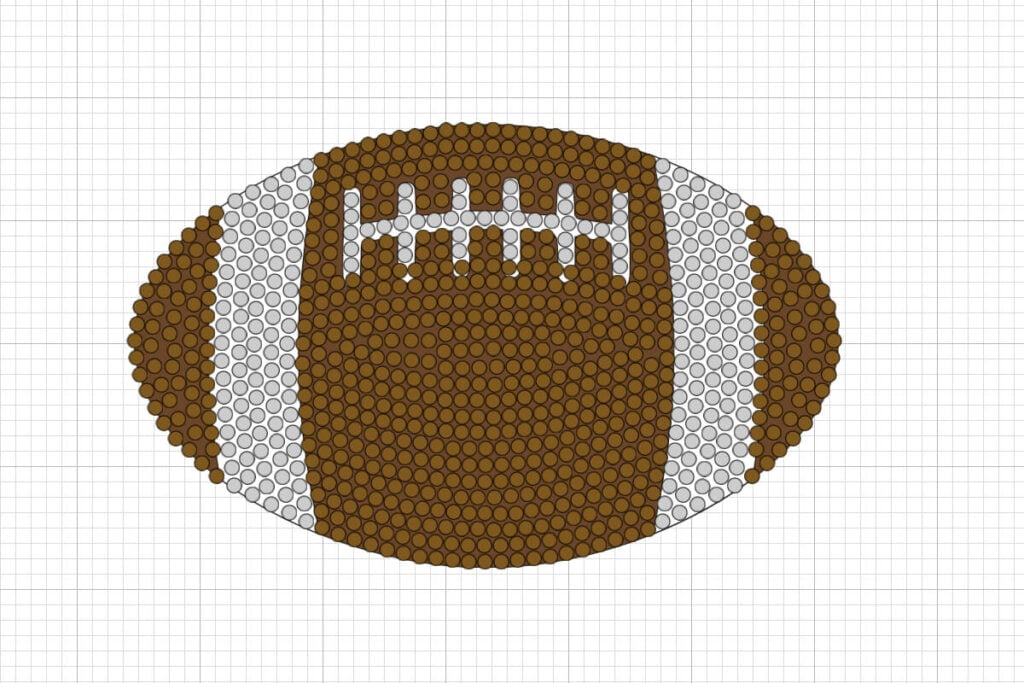
Step 4: How to Design the Rhinestone Template
You’re now ready to begin creating your rhinestone template. To create the template, all you need to do is place the circles over your mock up design. Continue to duplicate the circle, placing it as close as you can with the other circles. If you are using more than one color, make sure to use more than one color circle and place them where the correct color should be.
For helpful tips on spacing and duplicating rows, make sure to watch my rhinestone template video tutorial here. You’ll get to see how I use the align and distribute feature to perfectly distribute a group of random circles and also how I duplicate groups of circles to speed the process up.
Next, group all of the circles that are the same color together. So I will have a group for the brown and a group for the white. You’ll also want to hide or delete the template you used to create the rhinestone template.
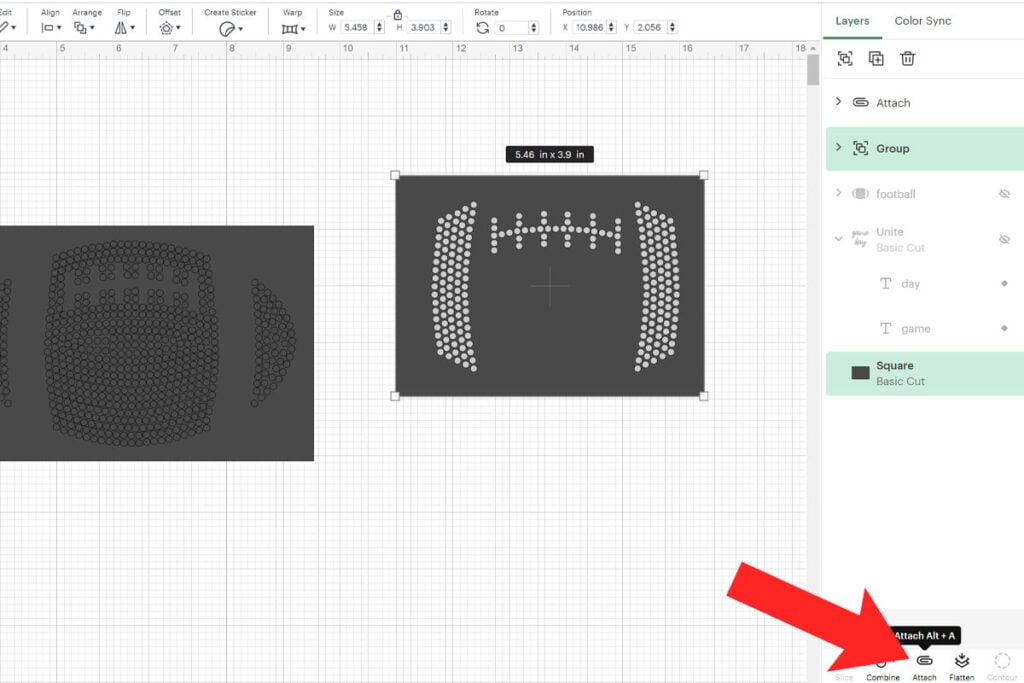
Then, separate the colors and add a rectangle using the shapes tool behind each of the color groups that you have.

Attach each color to the rectangle that is behind it. Do this for each color that you have. To do this, select the group of circles and the rectangle together and select “Attach”.
Modifying Rhinestone Templates in Cricut Design Space
It’s very important to note that you can not resize a rhinestone template. If you resize these, the circles will not be the correct size and the template will not work. HOWEVER, you can modify the template for a different size rhinestone which can be very helpful.
For example, if you have an existing rhinestone template designed for SS10 rhinestones, but you have SS16 (or any other size) stones on hand, you can easily modify this rhinestone template in Cricut Design Space to work.
How to Modify Rhinestone Templates
First, detach the rhinestone mock-up from the rectangle and remove the rectangle. Then select the first group of circles (brown football layer for me) and select “Weld”.
Once you weld the circles together, you cannot undo this so I recommend first duplicating the layer so you still have the original rhinestone template file where you can modify the circles.

Select the welded layer and select “Contour”. When the contour window opens, select “Hide All Contours”. It may take a minute or 2 for the contour window to open because of the amount of dots that Cricut Design Space has to process.
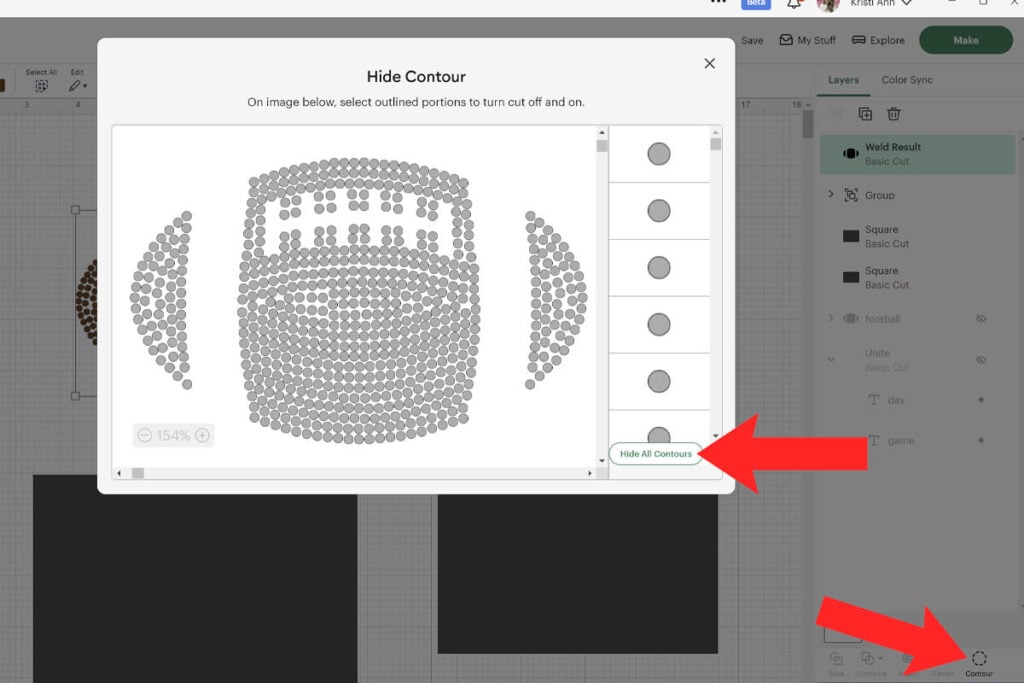
Only one circle should remain selected. Keep this circle selected and click the “x” to close the contour window.

Select the remaining circle and resize it for the rhinestone size that you need. I am resizing this for the SS16 rhinestones so I’ll modify the size from 0.12″ to 0.17″.

Select the single circle after you resize it and select “Contour” again. Then select “Show All Contours”. When all of the circles are visible again, click “x” to close the contour window.
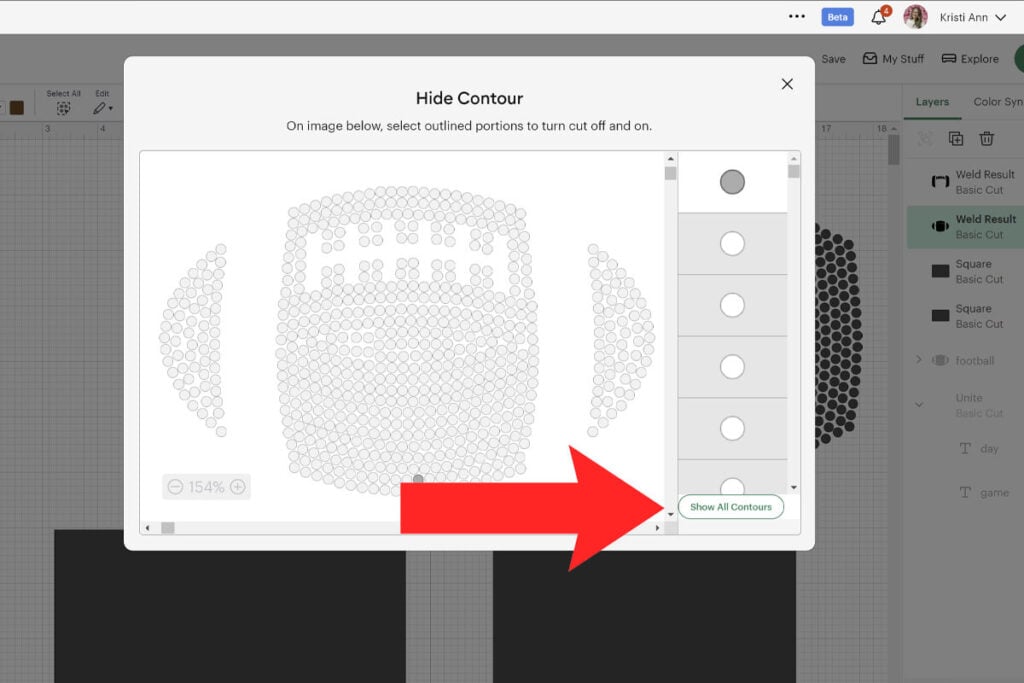
All of the circles will automatically resize to 0.17″ and the spacing will adjust as well. Repeat these steps for the rest of the colors of your design as well and they will line up perfectly.

Cutting Rhinestone Templates with a Cricut
When your rhinestone templates are complete, it’s time to cut them so click on “Make.” It’s ok if the templates are the same color because you will cut each of them using your Rhinestock Flock. I prefer to cut all of my templates together on the same cutting mat.

To prepare your cutting mat, start by cutting the rhinestone flock to the size that you will need. Then remove the backing from the rhinestone flock and place it on your cutting mat like a sticker.

To cut the rhinestone flock, make sure to use a premium fine point blade. If you have a new blade, use the new blade. Otherwise, make sure the blade is clean by poking it into a ball of tin foil. This will help remove any leftover pieces that may be on your blade for a cleaner cut.
For the cut settings, I prefer to use the Heavyweight Cardstock (100 lb) setting with the pressure set to default. This gives me great results every time.
How to Weed Rhinestone Flock
When the rhinestone templates are done cutting, leave the rhinestone flock on your cutting mat. I find the easiest way to weed this is by using a lint roller to collect all the small circles. Continue to lint roll your rhinestone flock until you can’t get any more circles off.

Some of the circles may not come off with the lint roller, but almost all of them will. For the ones that are still stuck, they should come off when you remove the rhinestone flock from your cutting mat. Use your weeding tool to press down on any circles that won’t easily come off.

When you finish weeding the rhinestone flock, peel it off of your cutting mat and place it on your working surface. You can either place it back on the backing sheet of your rhinestone flock that you removed to cut or on parchment paper. I prefer to stick these to a baking sheet. This way I don’t lose any rhinestones as I’m working and I don’t have to worry about the paper rolling up or sliding.
When I am finished with the templates, I then remove the rhinestone templates from the baking sheet and place them back on the original backing sheet of the rhinestone flock to store them for future use.

How to Make a Rhinestone Shirt
Now that the rhinestone templates created, cut, weeded and ready to go, it’s time to use our rhinestone template to make a shirt (or any other fabric material).
Materials Needed to Make a Rhinestone Shirt
Here are the recommended materials for making rhinestone projects with your Cricut.
- Rhinestock Flock & iron on Transfer Tape – I am using this rhinestone flock which comes with the heat transfer tape as well.
- Hotfix Rhinestones – I recommend these Beadsland hotfix stones. They have a variety of colors and sizes for all projects. In this design, I’m using the SS10 size in Crystal AB and Smoked Topaz.
- Cricut Explore or Maker (I’m using the Explore) and a standard grip cutting mat.
- Premium Fine Point Blade
- Lint Roller to help with weeding the rhinestone flock.
- Trim Painting Pad for easily spreading the rhinestones.
- Cricut EasyPress or other type of heat press to adhere the stones.
How to Apply Rhinestones using a Cricut
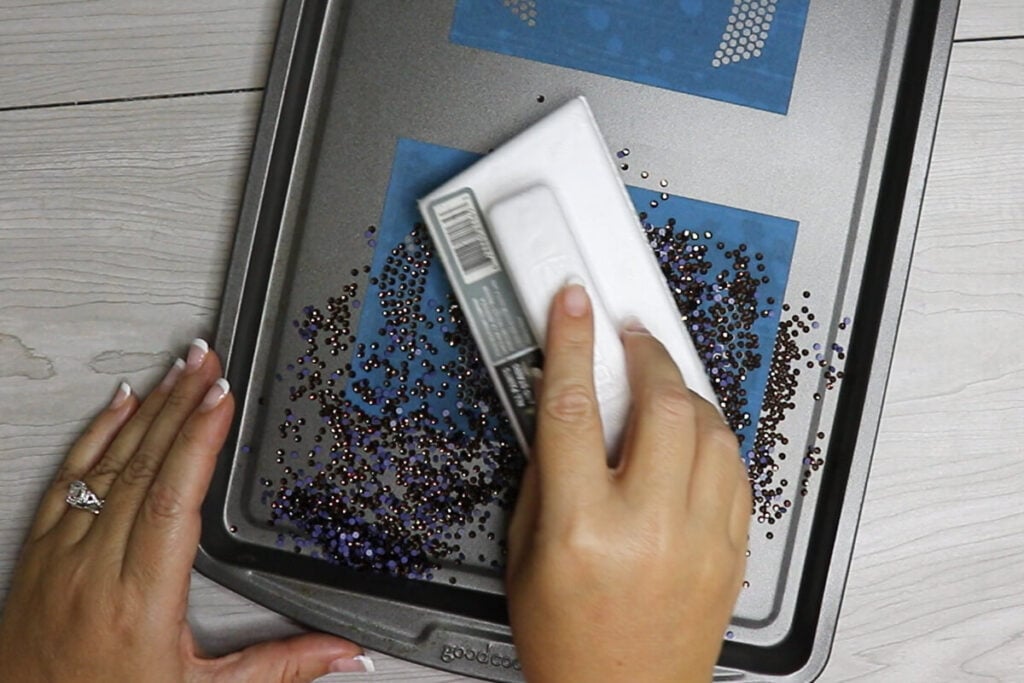
Pour a generous amount of rhinestones over the rhinestone template. Using a paint trimmer brush, brush in circular motions to help the rhinestones fall into their places. Continue to do this until all the spaces are filled and brush away the extra rhinestones.
Once each circle is filled, add the heat transfer tape over the rhinestone design. Press down really well to attach the rhinestones. Slowly pull away the tape, making sure all the rhinestones stay attached to the transfer tape.
Repeat this for each color or your rhinestone design.

If you are using heat transfer vinyl and rhinestones, first apply the heat transfer vinyl as you typically would. For help with applying heat transfer vinyl, check out my guide to applying heat transfer vinyl.
Then place 1 of your rhinestone templates in place with the transfer tape facing the top. So the shiny side of the rhinestones will be facing up.

Press the rhinestones using a heat press according to the directions for your rhinestones. If you are using these Beadsland hotfix stones, then you will press for 15 seconds at 305 degrees. If you have a layer of vinyl underneath, make sure to add parchment paper before pressing.
You do not need to wait for the rhinestones to cool before removing the transfer tape. However, if you have a cool peel vinyl underneath, make sure to let it cool first to keep the cool peel vinyl from peeling up.

After you remove the transfer tape, add the next color of your rhinestone design in place and press just as you did before. Remember to use parchment paper if you have vinyl on your shirt. Otherwise the parchment paper isn’t needed.

Once you remove the heat transfer layer, your shirt is ready to go. If you have even more colors, continue to press them until all of your rhinestones are in place. For “extra security”, place the heat press on the inside of the shirt, pressing down on the rhinestones and press for another 10 seconds.
You will be able to wash rhinestone shirts with cold water on a gentle cycle. To dry, either use the lowest heat setting or hang dry and your rhinestone shirts should hold up for quite awhile.
If you enjoyed this tutorial, find more Cricut Design Space tutorials to learn more design tips and tricks.

Thanks so much for checking out this rhinestone template tutorial. When you’re done, make sure to post your rhinestone projects in my crafting group here or tag me if you post them on social media. I absolutely love seeing your crafts and can’t wait to see how yours turn out!