
Ice Cream Gable Box Template
Learn how to make an ice cream theme favor box with this free gable box template. This gable box download comes with 3 different sizes so you can make boxes for any occasion.

You may also like these butterfly favor boxes for weddings and showers or these popcorn treat boxes for party snacks. And if you love making paper crafts with your Cricut, then make sure to check out all of my Cricut paper crafts before you go.
This gable box download, comes with 3 different sizes:
- Mini Box Template: 3.4″ x 2.1″ x 2″
- Medium Box Template: 5″ x 3.1″ x 3″
- Large Box Template: 6.2″ x 3.9″ x 3.6″

Download the Ice Cream Gable Box Template
You can download this free Ice Cream Gable Box Template from my members only free library (design #21 under Box Templates or search “Ice Cream Gable Box Template”).
Don’t have a password? Unlock my free members library by entering your name and email in the form below or click here.
Supplies Needed
- 12×12 Heavy or Medium Weight Cream Cardstock. I recommend using a 100lb weight cardstock for the large template. You can also use a 65lb or 90lb cardstock, the boxes just won’t be as sturdy, but it will work. A heavy or medium cardstock like this work for the medium and small box template.
- Medium or Light Weight Cardstock for the decorations. This is a great variety pack if you don’t already have the colors on hand.
- Brown Fine Point Cricut Pen – this ultimate pen set is such a great deal (which is what I’m using)
- A good craft glue – this Bearly Art craft glue is what I am using.
- Scoring Stylus (which is what I will be using in this tutorial with the Explore) or Scoring Wheel (Maker only). Or you can fold by hand.
- Cricut Maker or Explore Cutting Machine and a cutting mat.
- Ice Cream Gable Box Template (available in my free members library design #21 under Box Templates —get the password by filling out the form here.)
Share the love and easily come back to this gable box tutorial anytime just by saving this on Pinterest!

Ice Cream Gable Box Instructions
Follow along with the tutorial below and make sure to post these in my crafting group here or tag me if you post them on social media. I absolutely love seeing your crafts and can’t wait to see how your ice cream boxes turn out.
Step 1: Upload the Ice Cream Gable Box Template to Cricut Design Space
Upload the ice cream gable box template to Cricut Design Space. For help with uploading SVG files, check out my tutorial here.
Click on “Ungroup” to ungroup all of your layers. You will need to modify a few of the layers. Starting with the box template, click on the arrow to show all layers. Select the “grid lines” layer and change the operation to Pen.
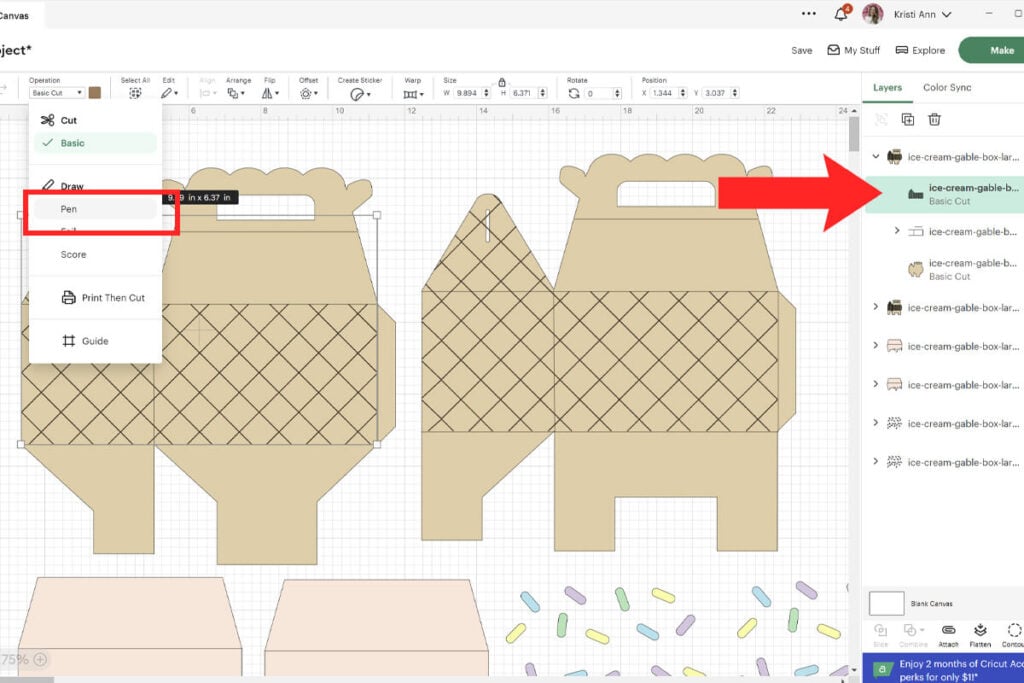
Then click the layer below (group of lines) and change the operation to score.

Next, select the pen layer, score line layer and box layer together and select “Attach.” Repeat these steps for the other box layer as well.
Note: If you are not using a pen or scoring tool, delete that layer instead.

For each of the ice cream layers, change the line to a score line. And then attach the score line to the ice cream layer just as you did with the boy layer.

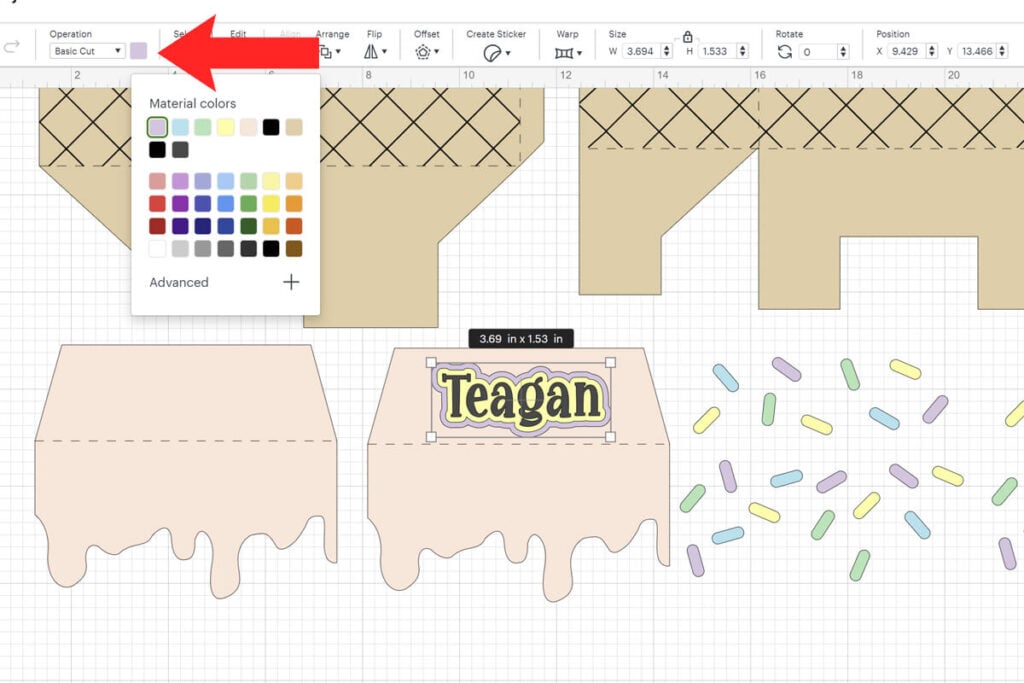
If you want to add a name to your box, select the text tool and type the name. Adjust the font and size accordingly. Click on “Offset” to add a boarder around your name. Adjust the size of your border and select “Apply”. You can add another offset behind this, by selecting the offset tool again.

To change the color of your text or offset, select the layer that you want to change and click on the color icon, select the color and then click off of it.
Step 2: Cut Everything Out
When cutting everything out, make sure to pay attention to the prompts in Cricut Design Space. Add your scoring stylus when prompted as well as your pen. For detailed instructions on using your scoring stylus and Cricut pens, watch the video tutorial here.
Step 3: Fold Box On Score Lines
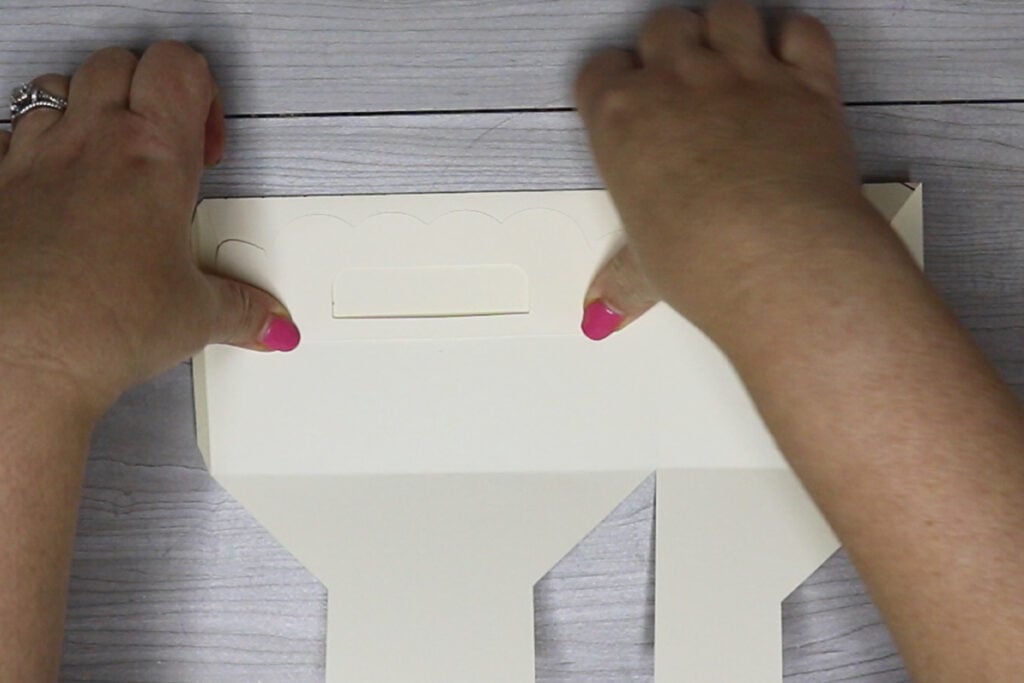
Place the box template with the front (side with the drawings) facing down on your work space. On each of the score lines, fold in except for the handle piece. For the handle, you will first fold in on the first score line and then fold up, folding the handle part up. Repeat this for the other box piece as well.
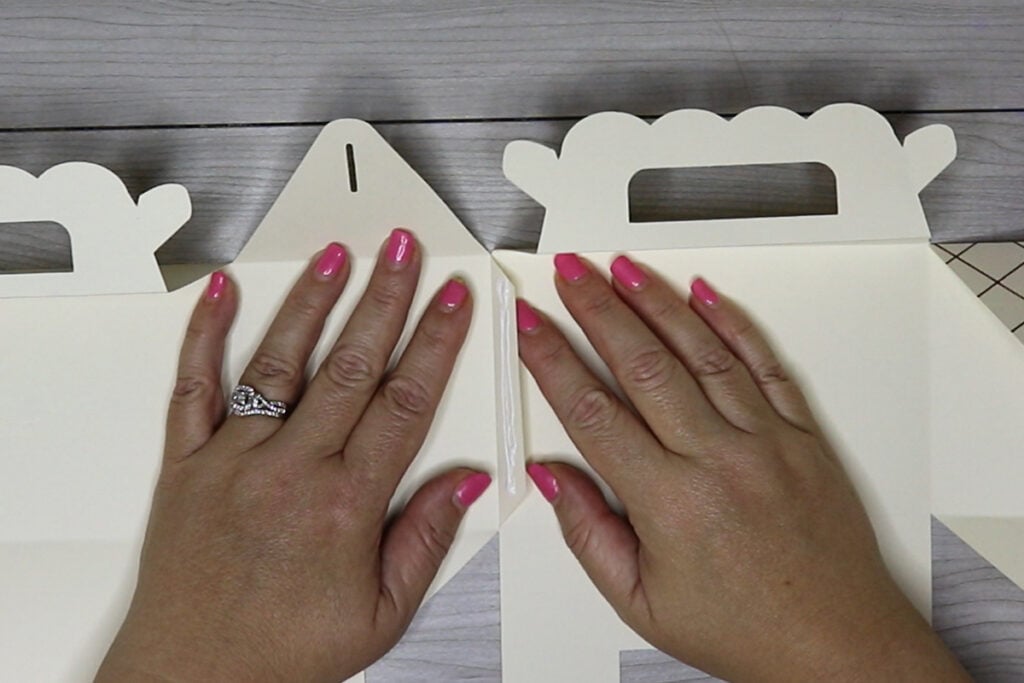
Step 4: Attach the Box Pieces Together
Line both box sides up together, both facing the same direction with the front facing down on your workspace. Add glue to the tab piece and use this tab piece to attach the sides together. Make sure to glue the tab piece to the inside of the box and not the outside.
Note: If you are using the mini template, the box is all cut out together, so no need to attach the sides.
Step 5: Glue Ice Cream & Sprinkles to the Front
Fold the ice cream layer on the score line and glue it to the front of the box. The ice cream fold and the box fold should line up together.

And then randomly glue the sprinkles to the ice cream layer. Also glue on your name if you are adding a name.

Step 6: Assembling the Box
To assemble the ice cream gable box, place the box with the front side facing down. Fold the side with the 2 rectangles on the outside up and then fold one of the sides on top.

Then fold the other side over and bring the last side with the rectangle in the middle through the slot in the bottom of the box.

Form into a box shape and use the tab piece to attach the box together. Once this dries, your box is ready to go! Because the bottom isn’t glued, you can easily fold the box flat to store and re-use these cute ice cream favor boxes as much as you like.

When you’re done, make sure to post these in my crafting group here or tag me if you post them on social media. I would love to see how yours come out!
Video Tutorial For Ice Cream Gable Boxes
Watch the step-by-step video tutorial to learn how to make these Ice Cream Gable Boxes here:
