
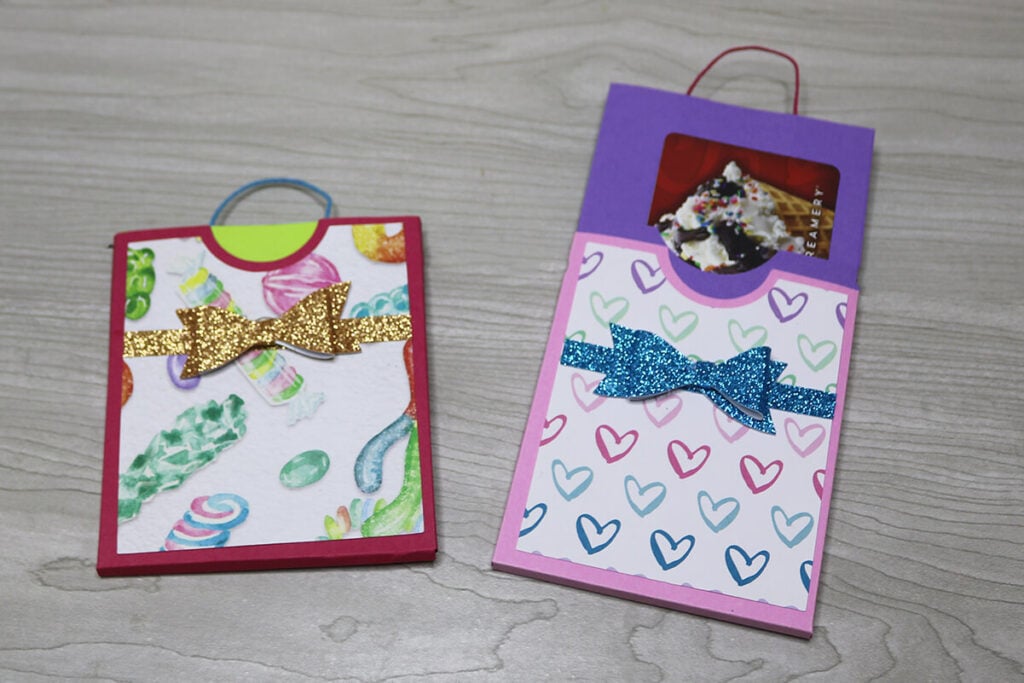
Gift Bag Gift Card Holder Template

It’s been awhile since I’ve added a new gift card holder template to my blog, so today I am changing that with this cute gift card holder that looks just like a gift bag. You’ll love how easy this is to make and customize for any holiday or occasion.

This post contains some affiliate links for your convenience (which means if you make a purchase after clicking a link I will earn a small commission but it won’t cost you a penny more)! Read my full disclosure policy.
If you’re looking for more creative gift card holder template, then make sure to check out this popcorn gift card holder template or this adorable butterfly gift card holder. You can also find all of my gift card holder SVG files here.
Learn how to us this Gift Card Holder Template
My favorite part about this gift card holder template is that it’s very basic because it’s the scrapbook paper that gives it the details. Which means that you can use this for any holiday or occasion that you need a gift card holder for, just by choosing coordinating scrapbook paper.
Watch the step-by-step video tutorial to learn how to make this gift bag gift card holder here:

To Make this Gift Card Holder Template, You Will Need:
- Letter size or 12×12 Medium Weight Cream Cardstock. This is a great variety pack if you need to stock up on colors.
- Decorative scrapbook paper. Can find at Michaels, Hobby Lobby or Amazon.
- A good craft glue – this Bearly Art craft glue is what I am using. I’m also using hot glue for some parts.
- Scoring Stylus (which is what I will be using in this tutorial with the Explore) or Scoring Wheel (Maker only). Or you can fold by hand.
- String or waxed cord which is what I am using.
- Cricut Maker or Explore Cutting Machine and a cutting mat.
Download The Gift Card Holder Template
You can download this free Gift Card Holder Template from my members only free library (design #9 under Gift Card Holders or search “Gift Bag Gift Card Holder”).
Don’t have a password? Unlock my free members library here.
Share the love and easily come back to this tutorial anytime just by saving this on Pinterest… Plus this helps to keep my SVG files and Cricut tutorials free!

Step 1: Upload the Card Holder Template to Cricut Design Space
Upload the gift card holder to Cricut Design Space. For help with uploading SVG files, check out my tutorial here.
Click on “Ungroup” to ungroup all of your layers. You will need to modify a few of the layers before cutting. Click on the arrow in the layers panel to open up your first group layer. Select the layer with the group of lines. Change this operation from “cut” to “score”.
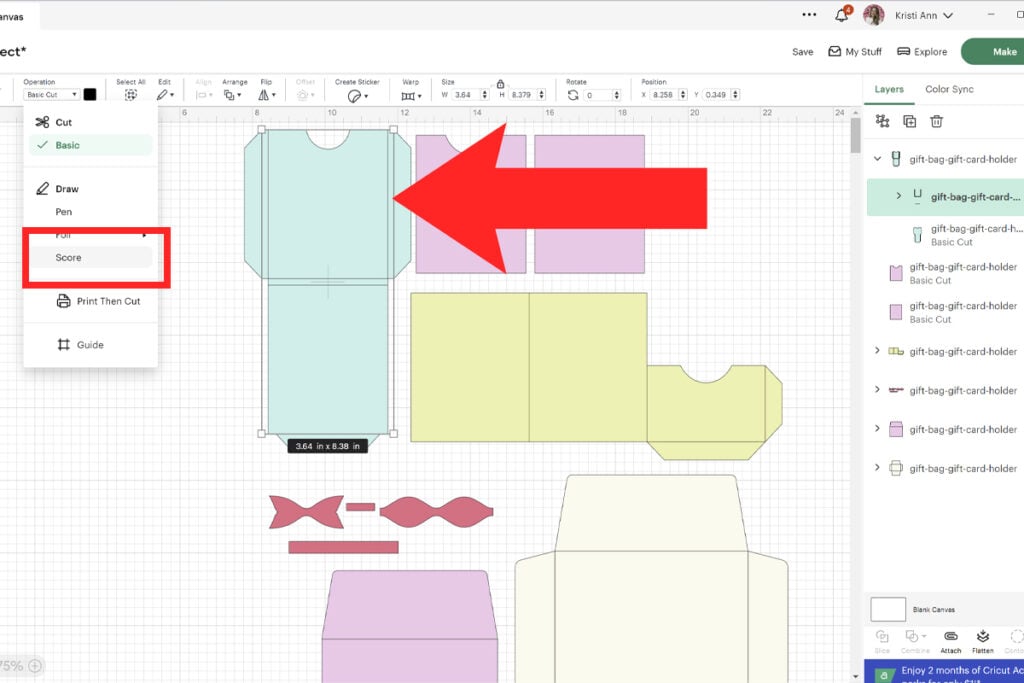
Then click on the score lines and the layer underneath together and select “attach” to attach the score line to the template.

Repeat these steps for all of the other score lines in the template.
Note: If you are not using a scoring tool, delete these lines instead and you can fold these areas by hand.

Step 2: Cut Everything Out
Select “Make It” to start the cutting process and then select the mat you are using. Check the mat preview to make sure the score lines are located in the correct places (where they are in Cricut Design Space”. If not, then make sure that you can back and attach your score lines to the layer.
If you are using letter size paper, make sure to change the paper size for each mat before cutting. Add your scoring tool and cut everything out. Your Cricut will automatically start cutting after scoring.
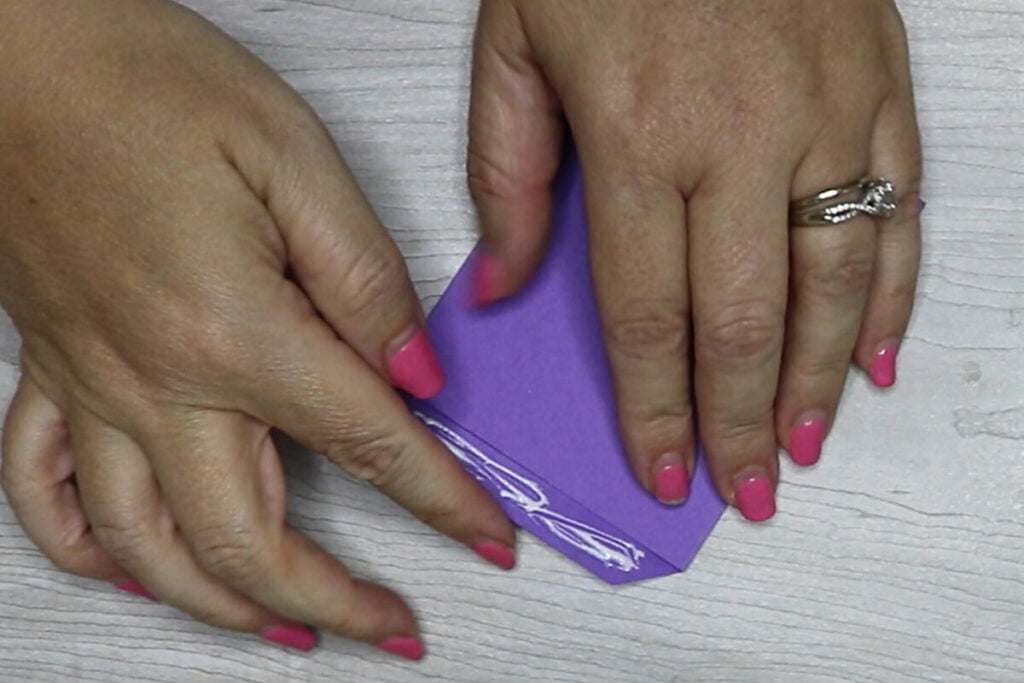
Step 3: Fold and Glue on Decorative Paper
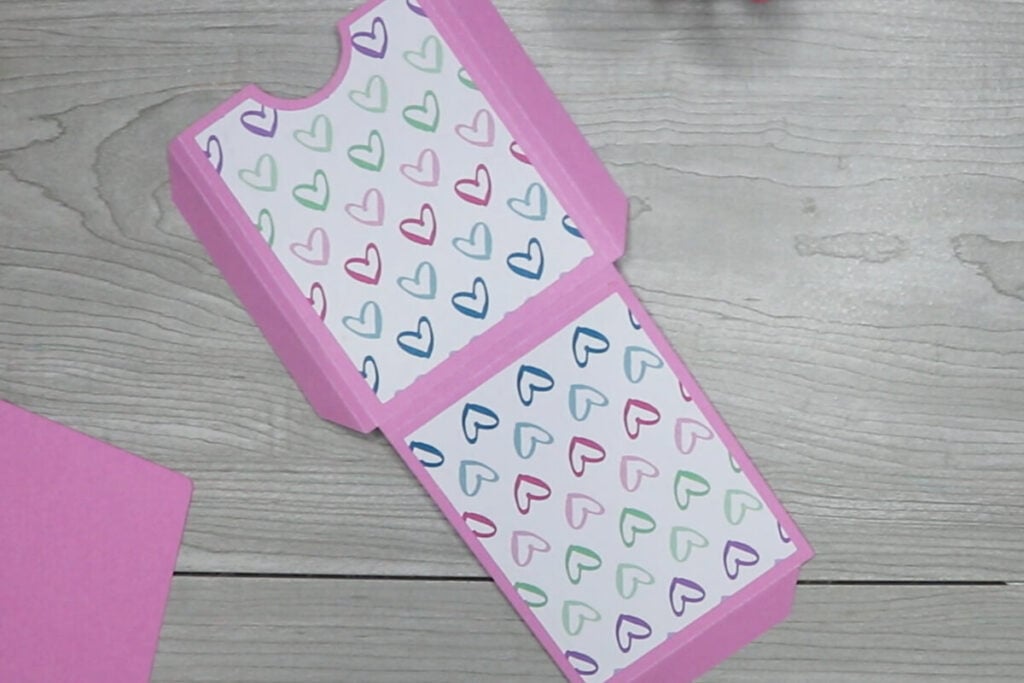
Starting with the outside part of your gift card holder, fold in on all of your score lines. Then glue decorative scrapbook paper on top. When adding the decorative paper, remember that this part will fold in half so add your paper accordingly so both sides will face up.
Step 4: Attach Sides
Use the side pieces to attach the gift bag together by gluing these to the inside. Glue both sides. Then fold the top piece into the box. You will not glue the top piece down. Then set this part aside to dry.

Step 5: Glue on the Handle
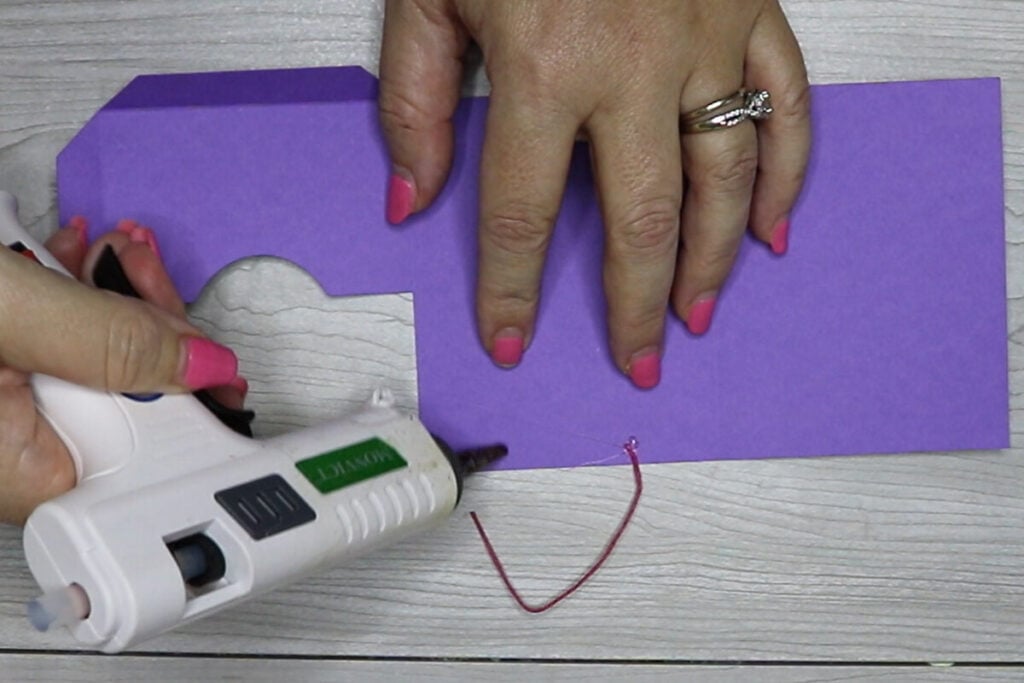
Glue your string to the middle section of the gift card holder. Glue down both sides to create a handle.
Step 6: Attach the Gift Card Holder
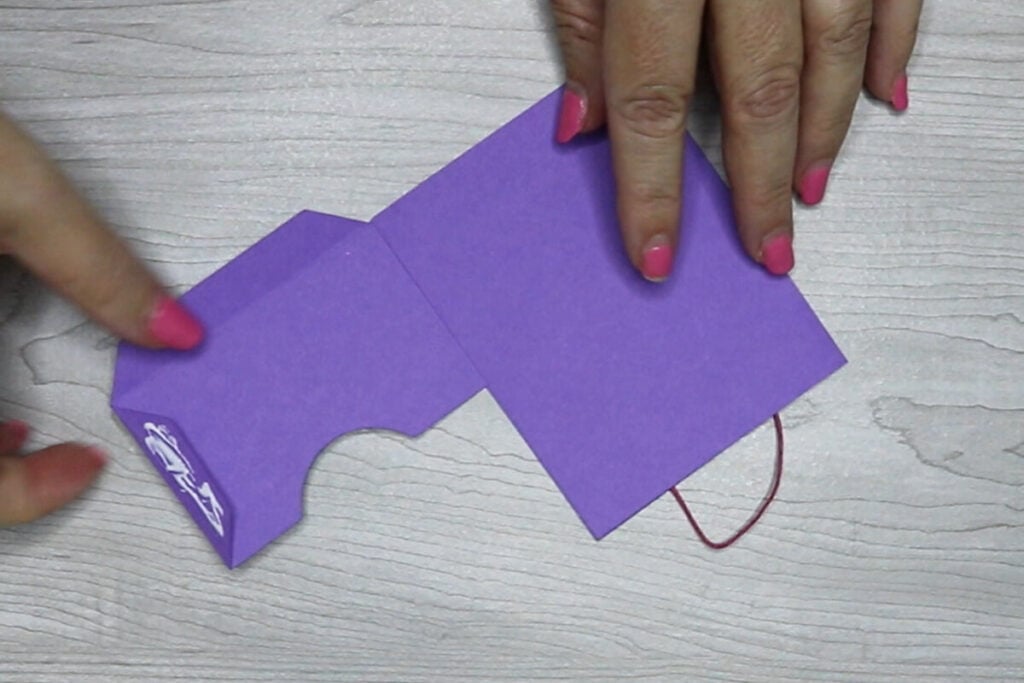
Fold the rectangle side on top of the middle rectangle, gluing these together so that you cover where the handle is glued. Then glue the side tab piece to the inside to attach this to the rectangle shape.
Step 7: Attach the Bottom
Glue the bottom tab piece over to the outside of the rectangle. Make sure that this piece is on the outside as this helps keep the gift card holder inside the bag.
Step 8: Add a Bow
Attach the bow together, by gluing each side to the middle, forming a bow shape. Then wrap the small rectangle piece and glue it around the middle of the bowl. Glue on the ribbon and bow pieces on top of your gift bag gift card holder.
Step 9: Assemble the Envelope
If you want to use the coordinating envelope template, then you can quickly and easily put this together. Start by folding on all score lines on the envelope and liner. Line the liner up with the score line on the envelope and this the liner on top.
Then fold the bottom over and glue each side on top of the bottom flap of the envelope.
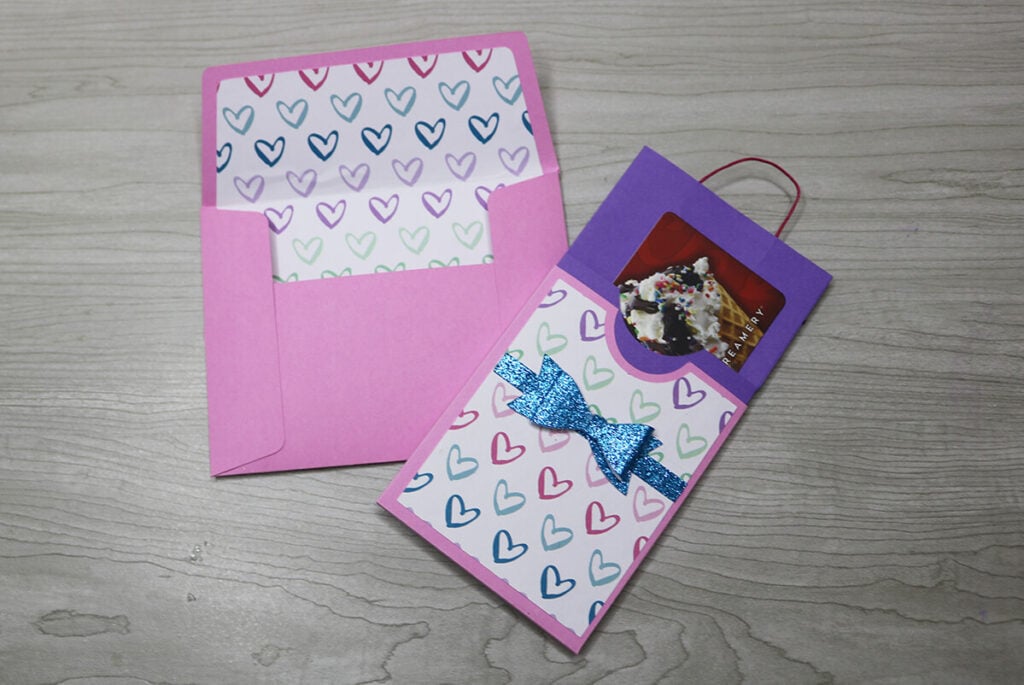
Add the gift card to the inside part of the gift card holder. The gift card will fit standing up, not sideways. Then slide this part into the gift bag. When adding this, make sure that the side where the tab piece is glued to the outside, lines up with the side where the tab piece is folded in on the outside. This will keep the gift card holder from being able to be easily removed when you pull it out.
When you’re done, make sure to post these in my crafting group here or tag me if you post them on social media. I would love to see how yours come out!