Happy Mother’s Day Card SVG
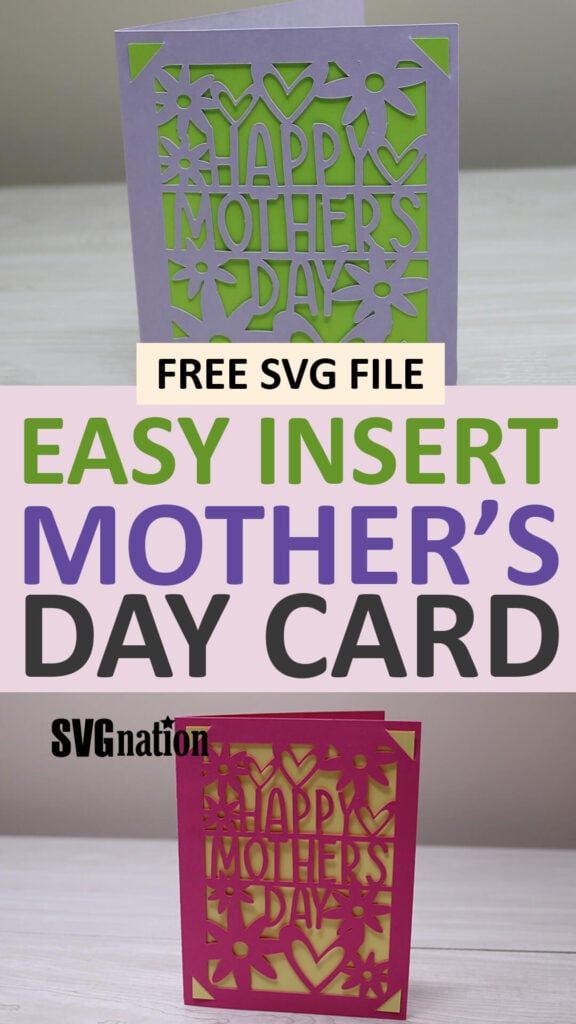
If you’re looking for a quick and easy card idea for Mother’s Day, then you’re in the right place. This Happy Mother’s Day Card SVG only takes minutes to cut and assemble. You’ll be able to make this with the Cricut Maker, Explore and even the Joy!

If you’re looking for a Mother’s Day card with a little more sparkle, then try this Mother’s Day shaker card instead. It’s the same design, but offers a fun, glittery surprise inside! You can also find a lot of free Mother’s Day SVG files on my site to help inspire gifts for Mom and more Cricut Mother’s Day Card ideas.
Download the Happy Mother’s Day Card SVG
You can download this free Happy Mother’s Day card SVG from my members only free library (design #17 under Card Templates or search “Happy Mother’s Day Card SVG”).
Don’t have a password? Unlock my free members library by entering your name and email in the form below or click here.
Supplies Needed
- Letter size or 12×12 Medium Weight Cream Cardstock. This is a great variety pack if you need to stock up on colors.
- Scoring Stylus (which is what I will be using in this tutorial with the Explore) or Scoring Wheel (Maker only). Or you can fold by hand.
- Cricut Maker or Explore Cutting Machine and a cutting mat.
- Happy Mother’s Day Card SVG (available in my free members library design #17 under Card Templates —get the password by filling out the form here.)
Share the love and easily come back to Mother’s Day card tutorial anytime just by saving this on Pinterest!
Mother’s Day Card Instructions (without a card mat)
First, upload the Happy Mother’s Day card SVG to Cricut Design Space. For help with uploading SVG files, check out my tutorial here.
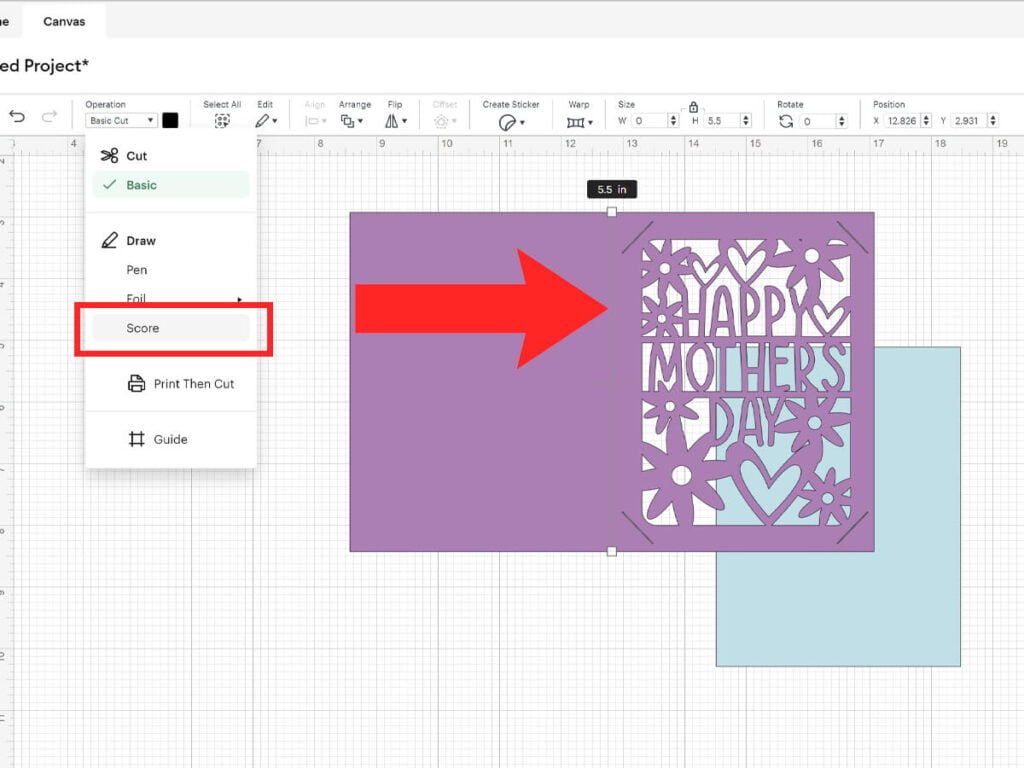
Click on “Ungroup” to ungroup all of your layers. Then click on the line going down the middle of the card and change the operation from “Cut” to “Score”. If you do not have a scoring tool, delete this line instead and fold the card by hand.
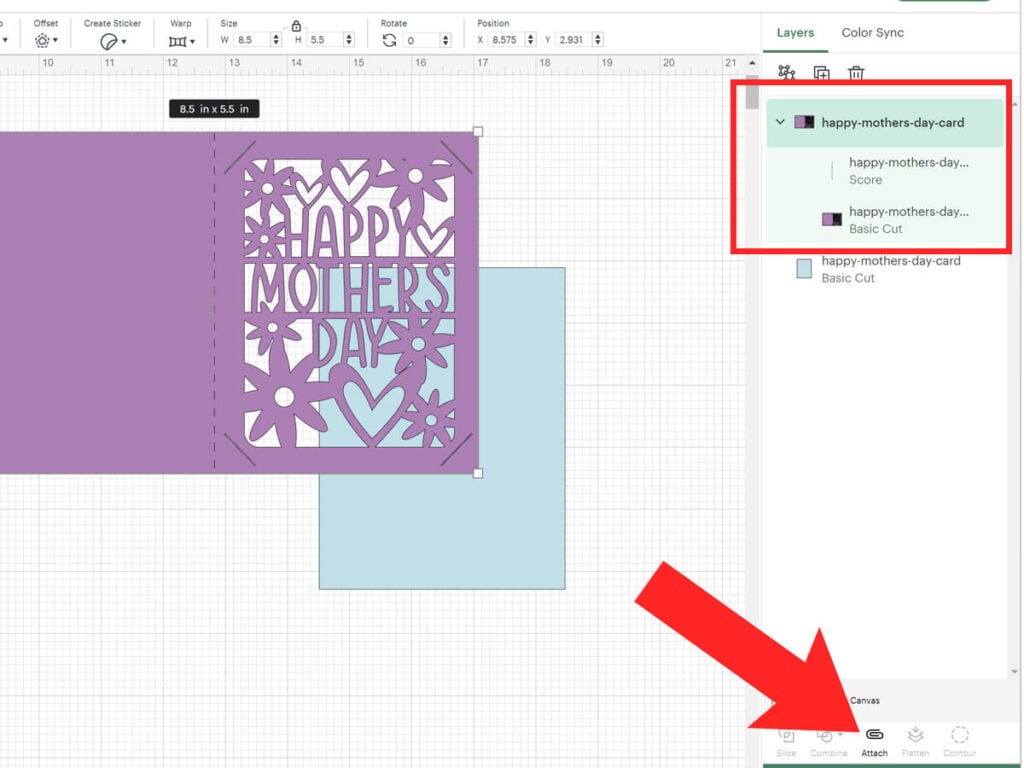
Before cutting the card, make sure that you select your score line and the card layer together and select “Attach”. This attaches the score line to your card so your Cricut knows where to correctly cut and score on your mat.
Cut everything out with your Cricut. And then all you need to do is fold the card in half and add the rectangle to the middle of your card through the slots in your card. If you like the insert to lay flatter, add just a little glue along the sides.

This card fits perfectly inside a 4″x6″ envelope. If you don’t have any on hand, you can grab a free 4″6″ envelope template here.
Mother’s Day Card Instructions for Cricut Joy & Card Mat
If you are using the Cricut Joy or the card mat, then upload the Mother’s Day card SVG for the Joy. The design is already sized for the R20 card size, so if you are using a different size, make sure to resize this first in Cricut Design Space.
In the mat preview, select the size card you are using and place the design over the card design where you want it to cut.
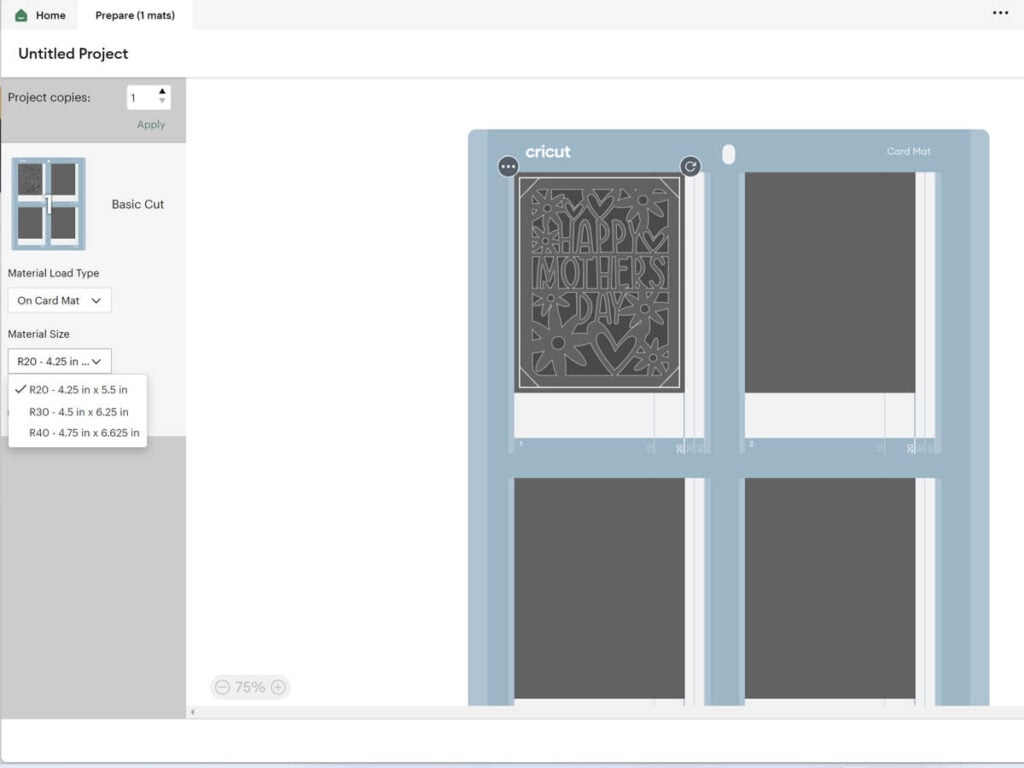
Once the card is cut, just add the insert card to the inside through the slits and your card is ready to go.
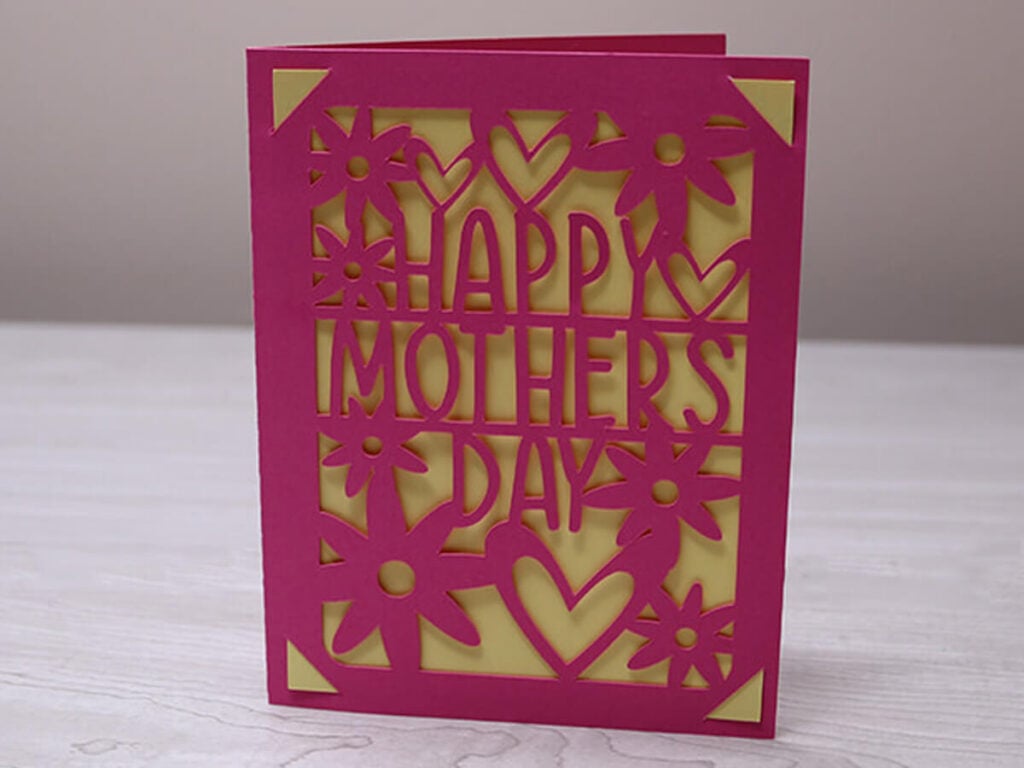
When you’re done, make sure to post these in my crafting group here or tag me if you post them on social media. I would love to see how your Mother’s Day card comes out!
