
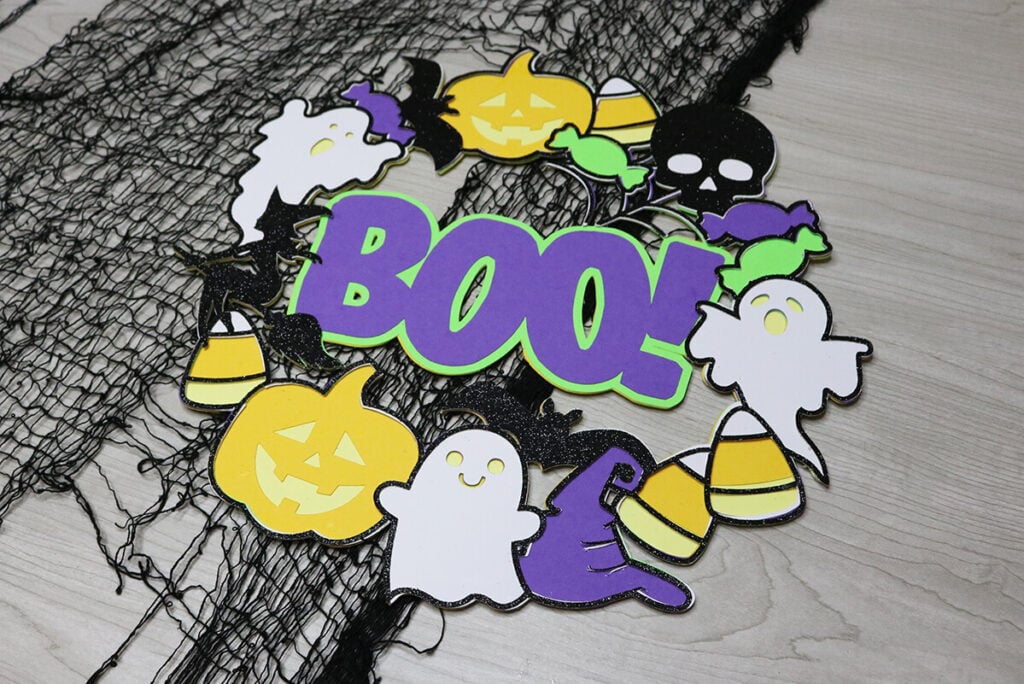
Cricut Halloween Wreath
I’m in love with the way this layered Halloween wreath SVG turned out. Because this is a layered file, it’s incredibly easy to put together and is going to be great for adding more Halloween decor to your house, classroom or office. Follow along with my step-by-step tutorial to learn how to make this Cricut Halloween wreath.
And if you want more Cricut Halloween crafts, then make sure to check out my most popular Cricut Halloween crafts while you’re here.
Cricut Halloween Wreath
This Halloween wreath is layered so it’s going to be thicker and sturdier so it can be reused for many years. It looks great using traditional Halloween colors, but feel free to use whatever color combination you want.
Supplies Needed:
This post contains some affiliate links for your convenience (which means if you make a purchase after clicking a link I will earn a small commission but it won’t cost you a penny more)! Read my full disclosure policy.
To make this Cricut Halloween wreath, you will need:
- 12×12 inch Medium or heavy weight Cardstock/Paper – I recommend this 90lb weight variety pack which has all of the colors that I am using in this tutorial, along with a sheet of black glitter cardstock for the top.
- Cricut Maker or Explore Cutting Machine and your standard cutting mat.
- A glue with a fine point to it – This Bearly Art craft glue is what I am using.
- Free Layered Halloween Wreath SVG
Download the Free Layered Halloween Wreath SVG
To get this free layered Halloween wreath SVG, enter your name and email into the form below and then click the “Get It Now!” button! If you have any issues with the form, then click here to open the form in a new window.
Please remember these are for personal use only. If you’re looking to sell products using these designs, please purchase a Commercial Use License here.
Save for Later!
Share the love and easily come back to this tutorial anytime just by saving this on Pinterest by clicking the picture below and then hitting “Save”… Plus this helps to keep my SVG files and Cricut tutorials free 🙂

Cricut Halloween Wreath Step-by-Step Tutorial
Watch the full step-by-step video tutorial to learn how to make this Halloween wreath with your Cricut here:

Create a new project in Cricut Design Space and then upload the Halloween wreath SVG and add it to your canvas. There are no modifications you need to make for this design, so you will just click on “Make It” to begin cutting your project.
Important Note: I do not recommend resizing this project. It is already as large as it can cut with your Cricut. If you resize it smaller, it will be extremely difficult to paste together because of the intricate cuts.
Tips for Cutting this Halloween Wreath
This Halloween wreath does have a lot of intricate cuts. So, if you are having issues, here are some helpful tips to help:
- I recommend using a premium fine point blade.
- Make sure that your blade isn’t dull and that it is clean. If you cut glitter cardstock, glitter can stay with your blade and cause issues. And if you are using glitter cardstock for your wreath, make sure to remove and clean your blade after each glitter cardstock that you cut.
- To clean your blade, remove it from your Cricut, press down on the top part to push your blade out and use a towel or something similar to wipe it with.
- You also want to make sure you have a clean mat. If your mat has debris on it or deep cuts in it, this can cause issues when cutting intricate designs.

How to Assemble Your Halloween Wreath
After you cut your design, you will have 6 different color pieces. You’re going to glue these on top of each other, just as they are in Cricut Design Space. So, you will glue the orange layer on top of the yellow layer. And then the green layer, the purple layer, the white layer and finally the black layer. If you used different colors, then your layer colors will be different.
I also recommend lining the layers up before gluing them down to make sure you don’t put glue on the wrong side. This is the worst!
More Cricut Halloween Crafts You’ll Love!
If you love this Cricut Halloween wreath, then make sure to check out these other fun Halloween crafts that you can make with your Cricut: