
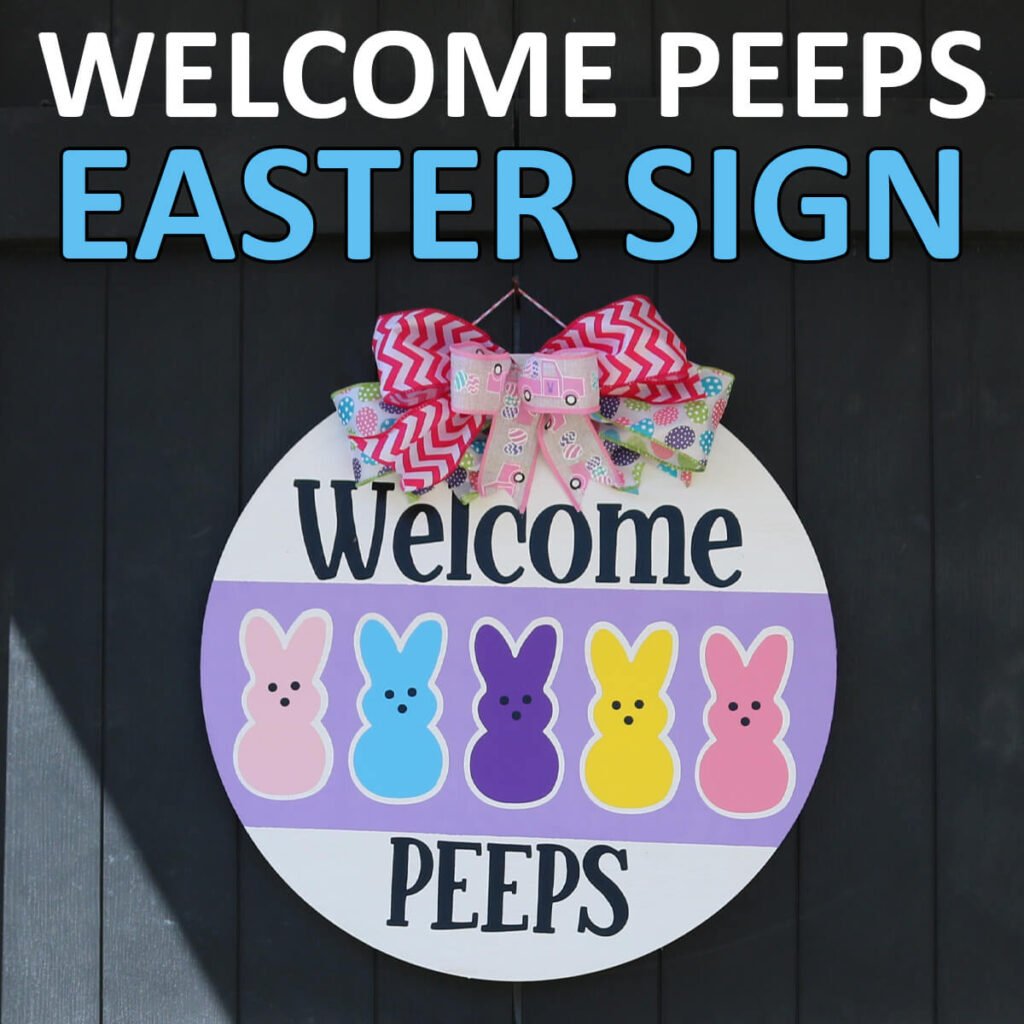
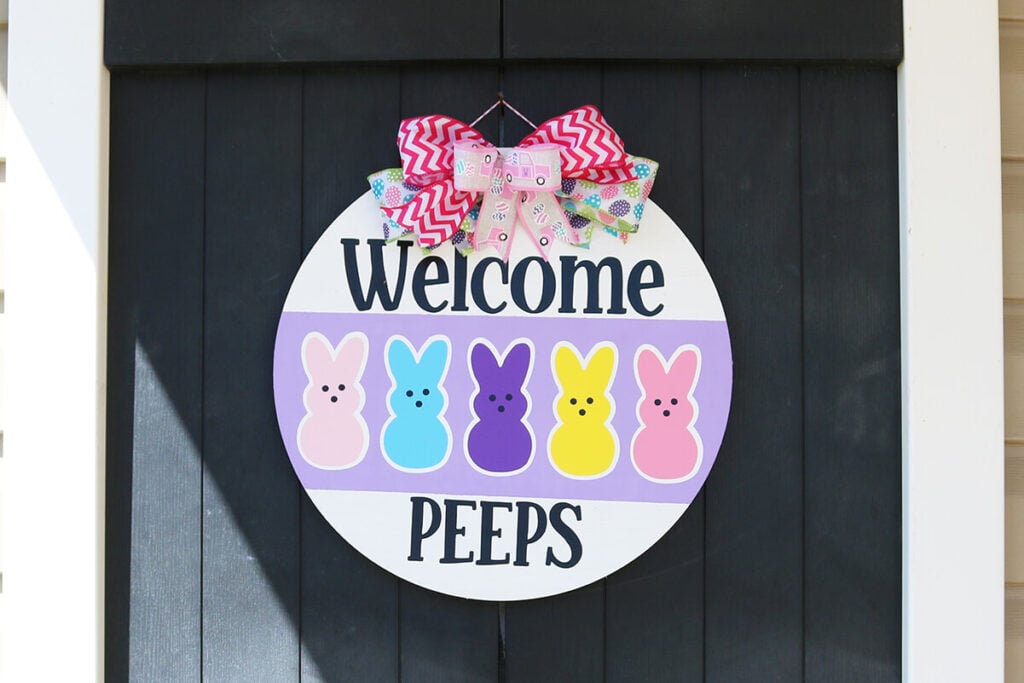
Welcome Peeps Easter Wood Sign with Cricut
Ready to decorate your house for Easter or spring? Today I’m going to show you how to use your Cricut to create this Welcome Peeps Easter wood sign.
This post contains some affiliate links for your convenience (which means if you make a purchase after clicking a link I will earn a small commission but it won’t cost you a penny more)! Read my full disclosure policy.
If you guys were here for my Valentine’s Day Wood Sign, then you know that I started with 6 wooden signs and this Welcome Peeps sign is the 2nd design in my wood round sign series. If you love making this type of welcome sign, then make sure to continue to follow along as I have 4 more designs coming.
I also have a lot of other Easter crafts that are fun to make, like these lollipop holders or this adorable bunny banner. But for now, let’s get started with this Welcome Peeps Easter sign.
Download The Welcome Peeps Easter Welcome Sign SVG
You can download this free Welcome Peeps SVG Template from my members only free library (design #2 under Wood Crafts or search “Welcome Peeps Wood Round Template”).
Don’t have a password? Unlock my free members library by entering your name and email in the form below or click here.
If you want more, here are some of my most popular spring craft cricut ideas!
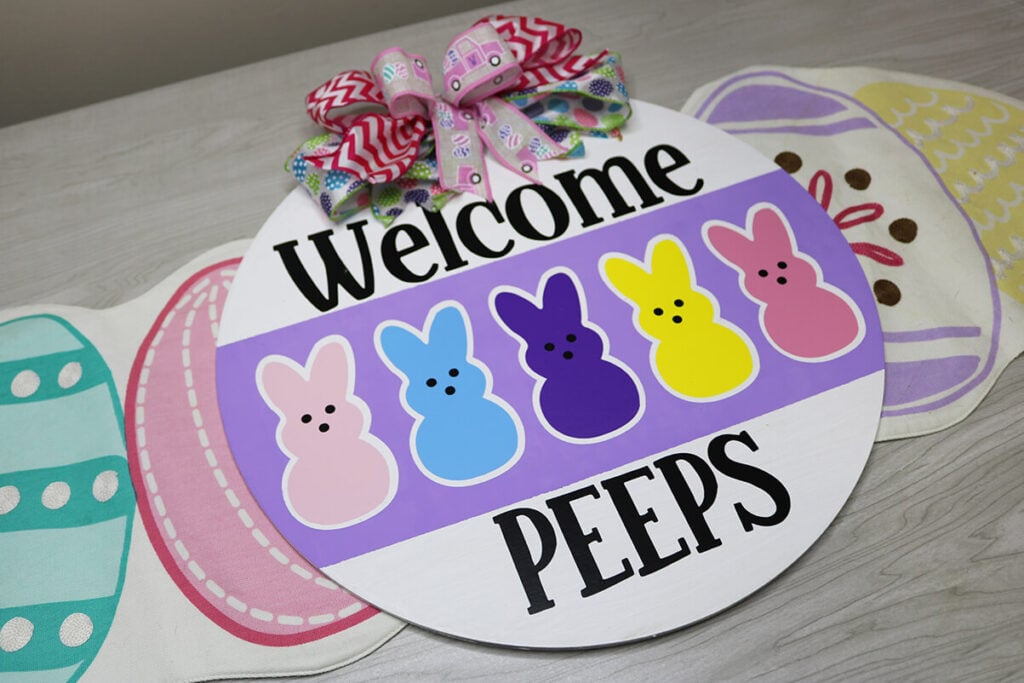
This Easter wood sign can be used for either indoor or outdoors. It’s also great to hang on the front door. I place mine on the shutters next to the front door and it holds up outside. But, if you want to make sure your wood sign lasts for many years, use an acrylic sealer to seal and protect it. You can find my preferred sealer here.
Supplies for an Easter Wood Sign
- Wood Round – I am using this wood round in the 16×16 inch size. If you want to use another size, I’ll show you how to resize the template.
- Black Iron on Vinyl (for the woods and bunny eyes)
- Variety Pack Iron on Vinyl (for the bunnies)
- Stencil Vinyl (you can also use adhesive vinyl)
- Transfer Tape
- Outdoor acrylic paint in purple and white.
- Heat Press – I am using this 12″x10″ EasyPress
- 2.5″ Wired Decorative Ribbon for the bow
- Floral Wire (for making the bow)
- Twine or String for hanging
- Cricut Maker or Explore Cutting Machine and a 12×24 inch cutting mat.
- Welcome Peeps SVG Template (available in my free members library design #2 under Wood Crafts —get the password by filling out the form here.)
Share the love and easily come back to this Easter wood sign tutorial anytime just by saving this on Pinterest!

Welcome Peeps Easter Sign Instructions
There are 2 versions of this Easter sign when you download the file. You can either make the bunnies with the faces or with the tails. Both versions are super cute and follow the same steps. The only difference is there is one extra step to add on the bunny faces (the bunny tails are already cut out of the design) so I’ll show you the version with the bunny faces in this step-by-step tutorial.

Step 1: Paint the Wood Round White
You can either leave the wood round it’s natural color or paint it white. I do recommend painting the wood if you are using the version with the bunny tails so that the tails will be white. If you want to paint the wood, apply at least 2 coats of an outdoor acrylic paint and then let it fully dry.
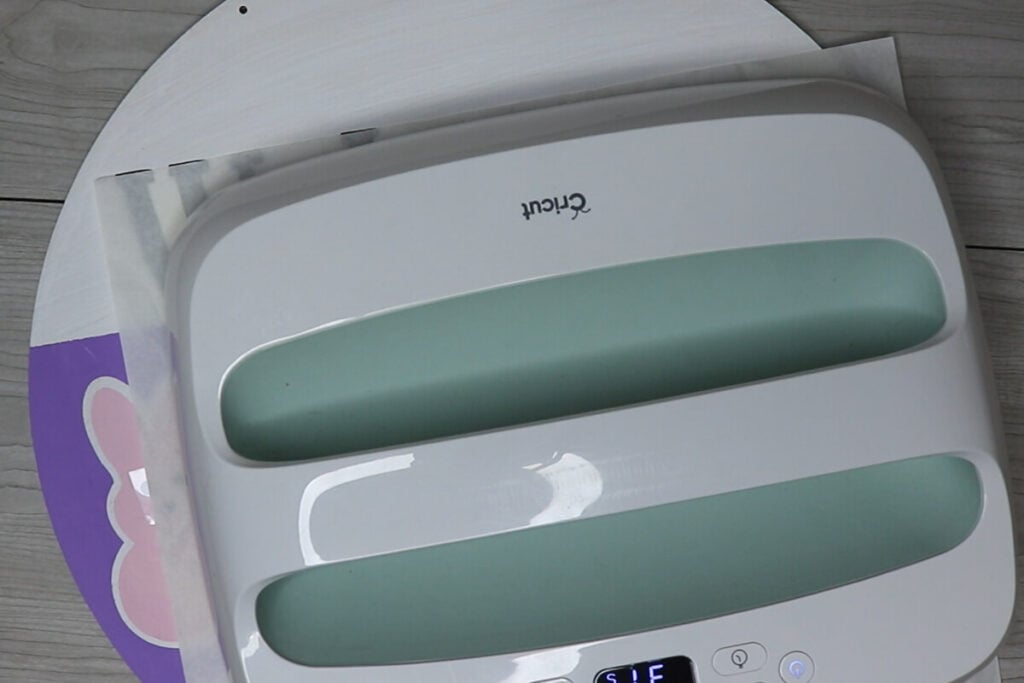
Step 2: Cut Stencil & Vinyl
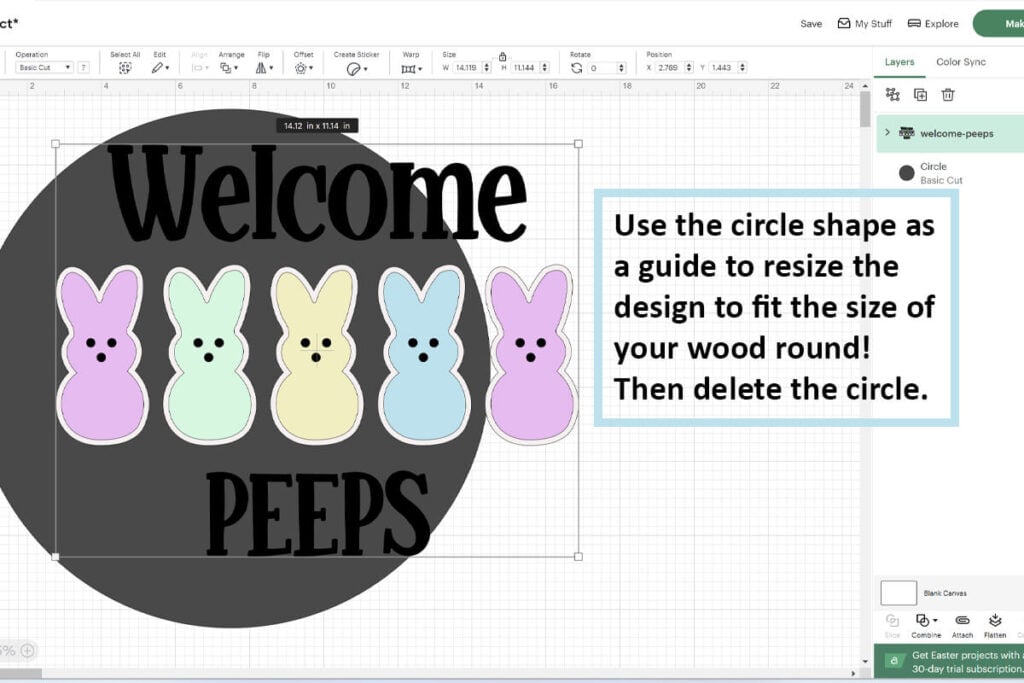
Upload the SVG file to Cricut Design Space. If you need help with uploading SVG files, check out my tutorial here. You will cut out the wood, colored bunnies and bunny eyes using iron on vinyl. But, make sure to mirror your image and place your vinyl shiny side down on the mat. Cut the white bunnies using stencil or adhesive vinyl.
Note: If your wood round is a different size than 16″x16″, then you will need to resize the design first. To do this, add a circle to your canvas and change the size to the size of your wood round. Send the circle layer to the back. Then, resize the design until it fits and delete the circle before cutting.
Step 3: Apply the Stencil & Tape
Weed your stencil and then transfer the bunnies to your transfer tape. Use the transfer tape to transfer the bunnies to your wood round. If you need help with the placement, use “Welcome Peeps” to help line the stencils up.
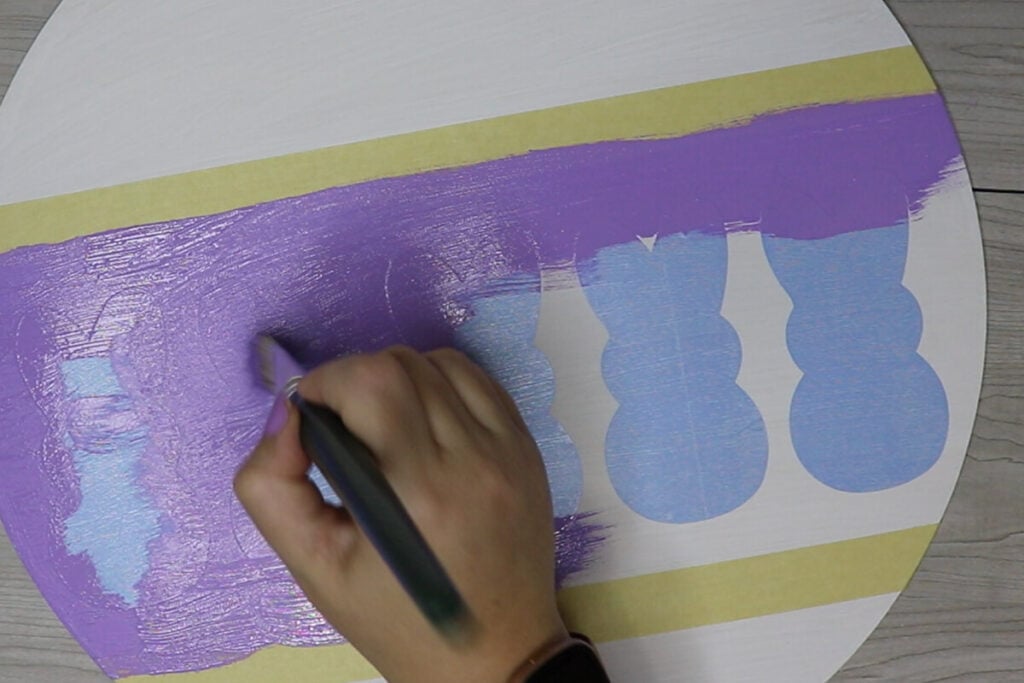
Make sure to press them down really well using your scraper tool because you don’t want paint to seep through. Then, apply painters or masking tape slightly above and below the bunnies (like the image below) and press down firmly on the tape.

Step 4: Paint over the Bunnies
Paint the middle part of the wood round, painting over the bunny stencils. But, make sure that you don’t go above or below the tape. I’m also painting the sides so it all blends together. Apply at least 2 coats and then let it dry.
Step 5: Remove the Tape & Bunny Stencils
Once the paint has had time to dry, remove the tape and the bunny stencils. You can use a weeding tool to pull up the bunnies which makes them easier to remove. If any of your paint seeps through, you can touch up the spots using the white paint.

Step 6: Weed the Iron on Vinyl
Weed the bunnies and “Welcome Peeps” by removing the pieces or the vinyl that you do not need. The pieces that you need, should remain on the clear backing. After you are done, cut away the extra parts around the words and bunnies. You want a very close cut so that you can lay all of your designs out on the wood round and press them together.

Step 7: Press on your Vinyl
Add parchment paper on top of your design and adhere the vinyl using a heat press. Use the cricut heat guide settings to apply this which are:
- 300 degress
- press for 40 seconds
- cool peel
Press each section for 40 seconds. Wait for the vinyl to cool before removing the carrier sheet. If you notice that some of the viny isn’t sticking, press the carrier sheet back down and add more heat until it adheres.
Next, place the bunny eyes in place and press again with the heat press to adhere the bunny eyes. Make sure to add parchment paper first so you don’t melt the other vinyl layers. If you are making the version with the bunny tails, you won’t need to do a second press.
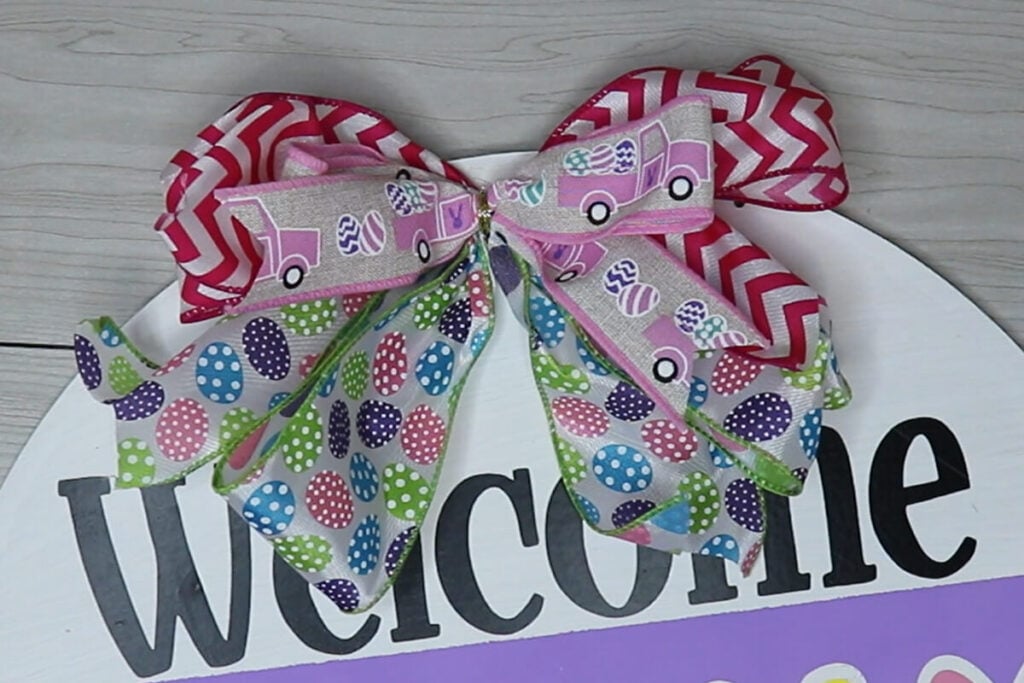
Step 8: Make the Ribbon
Using decorative ribbon, create a bow and attach it to the top of your sign using hot glue. If you need help creating a bow, you can watch my step-by-step video tutorial to see how easily I assembled the bow for my Valentine sign. For this Easter sign, my mom actually made the bow for me.
Note: Before adding the ribbon, spray your wood with an acrylic sealer to get more life out of your Easter outdoor sign. You can find my preferred sealer here.
Step 9: Add Twine & Hang
All that’s left is to add twine or string through the holes and hang your sign. The wood rounds that I purchased came with pre-drilled holes. If yours do not have this, you will need to drill 2 holes and then add your string.
When you’re done, make sure to post these in my crafting group here or tag me if you post them on social media. I absolutely love seeing your crafts and can’t wait to see your Easter Welcome signs!
Video Tutorial For Easter Wood Sign
Watch the step-by-step video tutorial to learn how to make this Welcome Peeps Easter wood sign here:
