

Interactive Father’s Day Card SVG
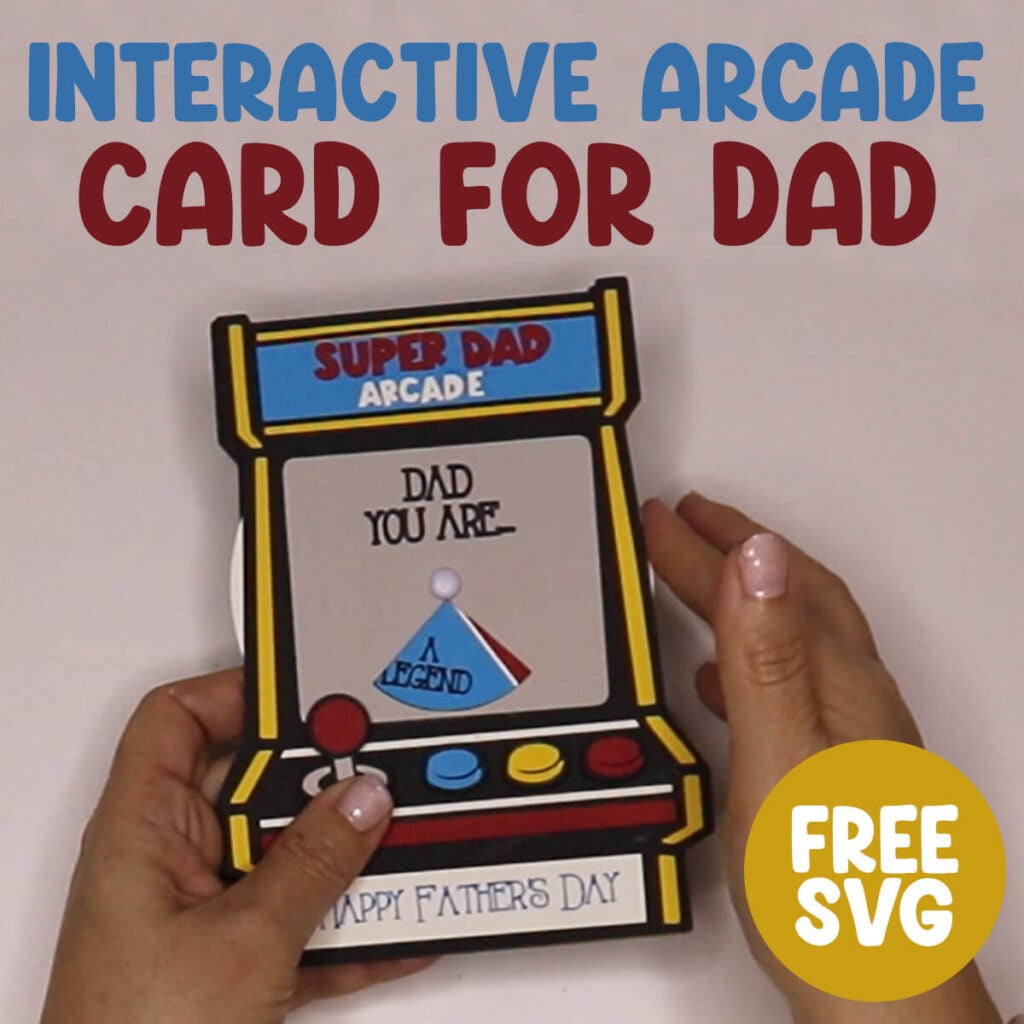
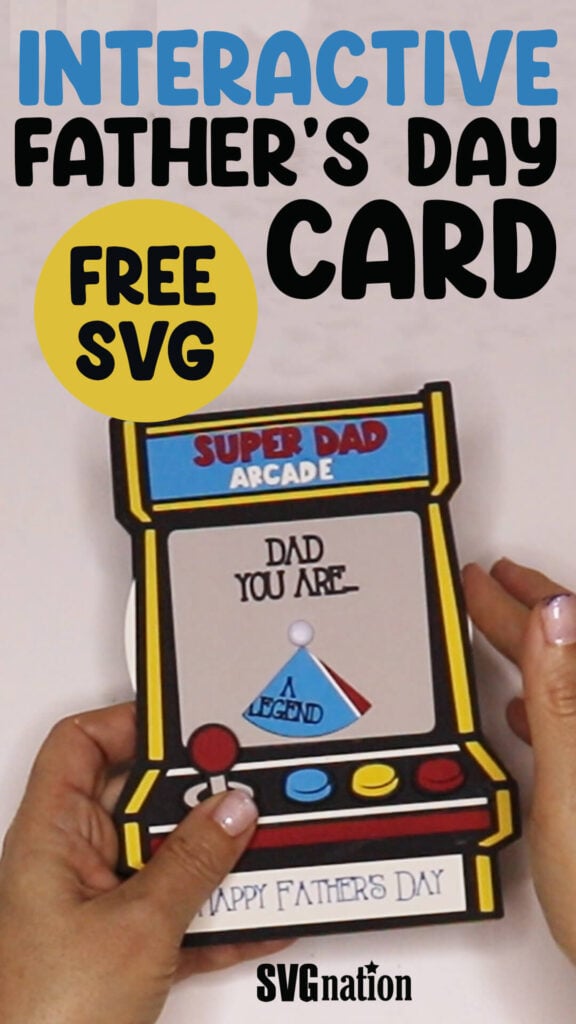
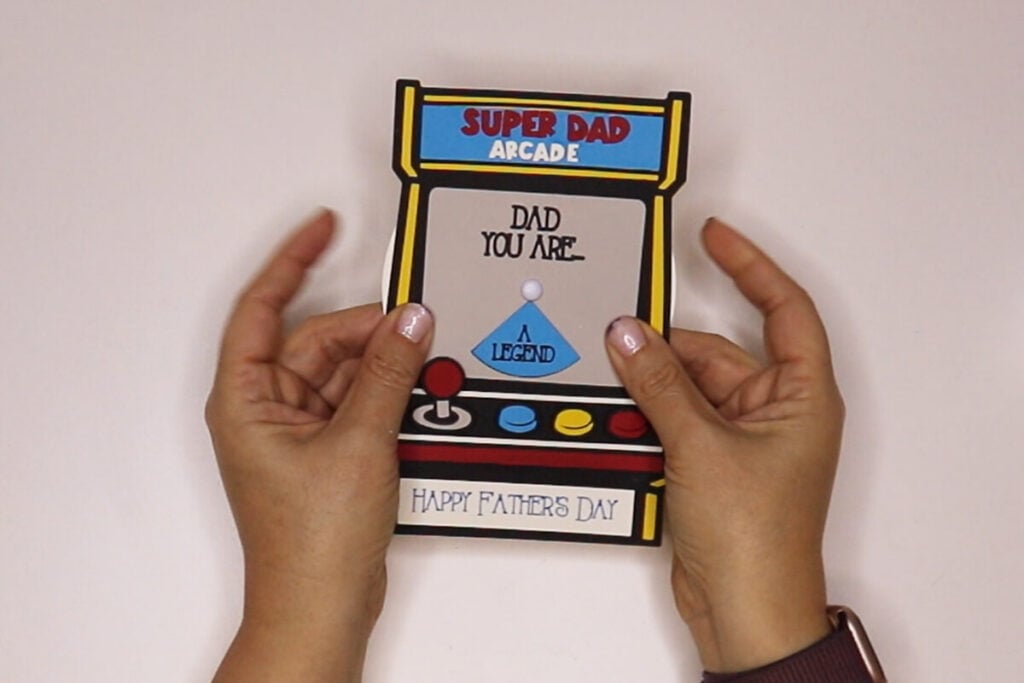
If you want a Father’s Day card that hits Dad right in the nostalgia, this interactive Father’s Day card SVG is perfect. This design looks just like a retro arcade game, but the real magic is the spin wheel with hidden messages. It’s playful, memorable, and ridiculously fun (and easy) to make with your Cricut.
This post contains some affiliate links for your convenience. (Which means if you make a purchase after clicking a link I will earn a small commission but it won’t cost you a penny more)! Read my full disclosure policy.
Love making handmade cards? Find more card designs like this interactive Father’s Day card by browsing 70+ card SVG templates. Or search all of my free Father’s Day SVG files for more Cricut Father’s Day ideas.
Learn how to make an Interactive Father’s Day Card
This design blends two things dads love: retro gaming and surprise elements. Instead of a traditional open‑and‑read card, Dad gets to interact with it—just like the arcade machines he grew up with.
Watch the step-by-step tutorial to learn how to make this arcade game Father’s Day card with your Cricut:

Will Need:
- Medium Weight Cardstock. You can find all the colors you need in this variety pack.
- Cricut Pens – I recommend this pack because you get so many colors and they are duel tip so you get the fine point pen tip and the marker.
- A good paper craft glue – this Bearly Art craft glue is what I usually use.
- Foam dots or strips
- Small brad fastener
- Brayer Tool for smoothing out the glue
- Cricut cutting machine – Use this Cricut Comparison Guide to find the right model for you!
Download The Arcade Game Father’s Day Card SVG
You can download this free interactive Father’s Day Card template from my members only free library (design #40 under Card Templates or search “Arcade Game Father’s Day Card SVG”).
Don’t have a password? Unlock my free members library here.
Share the love and easily come back to this tutorial anytime just by saving this on Pinterest… Plus this helps to keep my SVG files and Cricut tutorials free!
Step 1: Upload the SVG File to Cricut Design Space
Upload the Father’s Day Card SVG to Cricut Design Space. If you need help with uploading SVG files, then check out my tutorial here. Then click on “ungroup” to ungroup your layers.
Step 2: Modify Pen Layers
Open up the group for the image that says “Dad You Are” and select the text. Change the operation of the text from “Basic Cut” to “Pen”.
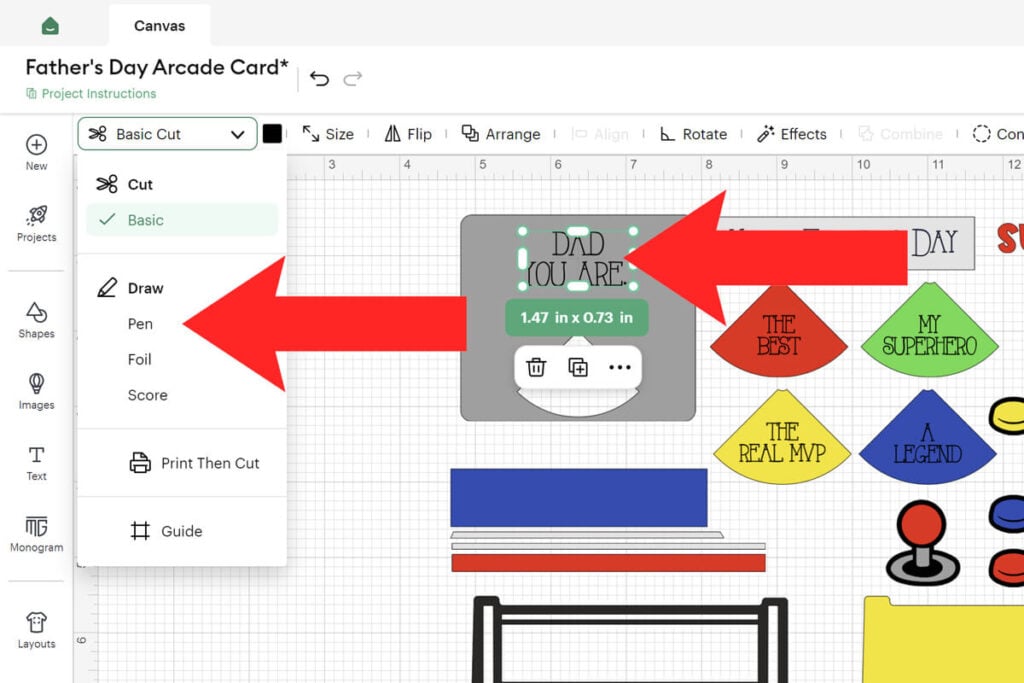
Then select the color icon to adjust the type of pen and color of the pen that you are using.
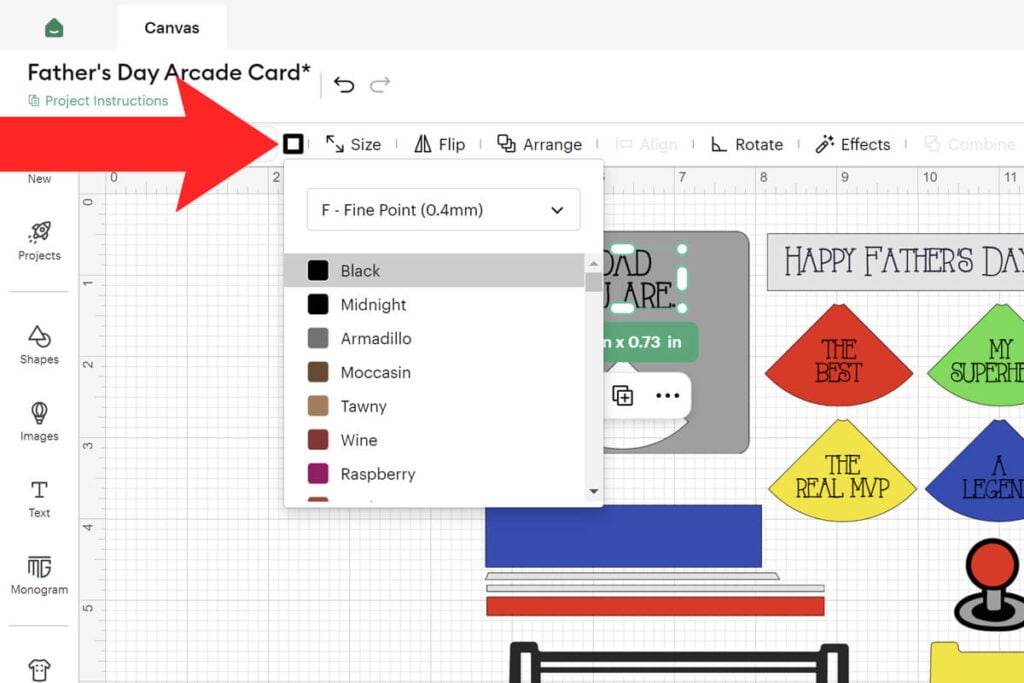
Select the pen layer and the layer below it together (they should already be grouped together) and select “Attach” to attach the pen layer to the layer it will write on. This step is important as it lets the Cricut know where to write and cut in relation to each other.
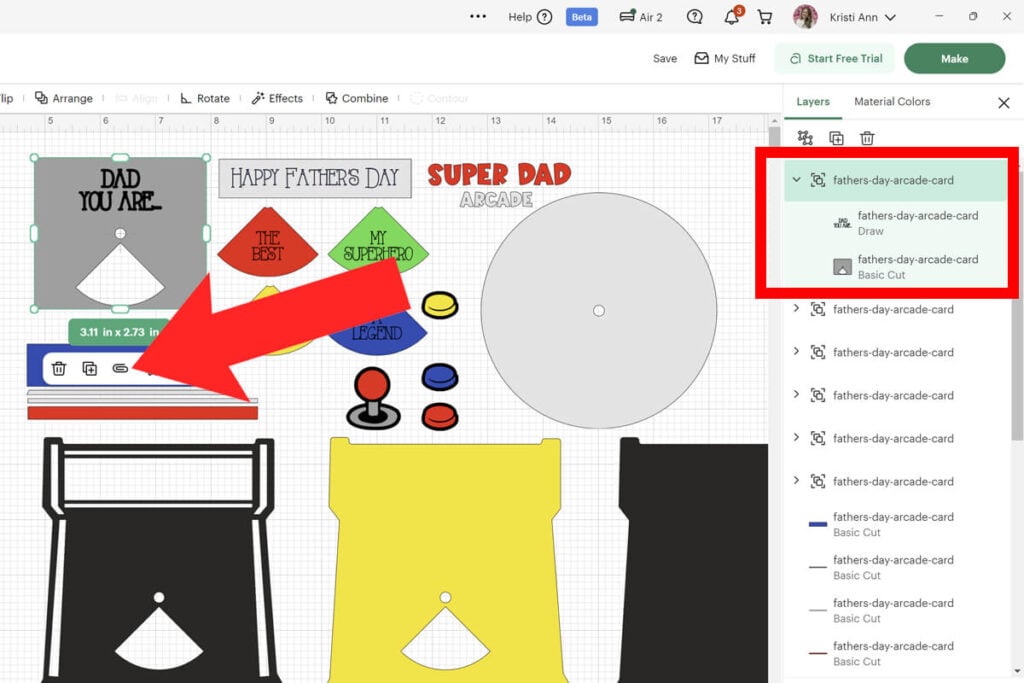
Repeat this for each of the text layers that will be using Cricut pens to write with. If you want to change any of the text, just delete the text layer and add your own using one of the Cricut writing fonts.
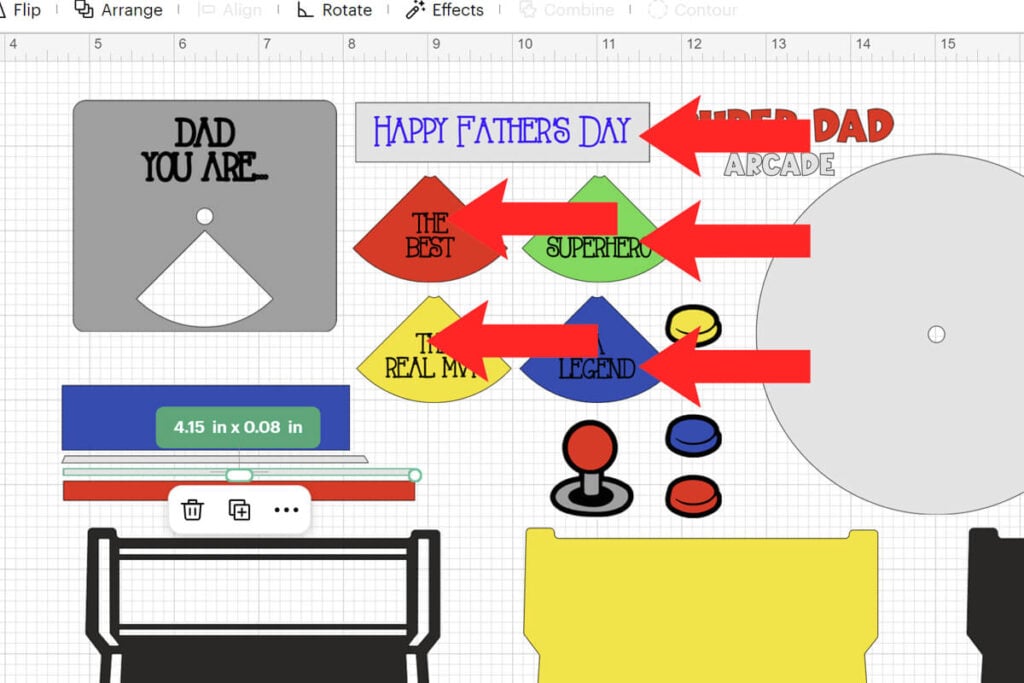
Step 3: Cut Everything Out
Select “Make” to cut everything out. Make sure to follow the prompts in Cricut Design Space so you know when to add each pen. If you have a heavier cardstock on hand (like 100lb weight), you may want to use this for the wheel.
Step 4: Assemble the Arcade Father’s Day Card
Start with gluing the black layer on top of the yellow layer. And then in each of the cut out spots glue down the blue rectangle, white rectangles, etc. Glue the gray screen to the front, lining this perfectly up with the cut outs.
Then assemble the joy stick and each of the buttons and attach them to the front of the card using foam dots.
Tip: Use a black sharpie to color around the sides of white foam to help these blend in better, or use black foam dots.
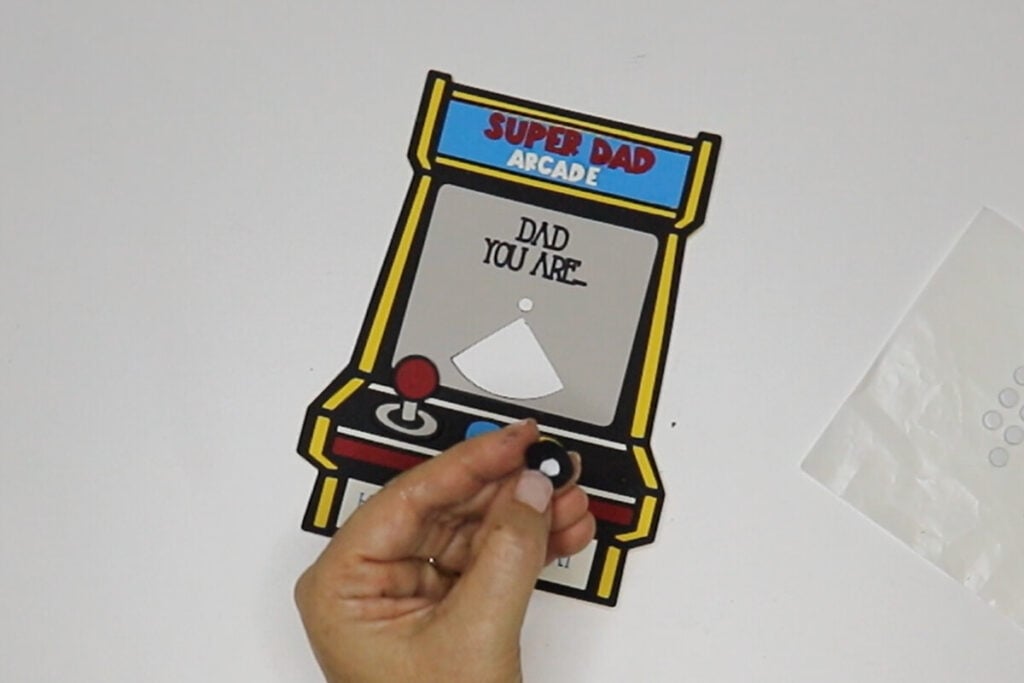
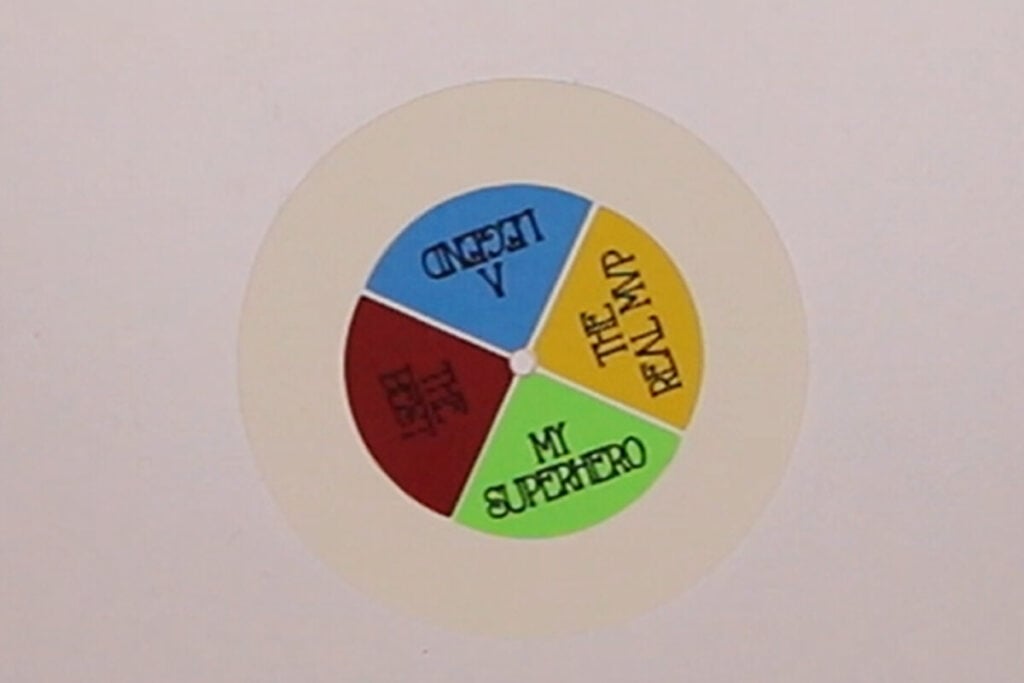
Next, assemble the wheel. Glue each of the sayings to the front of the wheel, lining them up with the cut out and leaving just a small gap between each one.
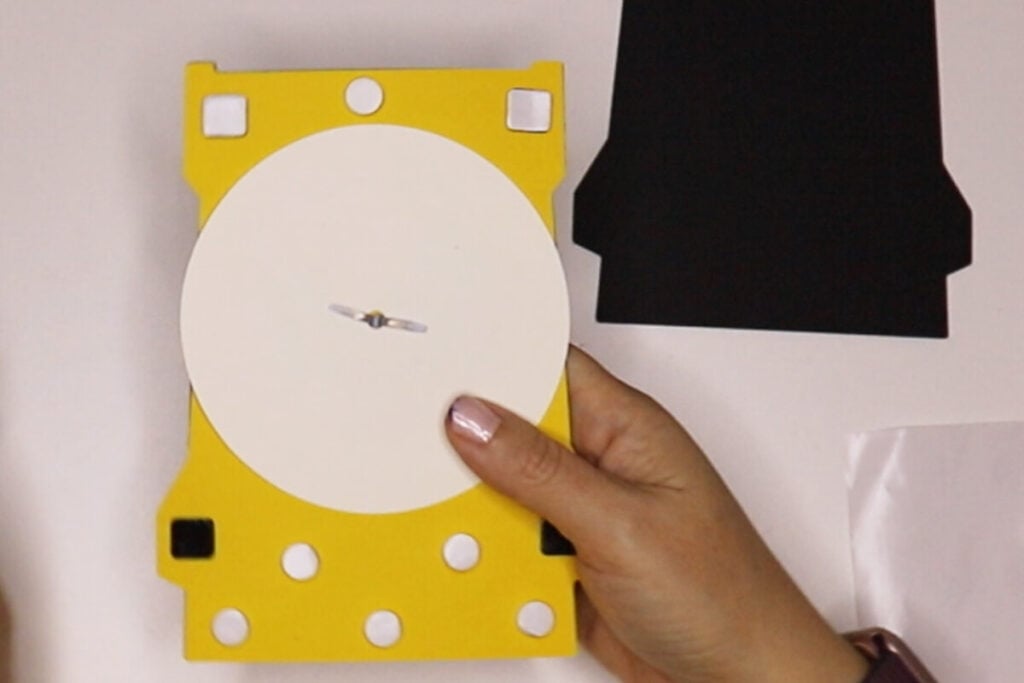
Line the wheel up with the back of the card, lining up the circle cut outs. Then add a small brad fastener to hold the wheel on. You can adjust how easy you want this to spin by how tight you tighten this.
Place foam dots or pieces of foam strip around the back of the card, making sure to not place these on top of the wheel. Then attach the back on to the card.
Tip: If you want to write on the back of the card, just cut out a lighter color for the back.
Step 5: Make the Envelope
If you want an envelope to go with your Father’s Day card, this arcade card will fit perfectly in a 5″x7″ envelope. If you don’t already have this on hand, you can easily make your own with my free envelope template.
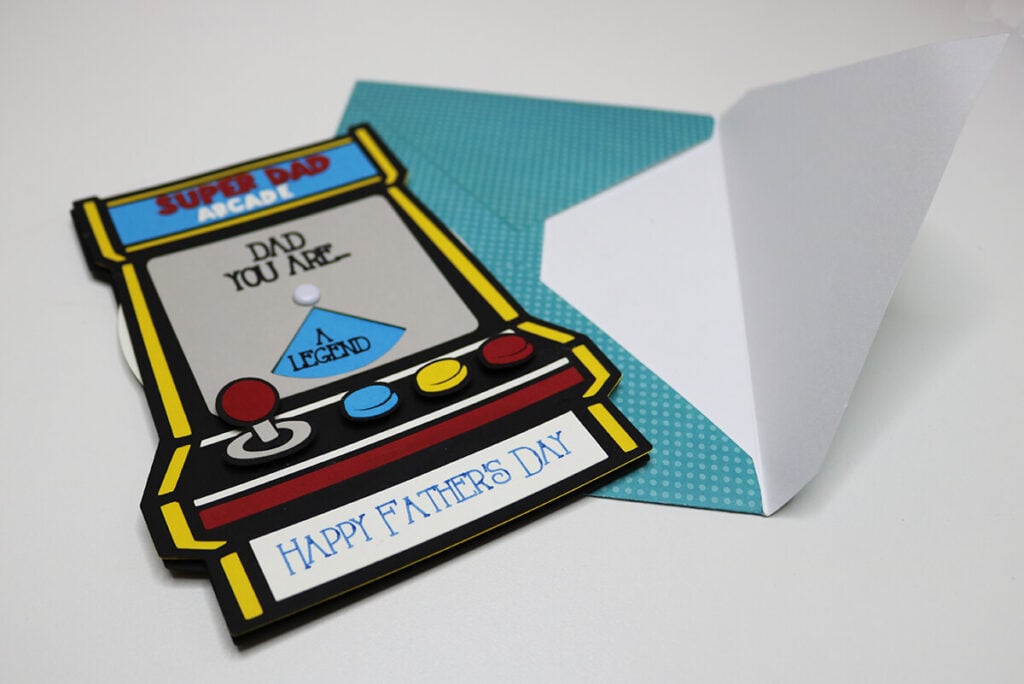
This Interactive Father’s Day Card SVG is the perfect blend of fun, heartfelt, and hands‑on. It’s easy enough for beginners but impressive enough to wow any dad. Whether you’re crafting one for your own family or adding it to your shop, this design is a guaranteed win.
