

21st Birthday Cricut Card Templates
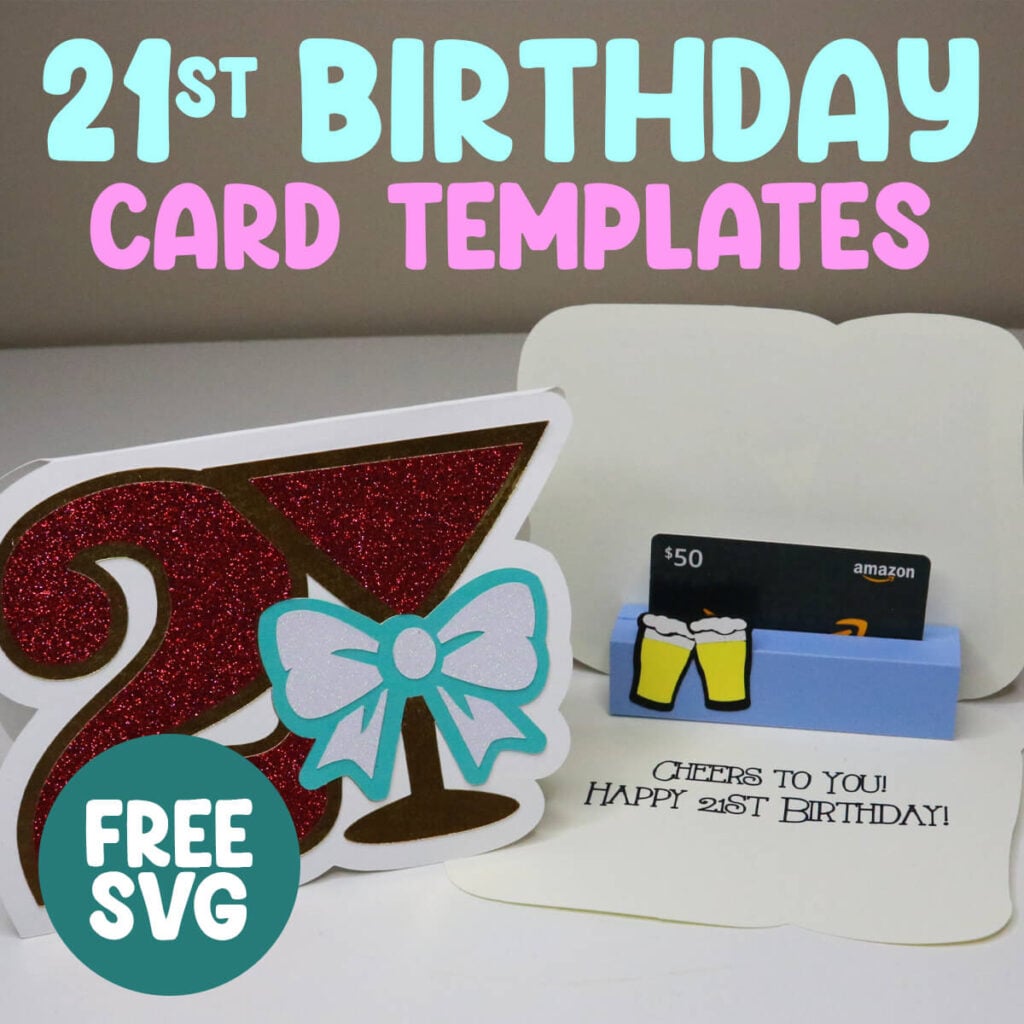
Turning 21 is a milestone worth celebrating. And these 21st Birthday Cricut Card Templates make it easy to create a handmade card that feels fun, personal, and totally unforgettable. These designs are beginner‑friendly, quick to cut, and perfect for adding your own creative flair.
This post contains some affiliate links for your convenience. (Which means if you make a purchase after clicking a link I will earn a small commission but it won’t cost you a penny more)! Read my full disclosure policy.
Love making handmade cards? Find more cricut birthday card templates to inspire you. Or search all of Or search all of my free card SVG templates to make cards for any holiday or occasion.
Learn how to make a 21st Birthday Cards with Your Cricut
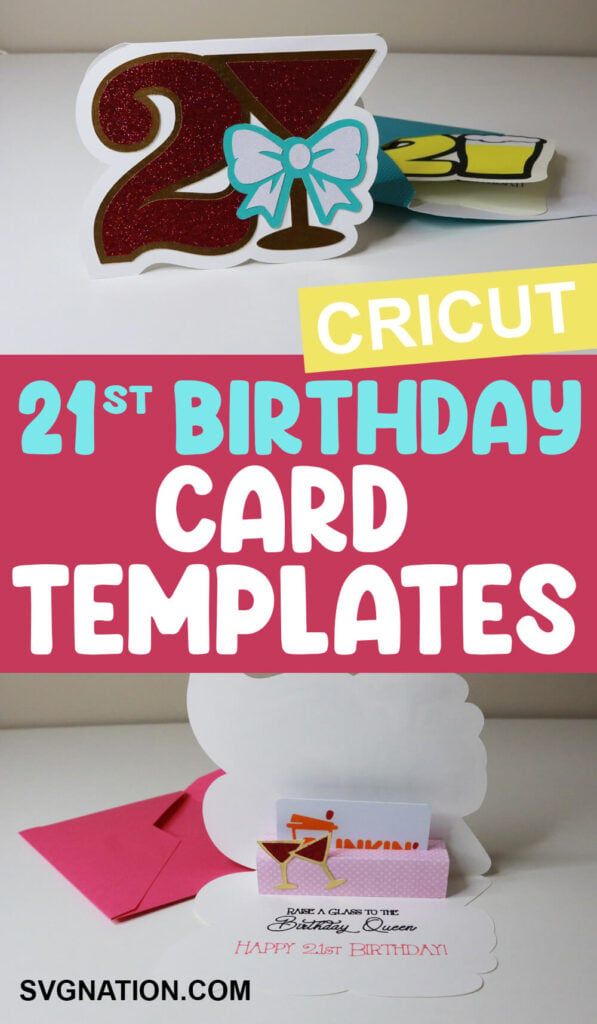
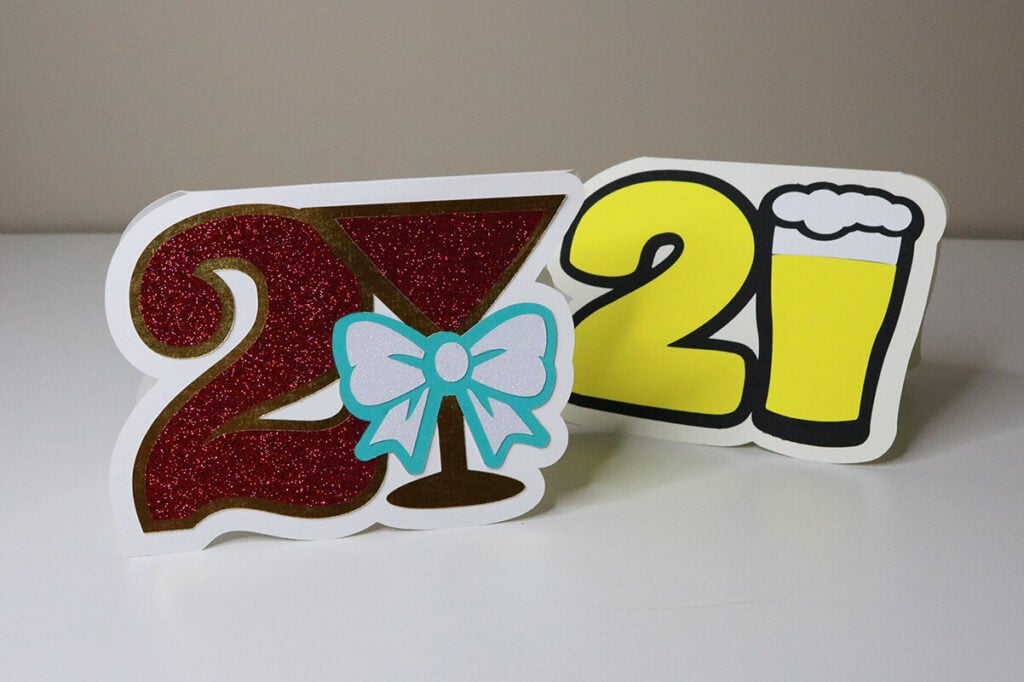
This 21st birthday card template has the option to add a pop-up gift card in the center if you want to add an extra surprise. And the download includes both a martini and beer 21st birthday card design so it’s perfect for anyone.
Watch the step-by-step tutorial to learn how to make these 21st birthday cards with your Cricut:

To Make these 21st Cricut Birthday Cards, You Will Need:
- Medium Weight Cardstock. You can find all the colors you need in this variety pack.
- Cricut Pens – I recommend this pack because you get so many colors and they are duel tip so you get the fine point pen tip and the marker.
- A good paper craft glue – this Bearly Art craft glue is what I usually use.
- Brayer Tool for smoothing out the glue
- 5×7 Envelope – I have a free free 5×7 Cricut envelope template if you need one
- Cricut cutting machine – Use this Cricut Comparison Guide to find the right model for you!
Download The 21st Birthday Cricut Card Templates Here
You can download these free 21st Birthday Cricut card templatesfrom my members only free library (design #41 under Card Templates or search “21st Birthday Card SVG”).
Don’t have a password? Unlock my free members library here.
Share the love and easily come back to this tutorial anytime just by saving this on Pinterest… Plus this helps to keep my SVG files and Cricut tutorials free!
Step 1: Upload the SVG File to Cricut Design Space
Upload the 21st Birthday card SVG to Cricut Design Space. If you need help with uploading SVG files, then check out my tutorial here. Then click on “ungroup” to ungroup your layers.
Both card designs are modified the same way, so I’ll only include one of the designs in this tutorial
Step 2: Modify the Card Layer
Click on the card layer and then open up the group in the layers panel so you can see each layer. Click on one of the text layers and change the operation from “Basic Cut” to “Pen”. You can then click on the color swatch to switch the color of the pen. Repeat this for each line of text. I put the text on different lines so that you can use different colors if you want.
Note: If you want your card to say something different, just delete all of the text and add your own.
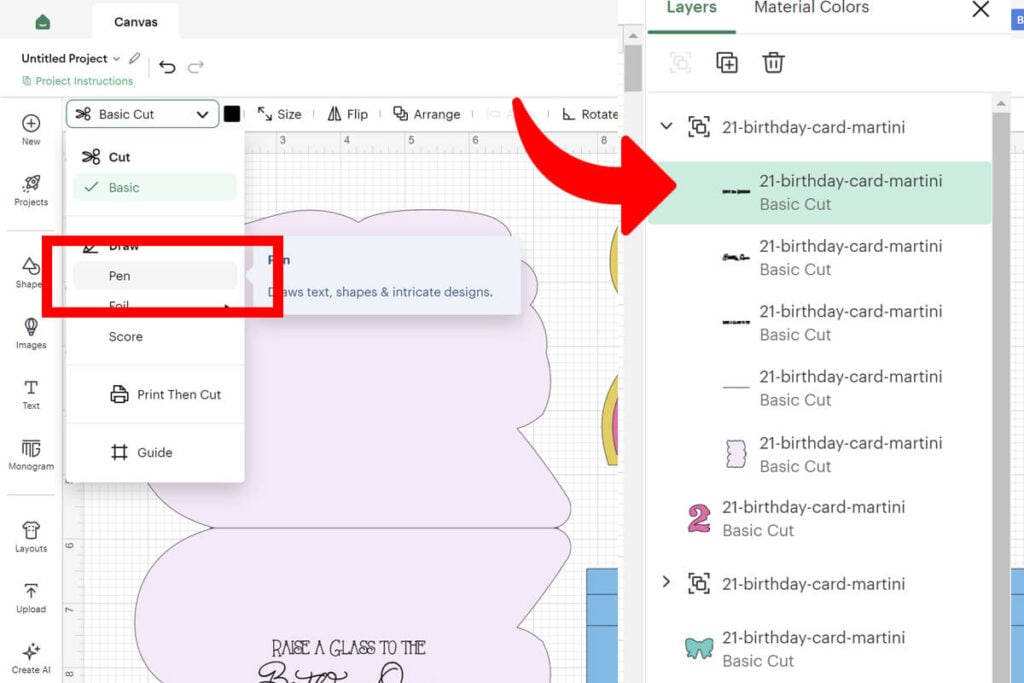
Then select the layer with the line and change the operation to “Score”.
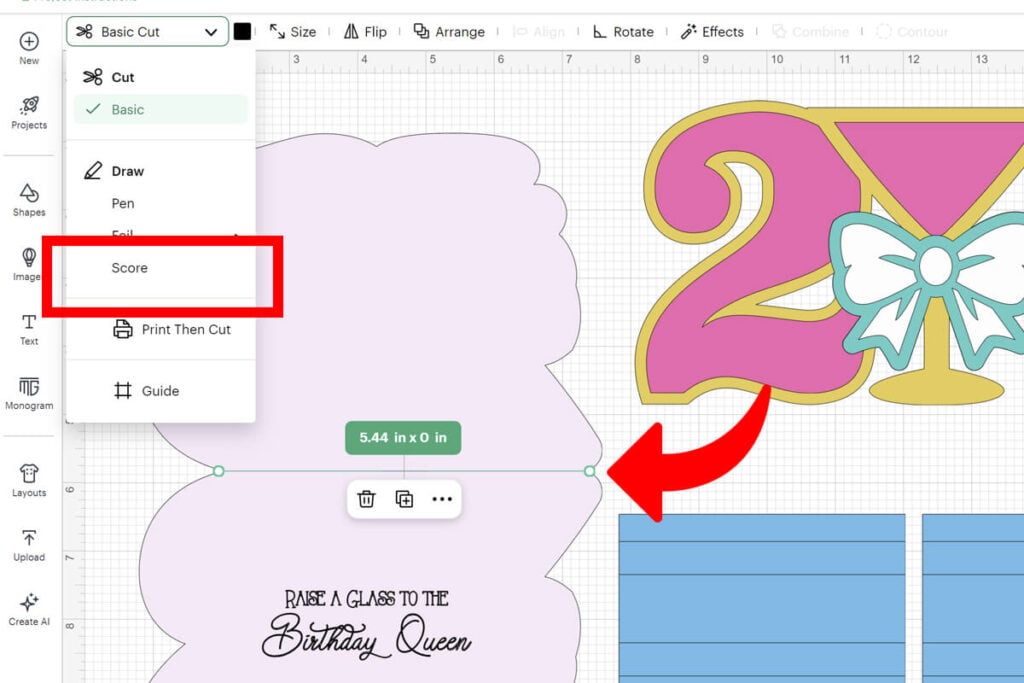
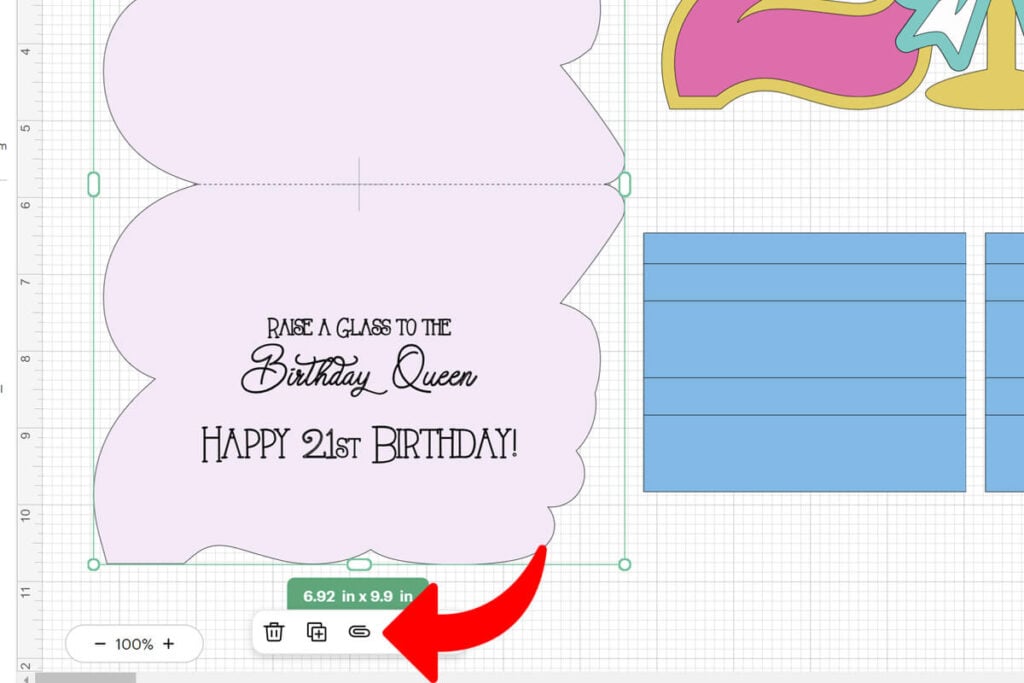
Once all the modifications are made, select all the layers together (this includes the card layer, all text layers and score line) and select “Attach”. This will attach everything in place to the card so that your Cricut knows where to write, score and cut properly.
Step 3: Adding the Gift Card Holder
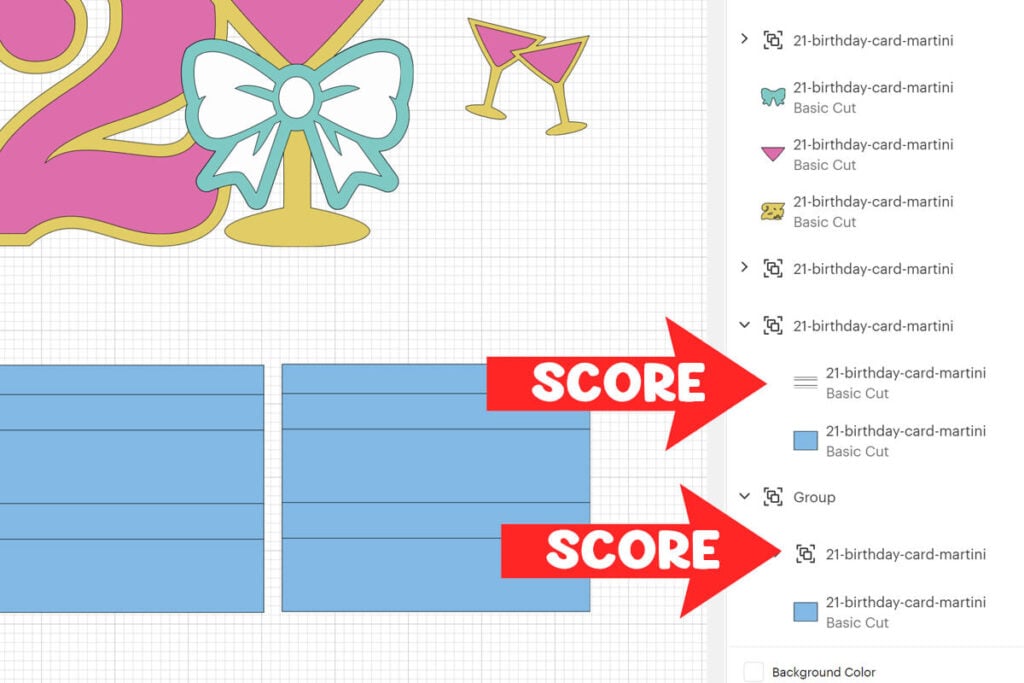
If you would like to include a gift card inside the card, there is a pop up gift card holder template included with this file. If you don’t want to add one, then just delete the 2 blue rectangle layers. But, to use this, you will need to change the lines on each of the rectangles to score and then attach those lines to the rectangle, just as we did in step 2.
Step 4: Cut Everything Out
Select “Make” to cut everything out. Make sure to follow the prompts in Cricut Design Space so you know when to add each pen and the scoring tool. If you have any issues with your Cricut not writing or scoring in the correct place, then go back and check that everything is attached properly.
Step 5: Assemble the 21st Birthday Card
The front of the card is super easy to assemble. Just glue the 21 details on top of the outline layer and then glue this on to the front of the card. If you aren’t adding the gift card holder, then you’re done! But, if you want to include it then continue to follow along.
To assemble the gift card holder, start by folding on all 4 of the score lines on the rectangle cut outs. Then attach this together by gluing the extra small side piece to the inside so that you form an open cube shape. Do this for both of the rectangle pieces.
Then attach the cubes together, by adding glue only to the outside of each side. It’s important that the middle stays open because this is where the gift card goes. You will glue them directly on top of each other facing the same direction.
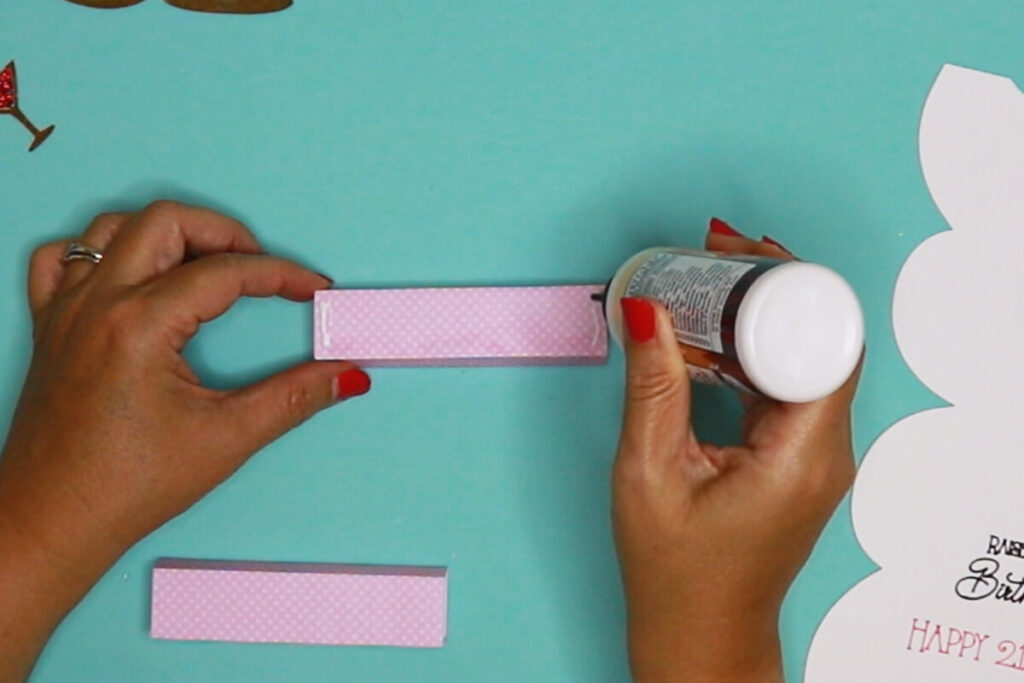
To attach the gift card holder to the inside of the card, glue one of the sides to the top side of the card. When you glue this down, line this up so it sits where the fold is. The 2 cubes that are glued together should both side on the base of the card. Glue those down as well.
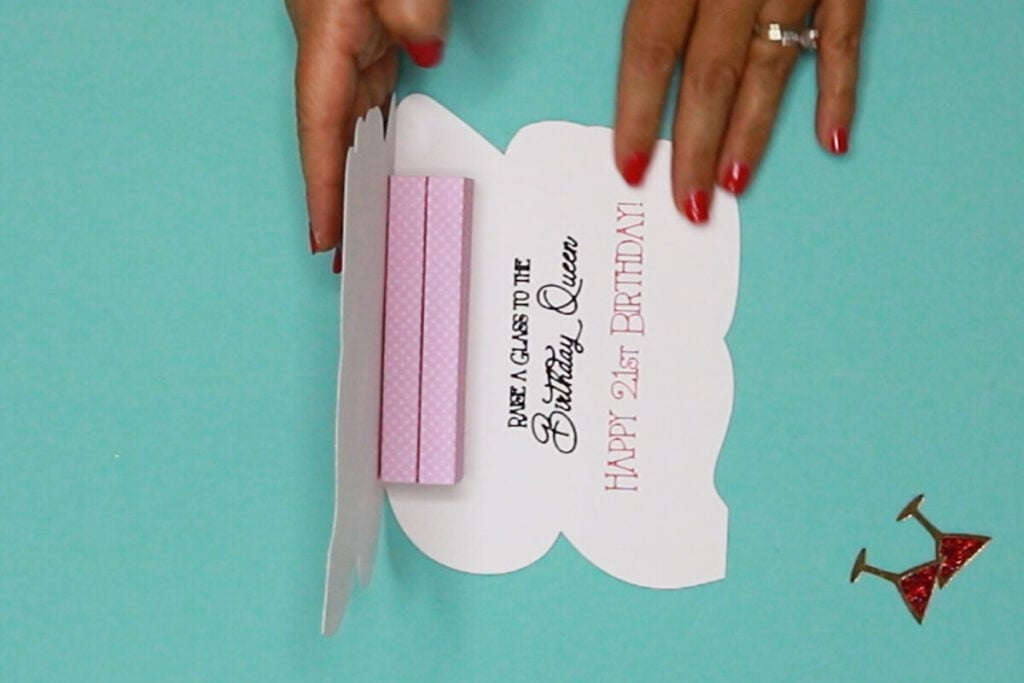
Last, glue on the mini martinis or beer onto the front of the gift card holder. Insert your gift card and your 21st birthday card is ready to go. This card will fit in a 5″x7″ envelope. If you don’t have one on hand, you can grab a free 5″x7″ envelope template here.
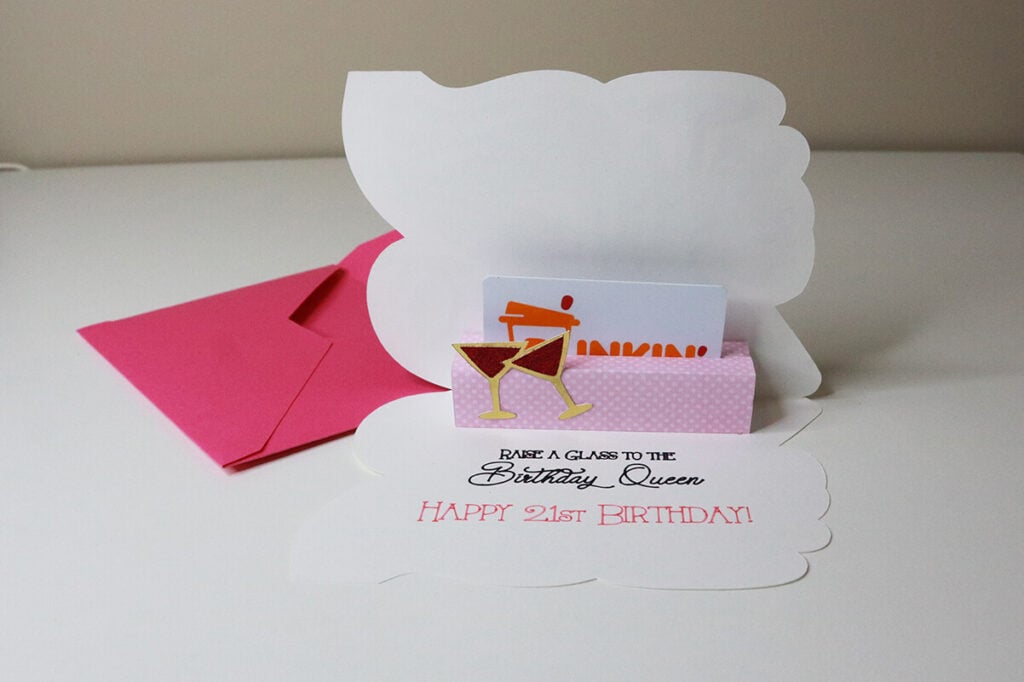
Creating a handmade 21st birthday card is one of the easiest ways to make this milestone feel extra special. And these 21st Birthday Cricut Card Templates give you everything you need to craft a card that stands out. With just a few pieces of cardstock and your Cricut machine, you can make a personalized card that feels thoughtful, unique, and totally unforgettable.
