

Halloween Shadow Box Card Templates
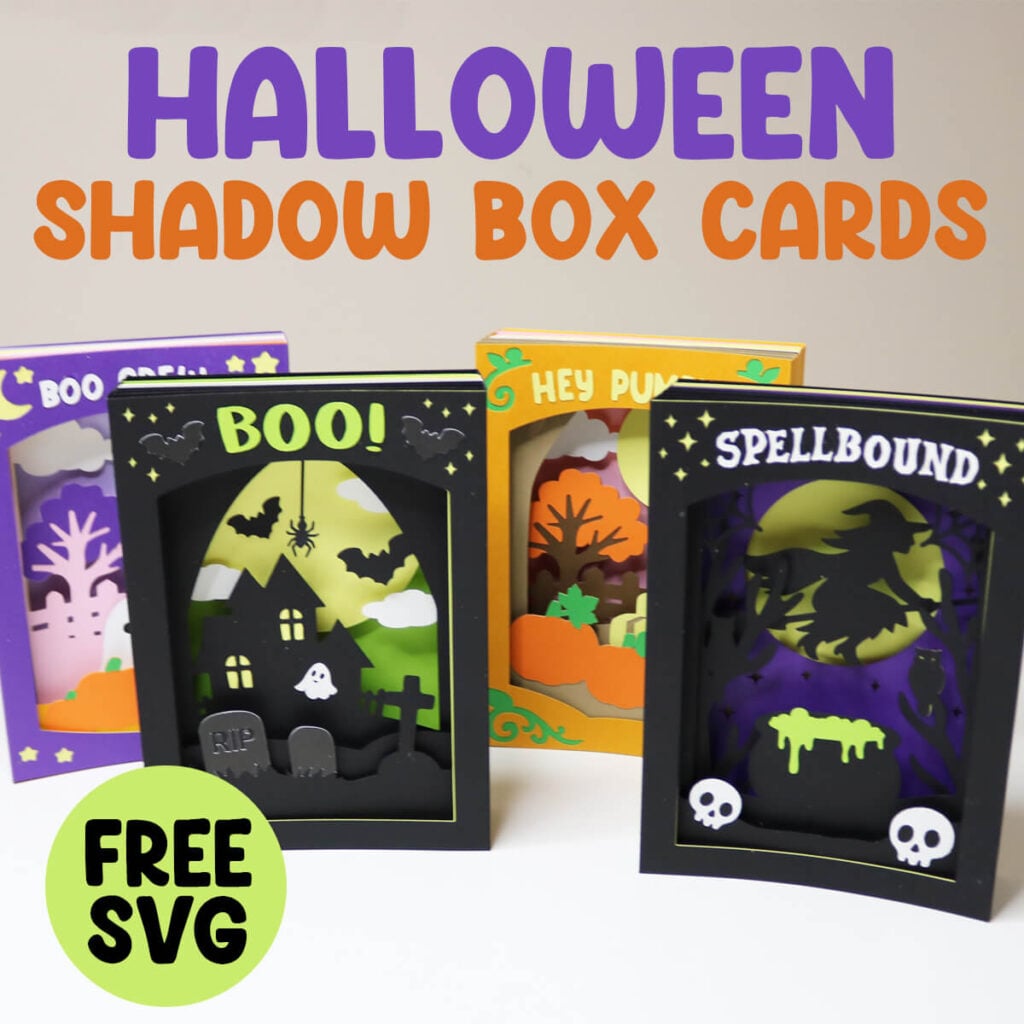
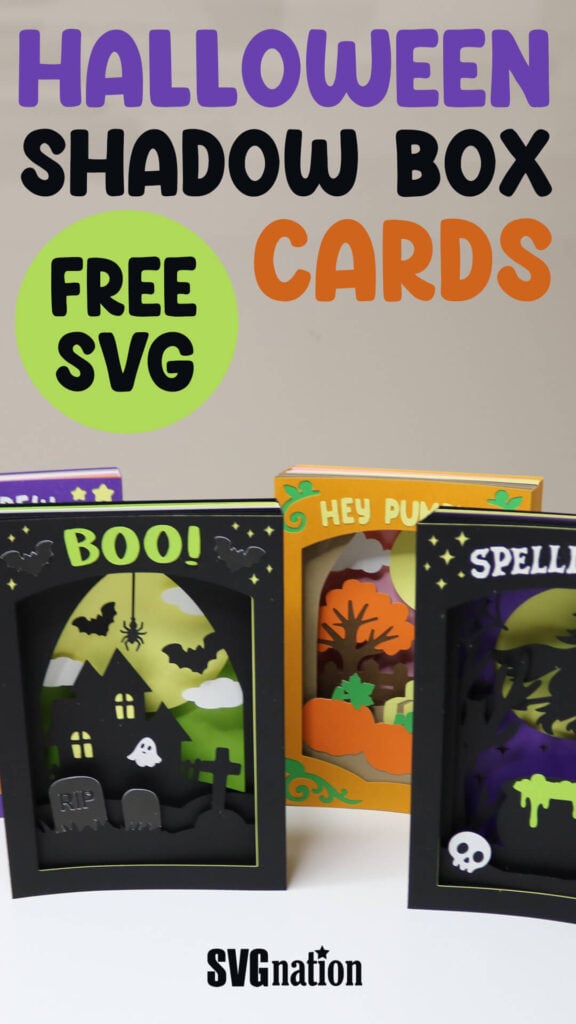
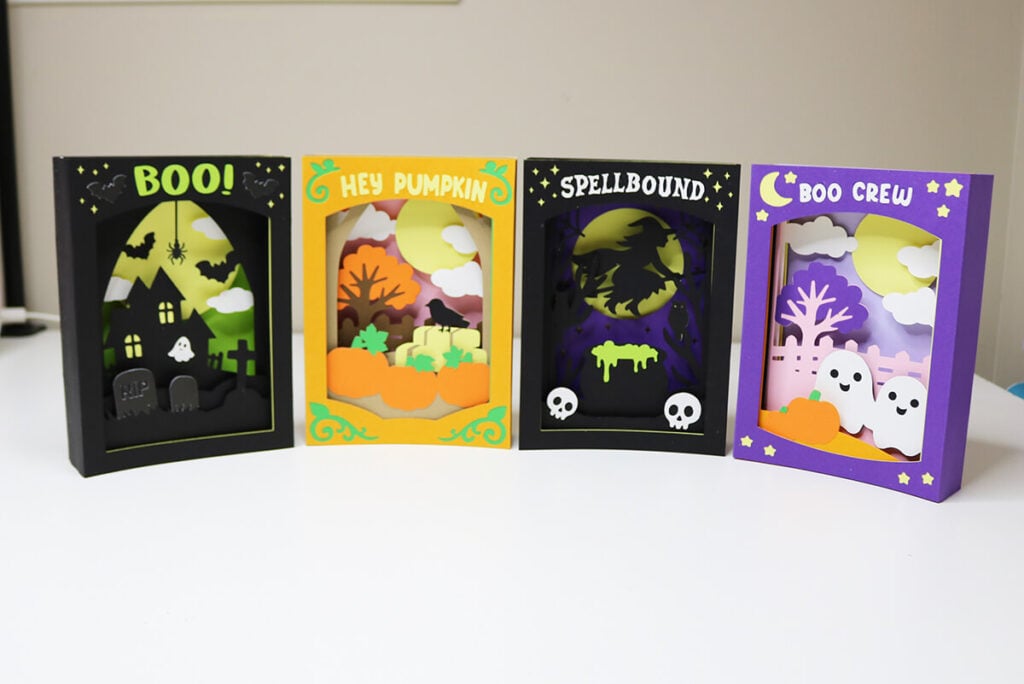
Halloween crafting just got a lot more fun! These Halloween shadow box card templates are the perfect mix of spooky and sweet. Each one folds flat to fit in an envelope and pops open for a dimensional display that doubles as a spooky decoration. All you need is cardstock, glue and these free templates and you’ll have handmade Halloween cards that wow.
This post contains some affiliate links for your convenience. (Which means if you make a purchase after clicking a link I will earn a small commission but it won’t cost you a penny more)! Read my full disclosure policy.
Love this Halloween craft? Then make sure to check out this 3D Haunted House Halloween Card for another card that doubles as a great decoration. Or, view all of my most popular Cricut Halloween projects for spooky gift ideas, DIY decorations and more.
Learn how to make Halloween Shadow Box Cards
The download for these templates will include an SVG file and DXF file of all 4 designs (and the envelope template), so they are compatible with many different types of cutting machines. But, for this tutorial, I’ll be using my Cricut and Cricut Design Space to walk you through the steps of modifying the templates.
Watch the step-by-step video tutorial to learn how to make these Halloween shadow box cards:

To Make these Halloween Cards, You Will Need:
- Medium Weight Cardstock in a Variety of Colors. This is a great variety pack that will give you all the colors you need for these cards. If you are making the haunted house and witch cards, you may want to grab a pack of just black cardstock too.
- A good paper craft glue. This Bearly Art craft glue is what I use and recommend.
- Brayer Tool for smoothing out the glue. Optional, but great tool to have for multiple uses.
- Cricut cutting machine – Use this Cricut Comparison Guide to find the right model for you!
Download these Halloween Shadow Box Card Templates
You can download these free Halloween shadow box card templates from my members only free library (design #43 under Card Templates or search “Halloween Shadow Box Card SVG”).
Don’t have a password? Unlock my free members library here.
Share the love and easily come back to this tutorial anytime just by saving this on Pinterest… Plus this helps to keep my SVG files and Cricut tutorials free!
Step 1: Upload the Halloween Card SVG File to Cricut Design Space
Upload the Halloween card SVG to Cricut Design Space. If you need help with uploading SVG files, then check out my tutorial here. Then click on “ungroup” to ungroup your layers.
Step 2: Modify Score Lines
All 4 of the card designs have score lines that you need to modify on the exact same layers. So, I’ll only show you one of the card designs for this step. On the layers that are black, you cannot see these lines, but they are still there and you still need to modify these.
To modify these, click on one of the layers and open the group in the layers panel. Click on the top layer in this group which contains the 2 score lines for that design already grouped together. Select this group and then change the operation from basic cut to score in the operations menu.
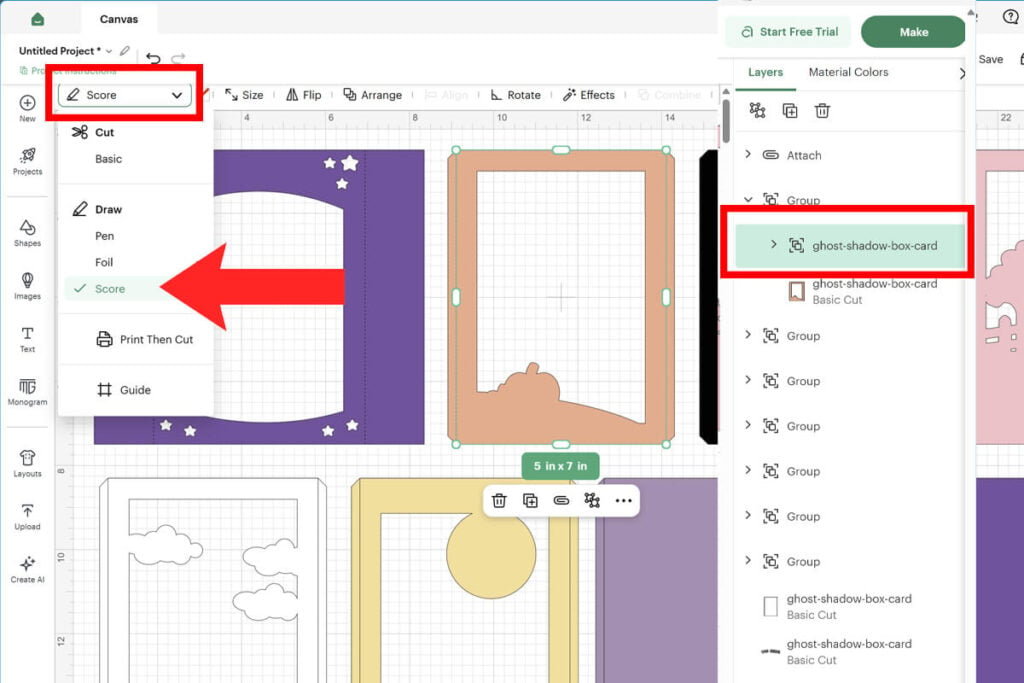
After changing the lines to score, select the full group which contains the group of lines that you just modified and the design layer together and click the paperclip to attach these together. This step is very important! If you do not attach these correctly, the Cricut will not score in the correct place.
Note: If your cutting machine does not have a scoring feature then delete these lines instead and you will have to fold this part by hand.
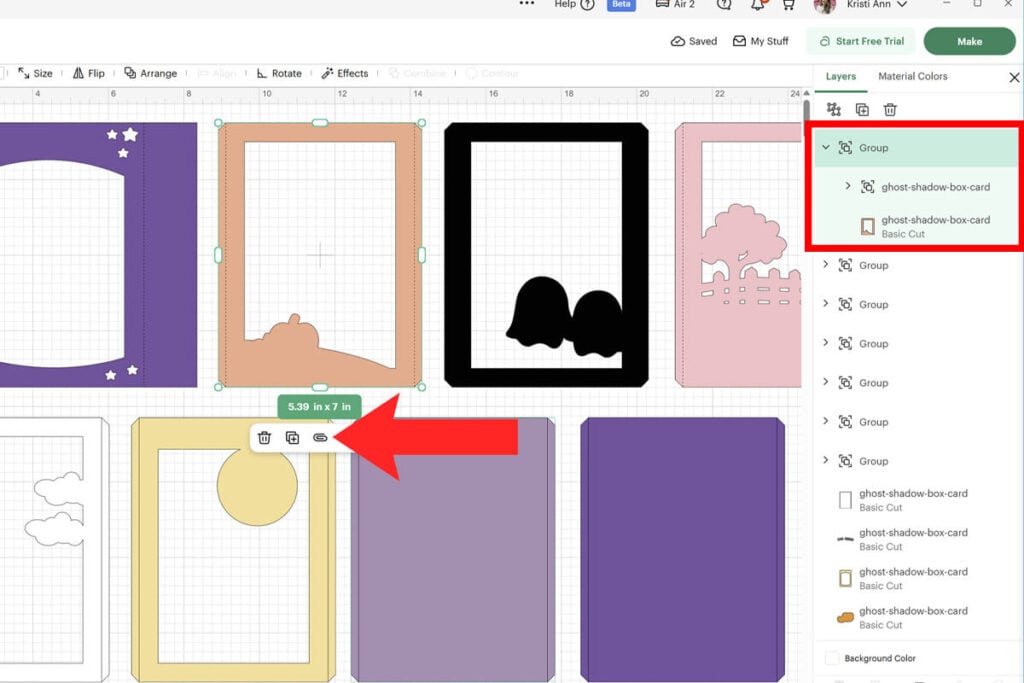
Repeat these steps until all the score lines have been changed from basic cut to score and attached to the layer they are on. There are 8 layers that will need these changes.
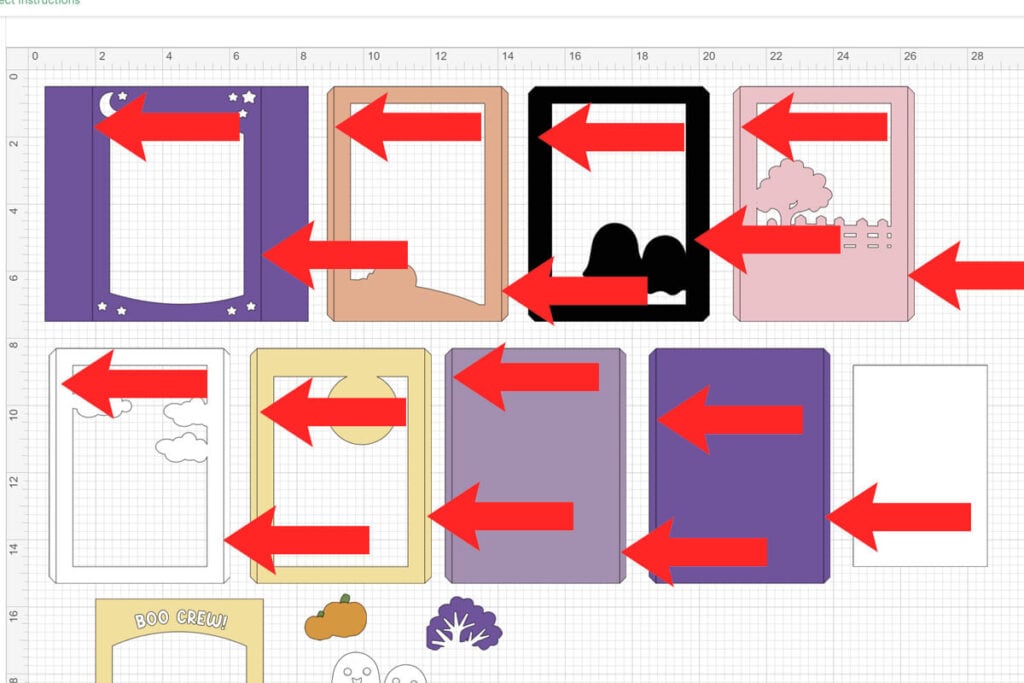
Step 3: Cut Everything Out
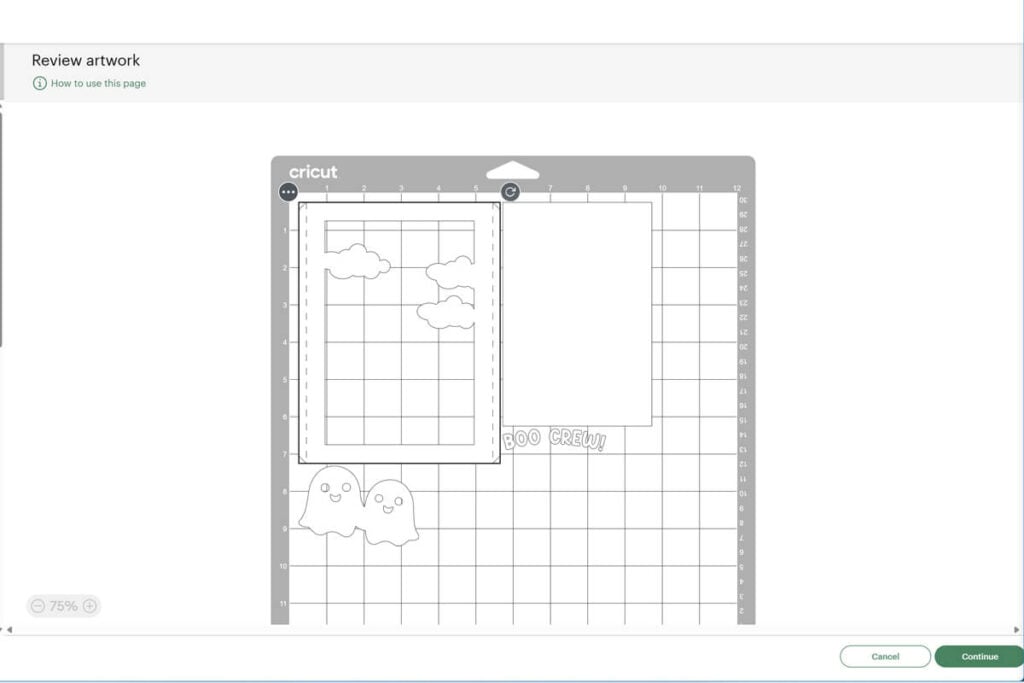
After all the score lines have been modified, you’re ready to cut everything out! Before cutting everything, make sure to check the mat preview and that you see the score lines in the correct spot. If they are not in the correct spot on the mat preview, you need to go back and make sure they are attached properly.
Step 4: How to Fold on the Score Lines
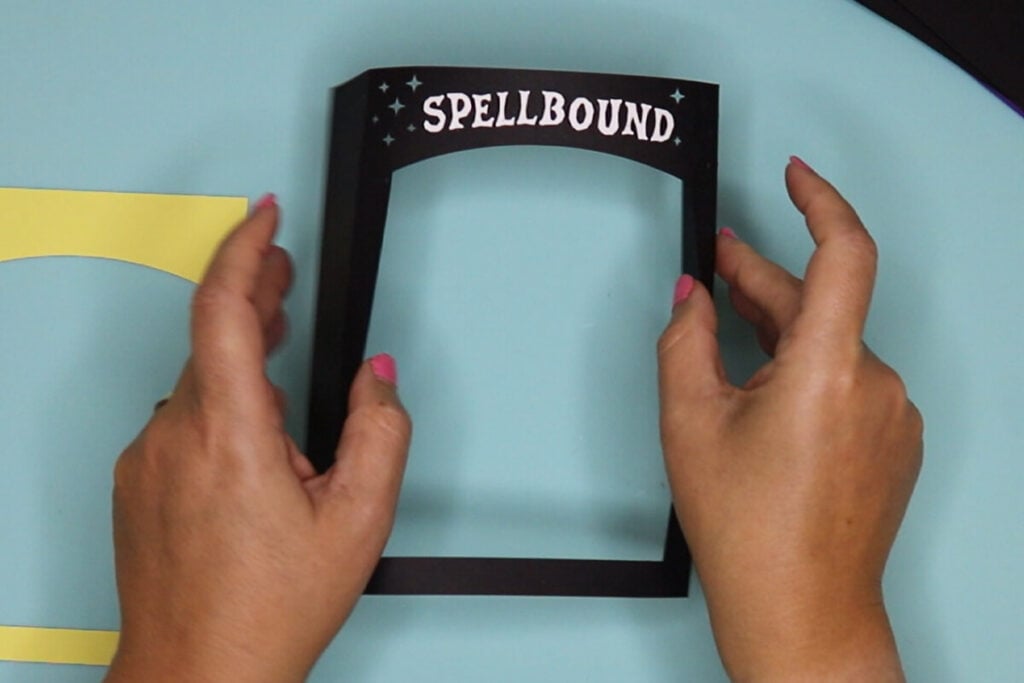
For all of the layers except the top layer (the top layer has the wider area with the score lines), you will fold on the score lines the same way. Lay this piece on your work surface with the front facing up and fold the score lines up so it folds over on top of the front. To know which side is facing up, it’s the side that your machine scored on so you will see the score lines deeper on this side. Or look at the way the design is in Cricut Design Space.
Note: It’s VERY important that you fold each design correctly. If you fold the wrong way, the design will face the wrong way when you assemble this.
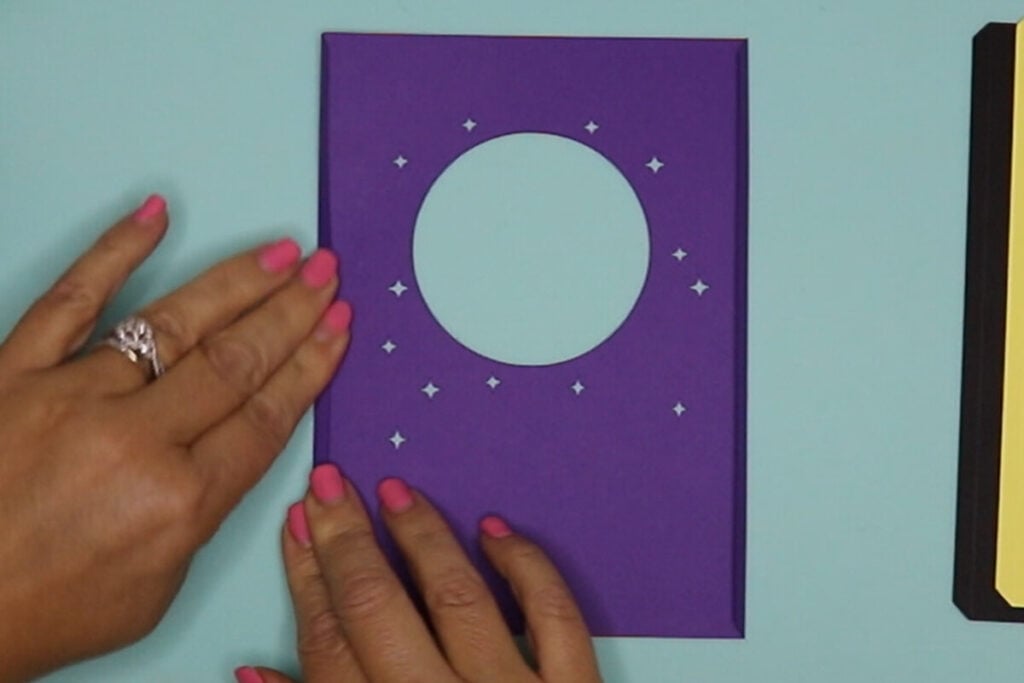
For the front piece, fold on the score lines in the opposite direction. So place the front of the card facing down and then fold towards you on the score lines.
Step 5: Glue the Card Accents into Place
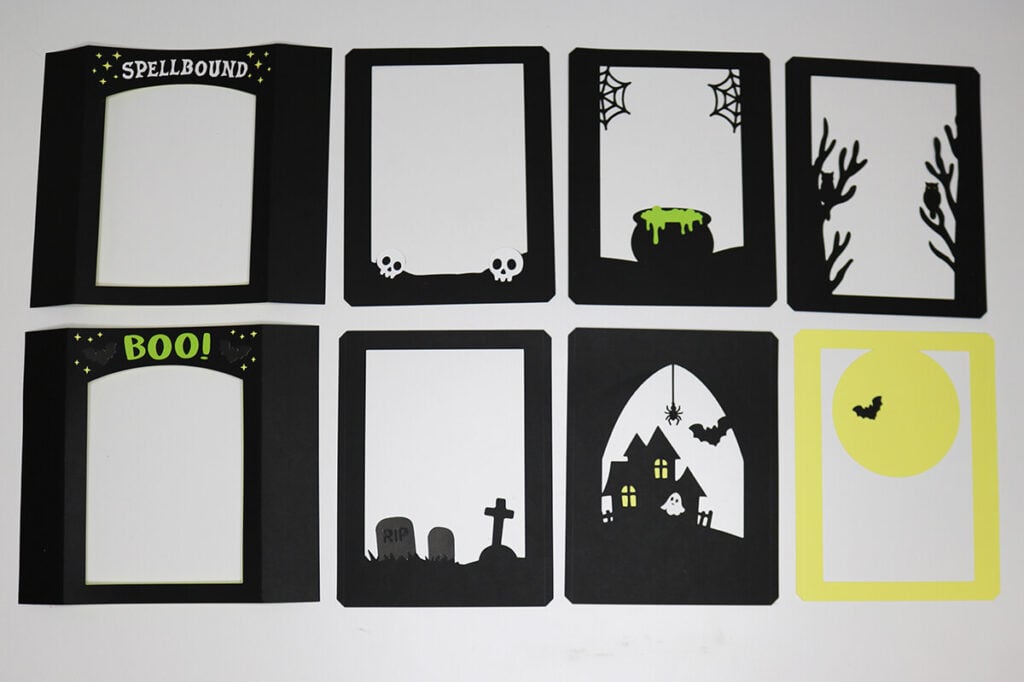
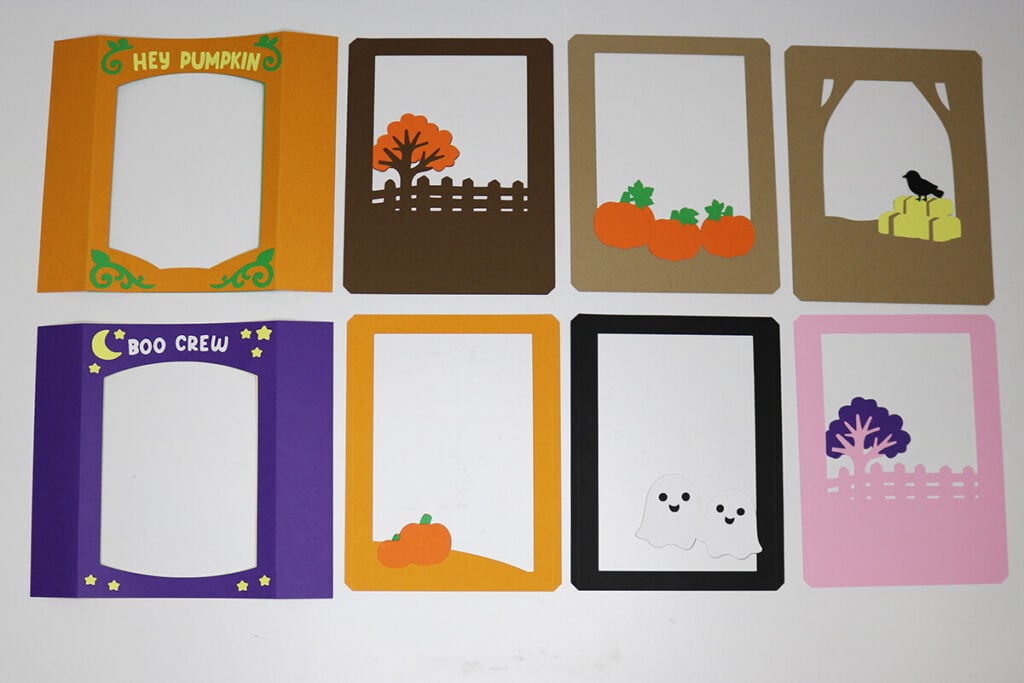
Each card design has different accents that you will need to glue in place. Most of the accents will glue to the front of the card layer. But, there are a couple designs that you will glue to the back. These designs are: the yellow windows on the haunted house and the yellow part of the owl on the witch design.
These card layers should look like the pictures below when you are done gluing them together.
Step 6: Assembling the Halloween Shadow Box Card
When assembling all the layers together, it’s important that you take your time and continue to fold the layers as you assemble them. If you do not, the card will not lay flat for you to put in an envelope. If you are just making this as a decoration and do not need it to lay flat, then it isn’t going to matter as much.
Note: The front layer is the first design (on the top left) that you see in Cricut Design Space. The designs continue to go from left to right as layer 1, layer 2, etc.
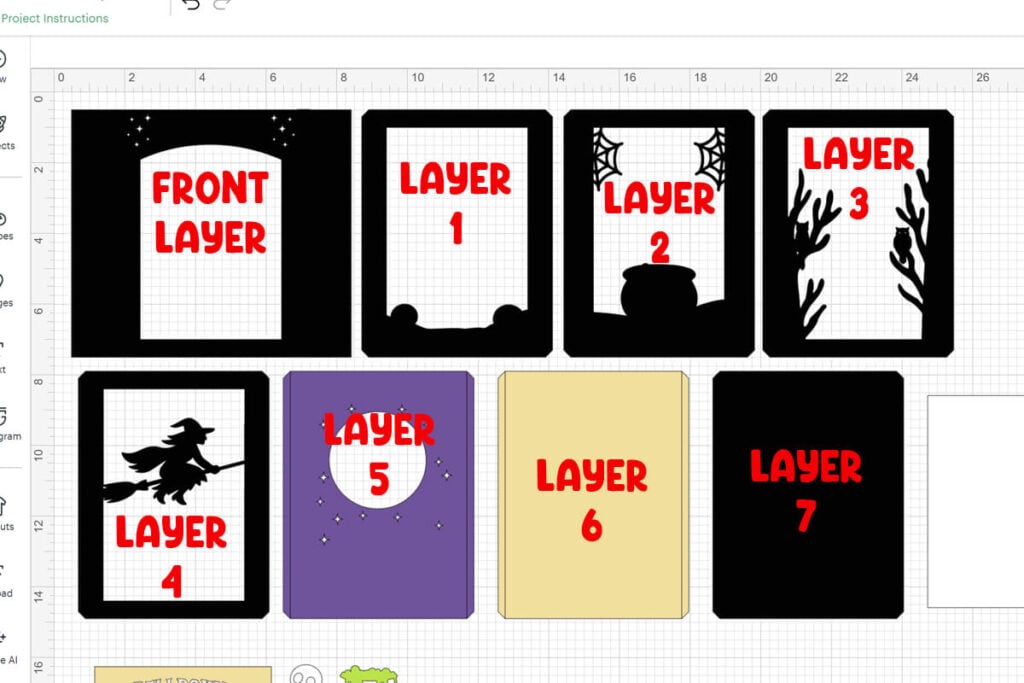
Start with the front layer wrong side up (front facing down on your work space). Then take layer 1 and face it face up. Glue the tab piece of this layer to the front layer, lining it up with the score line.
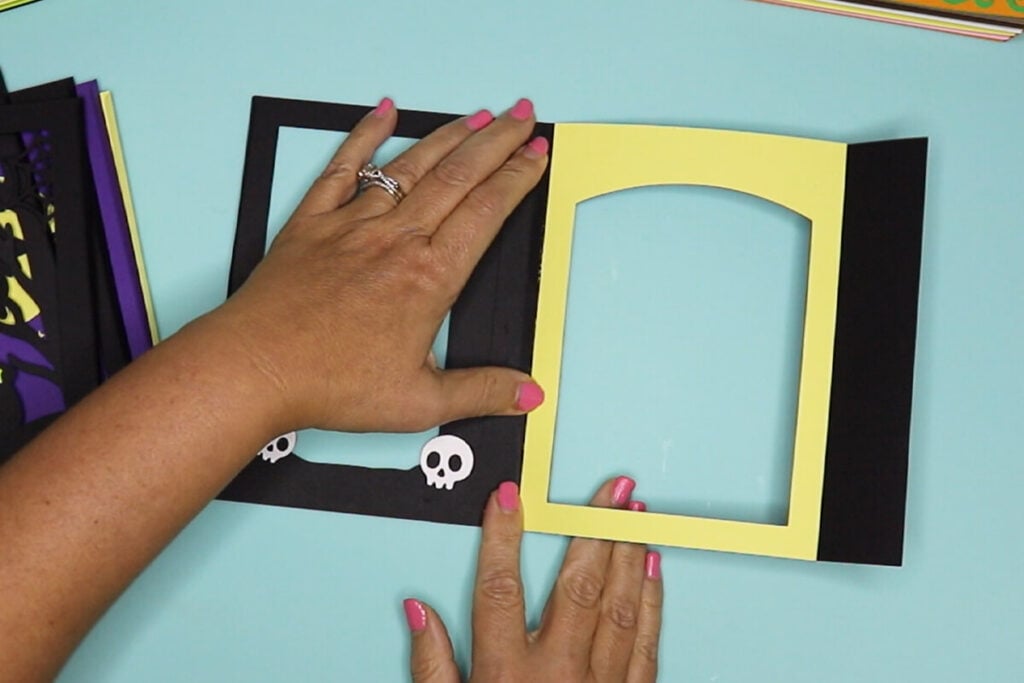
Give that a chance to set and then flip layer 1 over by folding on the score line.
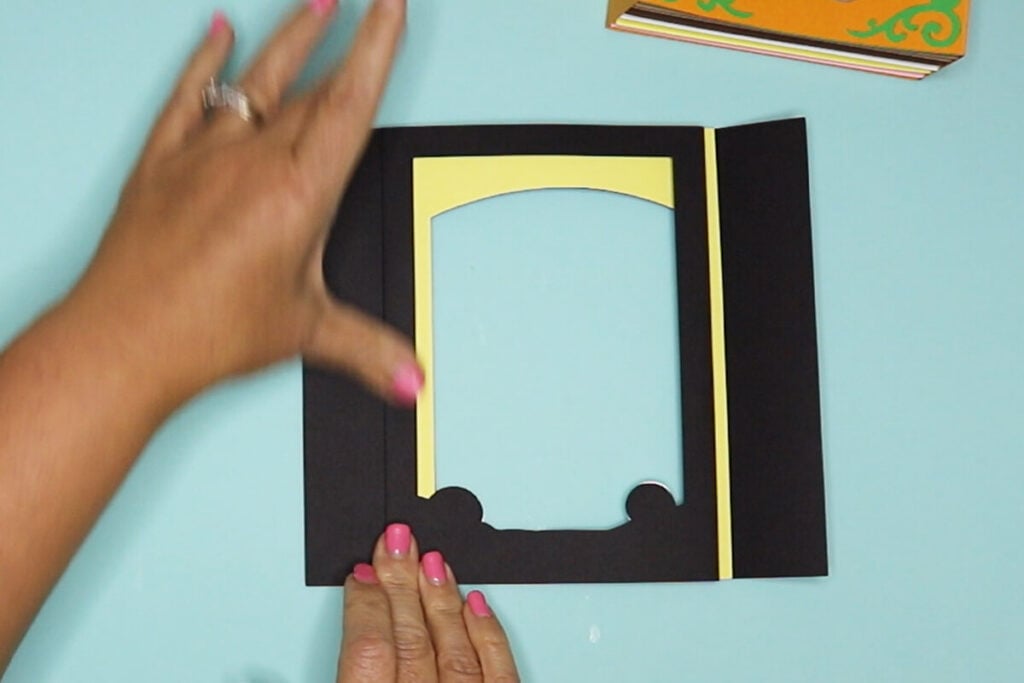
Push the left flap over and push this down flat. Then add glue to the tab piece on the other side.
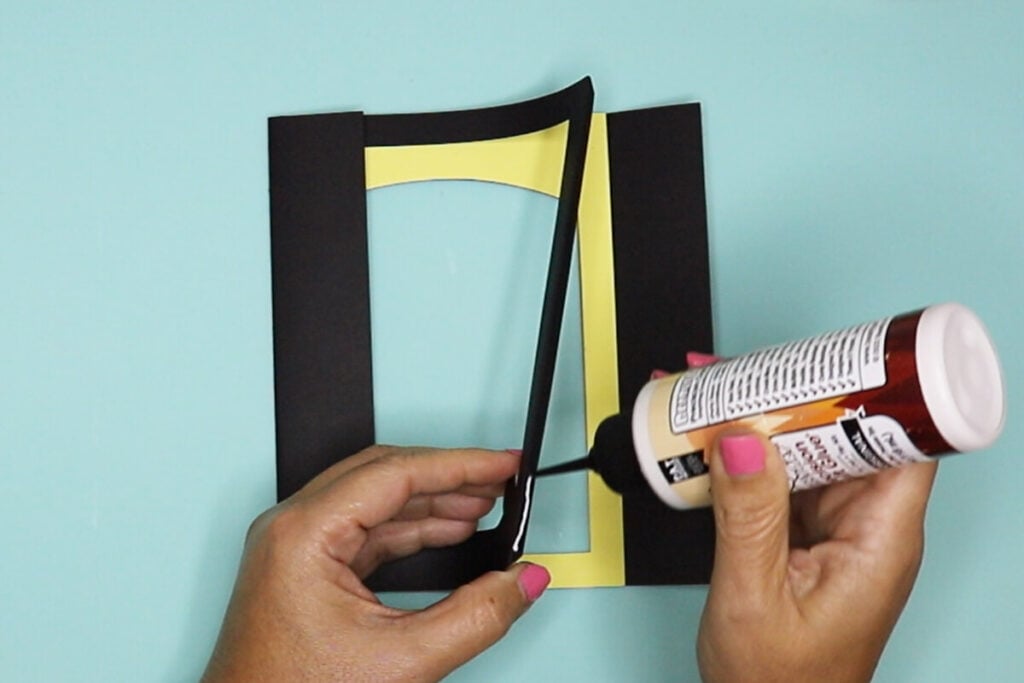
And then glue this down to the flap on the right side. Let this dry and then fold the card back the other way and start over with layer 2. Repeat these steps until all the layers are attached. While you add these layers, continue to fold the card back and forth in between each layer. This will help to make sure the card easily lays flat when it is finished.
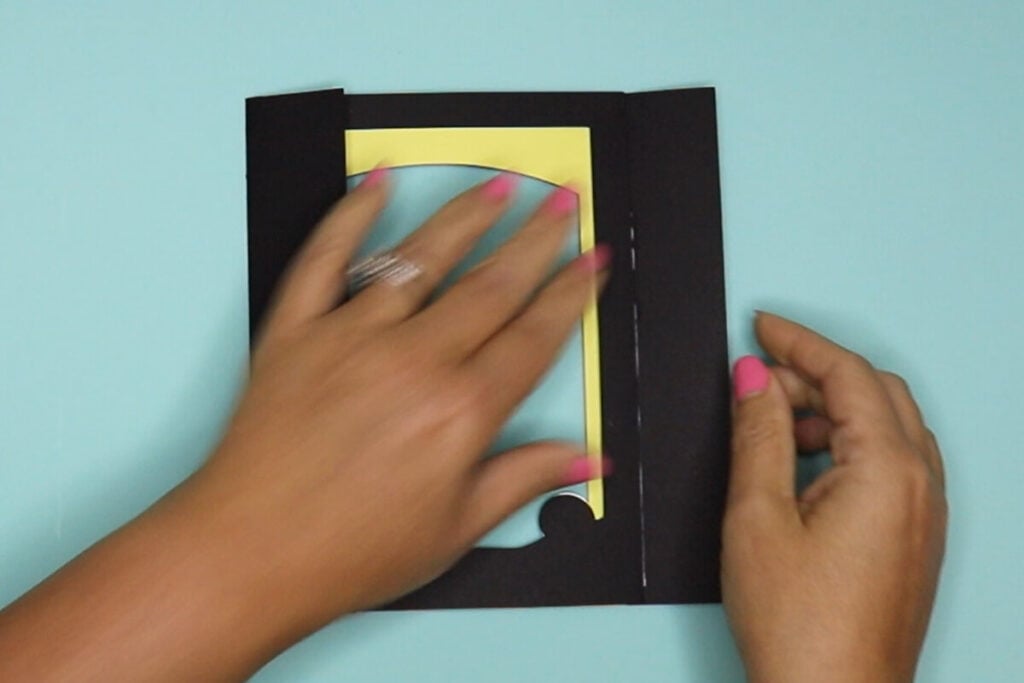
After all the layers are attached, you can glue the white rectangle to the back if you want to write a message on the card. I recommend writing on this before attaching it. This step is optional. You can delete this layer in Cricut Design Space if you don’t want to use it.
Step 7: How to Assemble the Envelope
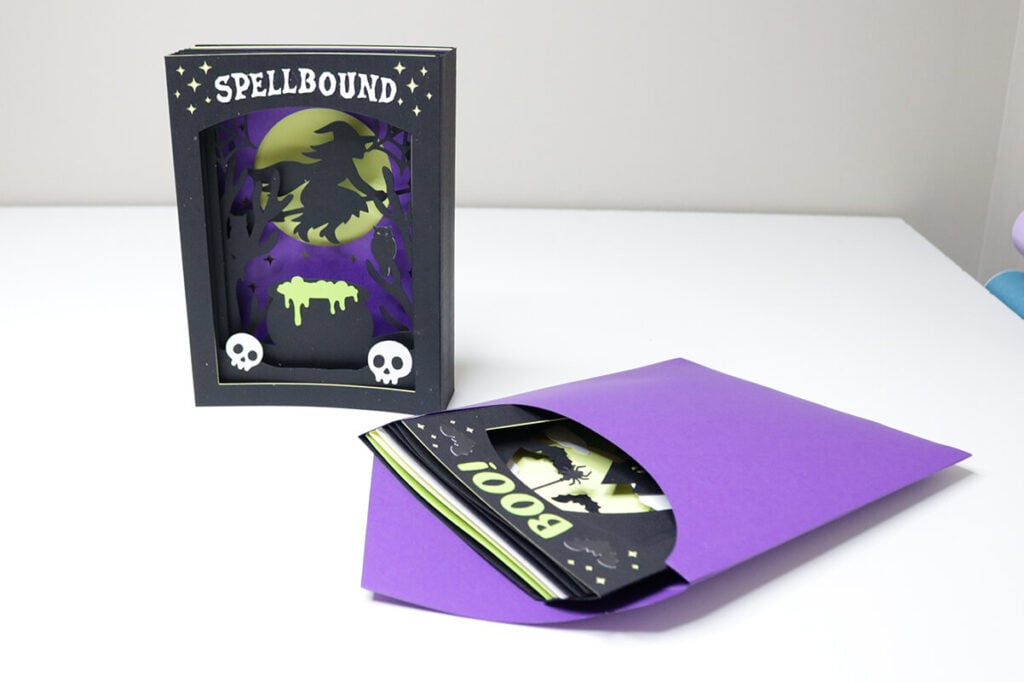
When these Halloween shadow box cards are assembled, they measure 5″x7″. But, when folded flat, they are larger than this so they won’t fit in a standard size envelope. You can use the envelope template included for these cards. Just change the lines to score lines in Cricut Design Space. Then attach them to the envelope just as we did in Step 2.
To assemble the envelope, fold in on the 2 sides and the bottom. Then add glue to these and attach the other envelope piece on top. Fold the top over and seal with tape or glue.
Halloween is the perfect excuse to get creative — and these Cricut Halloween shadow box card templates make it easy to craft something unforgettable. Whether you’re drawn to the witch’s magic, the haunted house’s mystery, the pumpkin’s cozy charm, or the ghost’s adorable grin, each design brings a touch of handmade joy to your spooky season.
