
Cricut Paper Easter Baskets
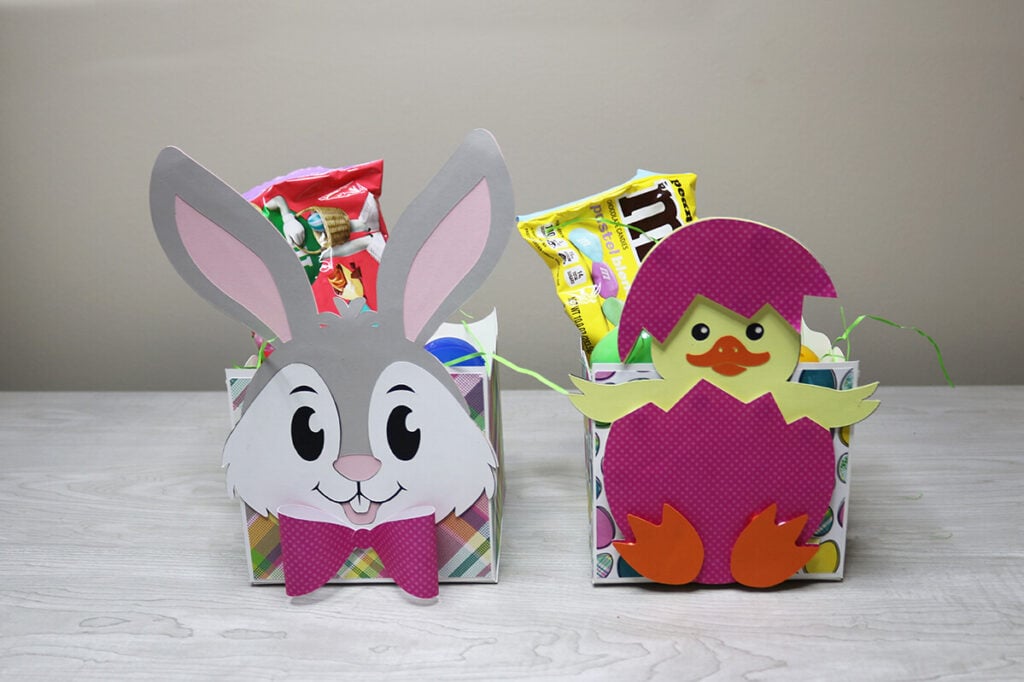
Spring is just around the corner, so today I’m sharing 2 adorable Easter basket SVG files that you can make out of paper. They’re the perfect size to fill with plastic Easter eggs, candy and other fun gifts. You’ll easily be able to make these Easter Baskets with cardstock and your Cricut.

Follow along with the tutorial below and make sure to post these in my crafting group here or tag me if you post them on social media. I absolutely love seeing your crafts and can’t wait to see how your Easter baskets turn out.
I also have a smaller Easter basket template if you are looking for something to make for large groups. Or you may want to try these popular Easter candy holders.
Download the Easter Basket SVG Files
You can download these free Easter basket SVG files from my members only free library (design #1 under Easter Files or search “Easter basket SVG”).
Don’t have a password? Unlock my free members library by entering your name and email in the form below or click here.
If you want more, find all of my Easter SVG files here.
Supplies Needed
- 12″x12″ Medium Weight Cardstock in multiple colors – this is a great variety pack if you don’t have cardstock on hand.
- Decorative paper – you can find adorable Easter paper here or by the sheet at Hobby Lobby and Michaels.
- A good craft glue – this Bearly Art craft glue is what I am using.
- Foam Dots (optional)
- Scoring Stylus (which is what I will be using in this tutorial with the Explore) or Scoring Wheel (Maker only). Or you can fold by hand.
- Cricut Maker or Explore Cutting Machine and a cutting mat.
- Easter Basket SVG Files (available in my free members library design #1 under Easter Files —get the password by filling out the form here.)
Share the love and easily come back to this DIY Paper Easter Basket tutorial anytime just by saving this on Pinterest!

Paper Easter Basket Instructions
Step 1: Upload Easter Basket SVG File to Cricut Design Space
Upload the Easter basket SVG file to Cricut Design Space. For help with uploading SVG files, check out my tutorial here.
Click on “Ungroup” to ungroup all of your layers. There are lines on top of the basket layers. These will be your score lines so change the operation of these lines to score.
Note: If you are not using a scoring tool then you will delete these lines instead.

Then select the score line and the layer underneath and select “Attach” to attach the score line where it will score.

Step 2: Glue Scrapbook Paper
Locate which side is the outside of your basket and glue the scrapbook paper to the outside.
Note: Make sure that both basket pieces can attach to form a box shape using the tab pieces before gluing the scrapbook paper down.

Step 3: Assemble the Basket
Assemble your basket by creating a box shape, but with an open top. Start by folding in on all the score lines. And then glue the side tab pieces to the inside to attach the sides together. Glue the bottom tab pieces to the bottom to attach the bottom together.
When the basket shape is assembled, glue the rectangle pieces to the bottom of the inside of your basket.

Step 4: Assemble the Bunny/Chick
To assemble the bunny, start by gluing the grey layer on top of the pink layer. Than glue the black layer on with the white layer on top. Don’t forget to add the tooth!
Note: Before gluing the bunny together, line it up with the Easter basket to make sure you are gluing everything on the correct side.

To assemble the bow, add glue to the middle circle and bring one of the circles and place it on top. Add glue to the top of that circle and bring the other circle in and place it on top. Hold it together for a few seconds to let it set.

To assemble the baby chick, start by gluing the black layer on top of the white layer. Then add the yellow layer on top and then the beak. Add your egg shell pieces and then the feet on top.
Note: You can use foam dots or foam tape to give the egg shell and feet a 3 dimension effect.

Step 5: Glue Bunny/Chick to the Basket Front
Next, glue the bunny or the chick to the front of the Easter basket. Fill with Easter grass and your favorite Easter treats for a super cute gift that everyone will love.
When you’re done, make sure to post these in my crafting group here or tag me if you post them on social media. I would love to see how yours come out!
Video Tutorial For Cricut Easter Basket
Watch the step-by-step video tutorial to learn how to make these adorable Easter Baskets here:
