Cricut Valentine Cards
Use your Cricut or Silhouette cutting machine to create your own Cricut Valentine Cards! Learn how to make all 5 of these cute Valentine’s Day cards (and download the free valentine card SVG) with the step-by-step tutorial below.

If you haven’t made cards with your Cricut, you are missing out! Creating your own cards is much more personal than store bought cards, plus it saves a lot of money over time! These Cricut Valentine cards easily come together in just minutes and all you need is cardstock to make these.

Supplies Needed:
- Cardstock in your color choices – This heavy weight cardstock is a great variety pack that I recommend keeping on hand if you like to do paper crafts. You may also like this heavy weight textured cardstock as well.
- Cricut Maker, Joy or Explore Cutting Machine and your standard or light grip cutting mat.
- Scoring Stylus (which is what I will be using in this tutorial) or Scoring Wheel (Maker only). If your cutting machine doesn’t have the scoring feature, this scoring board and stylus is great to use. You can also fold the cards by hand if you don’t have a scoring tool.
- Valentine Card SVG – Download at the bottom of the post
How to Make Cards with Your Cricut
These Cricut Valentine Cards are already the size perfect for cutting. They are sized 4.25″ x 5.5″ so they can be used with your Cricut Joy, Maker and Explore machines. Feel free to resize for your needs in Cricut Design Space.
If you would like to use your Cricut Explore or Maker to score the cards for you, follow the steps below.
If your cutting machine does not have the scoring option, you can fold the cards by hand or with your scoring board and stylus after you cut it. The scoring feature is really useful when making paper crafts like cards and boxes. So, if you don’t have a Scoring Stylus or Scoring Wheel (Maker only), I definitely recommend getting one.
How to Score with Your Cricut
Upload the Valentine Card SVG to Cricut Design Space. If needed, this tutorial will show you how to upload files to Cricut Design Space. Before adding your score line, you will need to Ungroup your Layers. With all your layers selected, click on “ungroup”.

Select the Shapes Icon and then select your line tool. Drag your line from the top of the card to the bottom. Don’t worry if the line is centered as we will fix this in the next step.

Select your line and your card layer together by holding down shift while selecting. Click on the Align tool and select “Center Horizontally.”

Next, make sure that your line is set to score. You can change this by clicking on the drop-down menu on the Operations tap and then select “Score”.

Before you can cut your card, you need to attach your score line with your card layer. If you do not do this, the score feature will not work correctly. To do this, select your score line and card layer together by holding down shift and select “Attach.”

Select “Make It’ and continue to follow the prompts on your Cricut to cut your card. If you have the scoring tool, remember to add that to your clamp before cutting your box pieces.

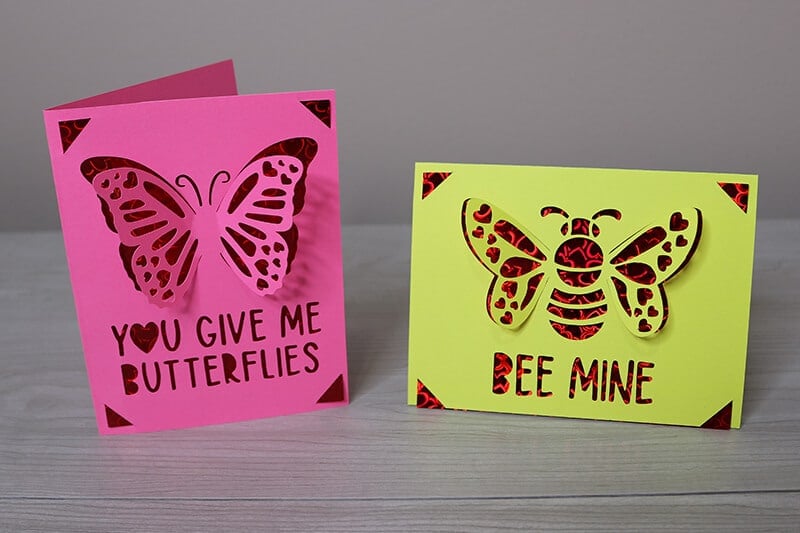
Once your card pieces are cut, assemble them by inserting the rectangle piece into the slots. Fold your card and it’s ready to go! For the butterfly and bee card, make sure to fold the wings outward for a 3-D effect.
Your cards are now ready to personalize with your own sweet message.
Looking for more designs? Then you will love these cricut Valentine ideas and these free paper craft ideas.
Before downloading this Valentine Card SVG, please share this design on Pinterest – it’s quick to do and makes a HUGE impact to keep SVG Nation’s designs free to you.

To get these Cricut Valentine Card Templates, enter your name and email into the form below and then click the “Get It Now!” button!
Please remember these are for personal use only. If you’re looking to sell products using these designs, please purchase a Commercial Use License here.
Want to make your Valentine’s Day celebration more festive? Download these Valentine’s Day Photo Booth Props SVGs! These are easy to put together and are a hit at any celebration!