
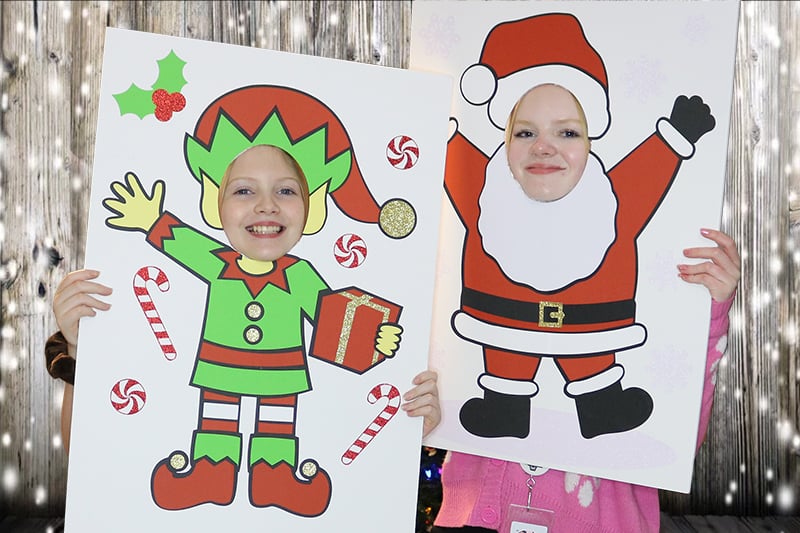
Larger than Mat Cricut Photo Booth Props
Photo booth props are fun for so many different holidays and occasions. And you can easily make them with your Cricut! So, in today’s tutorial, you’re going to learn how to make these larger than mat Cricut photo booth props.
Once you learn how to make these Christmas larger than mat photo booth cut outs, you’ll easily be able to use this same technique to make cut outs for any holiday or occasion. Or even your own larger than mat Cricut projects!
So, if you have ever wondered how to cut larger than a mat with your Cricut, then you’re about to learn! This is a great technique to learn because it creates so many different projects that you can make with your Cricut.
Find more fun Cricut Christmas crafts here!
How to Make Larger than Mat Cricut Photo Props
To make this Santa and Elf larger than mat photo prop cut outs, you will need:
- 20″x28″ piece of white foam board (you can find this at Target, Walmart, Michaels, etc.)
- Medium or Heavy Weight Cardstock in a variety of colors – you will need a lot of black for this project, so I recommend getting a pack of just black cardstock which you can grab here.
- Cricut Maker or Explore Cutting Machine and your standard cutting mat.
- Heavy Duty Exacto Knife
- Glue – I recommend this Bearly Art Precision Craft glue. You will need a glue with a fine point tip for gluing some of the smaller pieces.
- Christmas Photo Cut Out SVG Files (Download at the bottom of the post)
Step-by-Step Tutorial
To learn how to make these larger than mat Christmas photo booth props, watch the full step-by-step video tutorial here:

Since these are such large files, I recommend cutting the Elf and Santa separately. Start by uploading your file to Cricut Design Space. Then click “ungroup” to ungroup your layers.
As you scroll down your layers, you will notice the red explanation point next to your background layer. This layer is too large to cut on a Cricut mat.

Instead of cropping this for you guys in the SVG file, I left it this way so that you can learn how to crop it to create larger than mat Cricut projects. The steps that we will do in this tutorial is the same technique that you will use whenever you want to make projects that are larger than the Cricut mat.
Slice Larger Pieces so They Fit on the Cutting Mat
To get started, move the layer than you need to crop aside. It may help to zoom out so that you can see the full project on your screen. Using the shapes tool, add a square to your canvas.

Click “unlock proportions” and drag a rectangle over your Santa layer. Drag the rectangle so it goes down the center of your image and covers half it. Then select both your rectangle and the Santa layer and select “slice”.

Remove the extra pieces that you don’t need. You can now see that your single image has now been cut into 2 images.

Repeat these steps to slice each of these pieces in half so that each of your layers is small enough to cut out on a Cricut mat.

When you are finished slicing each of your pieces, click on all 4 of your pieces to make sure the size is correct. Each piece should be smaller than 11.5″x11.5″.
Note – If you are using a 12″x24″ mat and have cardstock or vinyl that is longer than 12″, then you can just slice Santa down the middle. There is no need to slice him again. But, if you are using 12″x12″ cardstock, then you need to slice until each piece is small enough to cut on this size paper.

Scroll down in your layers again, until you see the bottom snow piece. If you are using 12×12 cardstock, you will need to slice this piece as well. You can slice it in the middle to create 2 pieces.

If an image can fit on a 12″x24″ cutting mat, Cricut will not show the warning in your layers. If you are using 12×12 cardstock, then you will need to click on your larger pieces to see which pieces need sliced.
For this project, you will see that Santa’s white fur is larger than 11.5″, so this will need sliced as well. As well as Santa’s red jacket.

Note – You will follow these same steps to modify the Elf photo booth prop. To see how I crop each piece, watch the full step-by-step video tutorial here.
Cut & Assemble Your Larger than Mat Cricut Project
Once all of your pieces are sliced to fit on your cutting mat, you can cut your project! When you look at the mat preview, make sure that all your pieces are showing on a 12″x12″ mat. If any of them are showing on the larger mat, you will need to go back and slice them to fit on a 12″x12″ mat.
Note – If you are using longer vinyl or cardstock then 12″x12″, then your pieces can be on the 12″x24″ mat.
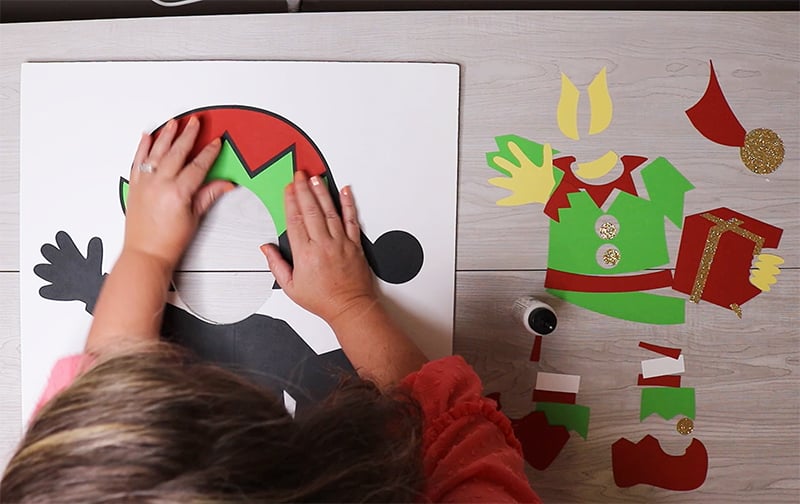
To assemble your larger than mat Cricut project, start by laying your black outline over your foam board. Line it up where it needs to be. Then, using just a little glue, glue down the face shape. You just need enough glue to keep it in place.
Remove the rest of the pieces from your board. Using an exacto knife, cut around the face stencil until your face is cut out.

Next, glue your black outline layer in place. Make sure to leave the feet unattached so you can then slide the snow piece underneath. Then, glue the feet down.
Continue to glue each piece to your foam board. Make sure to line each piece up before you add glue so that you glue the correct side.
Once everything is glued down, your photo booth props are ready to go!

These Christmas photo props are a big hit at Christmas parties and celebrations! And they pair great with these Christmas photo booth props. You can grab these Christmas photo booth prop SVG files here to make these as well.

Before downloading, please share this design on Pinterest – it’s quick to do and makes a HUGE impact to keep SVG Nation’s designs free to you.

To get these Christmas Photo Prop SVG Files, enter your name and email into the form below and then click the “Get It Now!” button!
Please remember these are for personal use only. If you’re looking to sell products using these designs, please purchase a Commercial Use License here.