
How to Make Graduation Fans with Cricut
It’s graduation time which means it’s time to learn how to make Graduation fans with your Cricut! Graduation fans are going to keep you cool for those outdoor graduations. But they’re also a great way to cheer on your Graduate for indoor graduations.
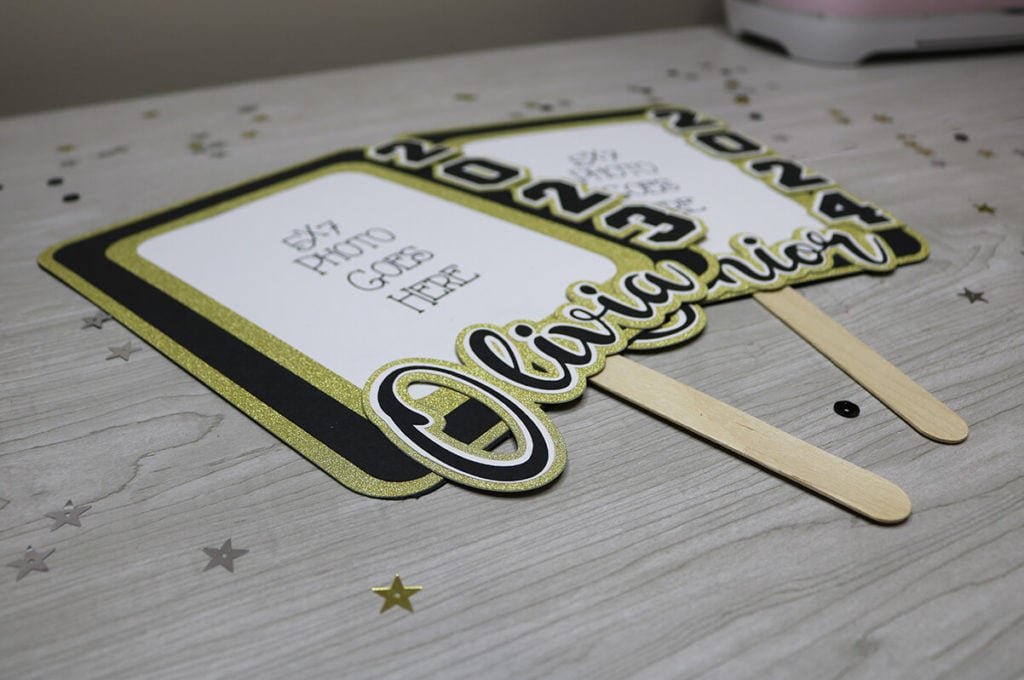
These graduation fans can easily be personalized for any year and any name, and I’ll be showing you just how to do that in this step-by-step tutorial.

DIY Cricut Graduation Fans
When you download the graduation fan templates, you’ll see there are 2 different sizes. I’ll be making the 5×7 photo size in this tutorial, but if you prefer a smaller size then you’ll want to go for the 4×6 version.
For the photo, you’re just going to need either your favorite 5×7 graduation photo or 4×6 graduation photo depending on the size that you go with. You’ll be adding the photo into the graduation fan for a personalized fan for your graduate.
Supplies Needed:
This post contains some affiliate links for your convenience (which means if you make a purchase after clicking a link I will earn a small commission but it won’t cost you a penny more)! Read my full disclosure policy.
To make this Graduation fan with a Cricut, you will need:
- Medium weight heavy cardstock – this is a great variety pack if you need multiple colors.
- If you like the gold glitter paper I am using, you can find this here.
- Cricut Maker or Explore Cutting Machine and your standard cutting mat.
- Wooden Fan Sticks
- Glue – This Bearly Art craft glue is my favorite glue for paper crafts.
- Graduation Fan Template
Download the Free Graduation Fan Template
To get this Graduation Fan Template, enter your name and email into the form below and then click the “Get It Now!” button! If you have any issues with the form, then click here to open the form in a new window.
Please remember these are for personal use only. If you’re looking to sell products using these designs, please purchase a Commercial Use License here
Graduation Fan Cricut Gift Box Step-by-Step Tutorial
Watch the full step-by-step video tutorial to learn how to make this graduation fan here:

Create a new project in Cricut Design Space and then upload the graduation fan template and add it to your canvas. Click on your template and then select “ungroup” to ungroup your layers.
Note: You won’t be able to modify the template if you don’t first ungroup your layers!
Adding the Graduation Year
Numbers 0-9 are already added in the template so you can easily adjust the year for your graduate’s year. Just delete the numbers that you don’t need and duplicate any numbers that you need more of.

How to Personalize with any Name
If you would prefer to personalize the graduation fan with your graduate’s name instead of “senior”, then delete senior and add your own name. I’ll show you the exact font and settings that I am using, but feel free to use whatever font you want and create the outlines as you want them.
Using the text tool, write your graduate’s name and change the font. I am using this script font called Rashida which is free to use for personal use.
Then resize your name so it’s about the width of the opening of the frame. This size will be different for every name. If you are using a script font, select “combine” and then “weld” so that your text layer attaches together and cuts correctly.

Select the offset feature in your top menu bar and adjust the offset to the size you want. I am going with 0.083″ and am keeping the corner rounded. Then select apply. Change the offset color to white.

Add another offset to your white offset layer. I am adjusting this to 0.125″ for the size. Hit apply when done and change that offset color to gold and the color for the top layer of text to black. So, your name should look very similar to what I have here.

You are now ready to cut everything out!
Note: If you are using the same gold glitter cardstock that I am using for this fan tutorial, make sure to use a very sticky mat. Because the glitter is double-sided, it slips easily. If your mat isn’t sticky, use masking tape to tape around the edges.
Assembling the Graduation Fan
1. These graduation fans are easy to assemble! Start by gluing each of your numbers together. You’ll glue the white layer on top of the gold and the black layer on top of the white (if you’re using the same colors as me). And then glue your 3 name layers together layering them as they are in Cricut Design Space.
2. Glue the decorative piece on top of your frame and then flip this over.
3. Tape the graduation picture to the inside of the frame and then flip it back over again.
4. Glue the name and numbers to the front of your graduation fan.
5. Glue a fan stick or popsicle stick to the back of your fan.
6. Last, glue the back piece to the back of your fan. Let it dry and your fan is ready to go!

More Cricut Graduation Crafts You’ll Love!
Looking for more Graduation crafts or decor to make with your Cricut? Check out of these fun Cricut Graduation Crafts on my blog:
- DIY Graduation Shaker Cake Topper
- Free Graduation Shirt SVGs
- Graduation Explosion Box
- K-12 Graduation Banner
- Pop-up Graduation Card
- Graduation Cap Gift Card Holder/Money Box
Make sure to save this graphic to Pinterest in case you want to use it again or save it for later!
