
Snowman Christmas Wreath SVG – Free Download
Are you looking for Christmas decorations to make with your Cricut? This simple Christmas wreath adds a pop of color to your house for the holidays and looks absolutely fabulous! Follow along with this step-by-step tutorial and grab the free Christmas wreath SVG in this post to get started.

Cricut Christmas Wreath
This Christmas wreath design is layered to add sturdiness and dimension. It’s fun to use a variety of regular and glitter cardstock to make this fun and festive. The smaller pieces are great for using scrap pieces so this is your reminder to check your scrap drawer.
Supplies Needed:
This post contains some affiliate links for your convenience (which means if you make a purchase after clicking a link I will earn a small commission but it won’t cost you a penny more)! Read my full disclosure policy.
To make this Christmas wreath, you will need:
- A variety of cardstock. I am using this white diamond glitter cardstock for the snowflakes and snowman (and this is my absolute favorite cardstock, you’ll love it!)
- Additional cardstock in green, red, brown, light orange and red glitter. If you don’t already have cardstock on hand, this is a great variety pack to get you started with paper crafts.
- Cricut Maker or Explore Cutting Machine and your light grip cutting mat.
- A glue with a fine point to it – This Bearly Art craft glue is what I am using.
- Scoring Stylus (which is what I will be using in this tutorial) or Scoring Wheel (Maker only). If your cutting machine doesn’t have the scoring feature, this scoring board and stylus is great to use.
- Fishing String or a thin string for hanging your wreath.
- (optional) Adhesive Rhinestones
- Christmas Wreath SVG
Download the Free Christmas Wreath SVG
To get this free Cricut Christmas wreath SVG, enter your name and email into the form below and then click the “Get It Now!” button! If you have any issues with the form, then click here to open the form in a new window.
Please remember these are for personal use only. If you’re looking to sell products using these designs, please purchase a Commercial Use License here.
Save for Later!
Make sure to share this on Pinterest so you can come back to it anytime! Plus, it makes a HUGE impact to keep SVG Nation’s designs free to you. Just hover over the graphic and click the pin icon.

Christmas Wreath Step-by-Step Tutorial
Watch the full step-by-step tutorial here to learn how to make this Snowman Christmas wreath with your Cricut here:

Step 1: Modify Your Design in Cricut Design Space
Create a new project in Cricut Design Space and then upload the Christmas Wreath SVG and add it to your canvas. Click on “Ungroup” to ungroup your layers. For help with uploading SVG files to Cricut Design Space, you can check out my tutorial here.
This is actually a very simple file to modify. You’ll notice there are a few lines. These are completely optional, but if you would like to use your scoring tool in these areas then change the operation of these lines to score and attach them to the layer they are on. Otherwise, delete the line layers. The score lines on the white layer are there for guides and the score lines on the flowers are there to give them more dimension.

Note: If you would like to use letter size cardstock for this cricut wreath, you are able to do this if you resize this slightly smaller. After uploading the file, keep everything grouped together. Click on the group of items and change the width to 27. Set the proportions to lock when changing the size to keep the correct dimensions.
Step 2: Cutting the Wreath
This Christmas wreath is pretty simple to cut. Just follow the prompts from Cricut Design Space for preparing each mat.
However, I did want to point out something for those using this white diamond glitter cardstock. When you click on the mat preview for this paper, you won’t be able to change it to letter size because there isn’t a half an inch buffer that Cricut wants. But, the design does fit, so select legal instead so the designs formats properly for this paper.

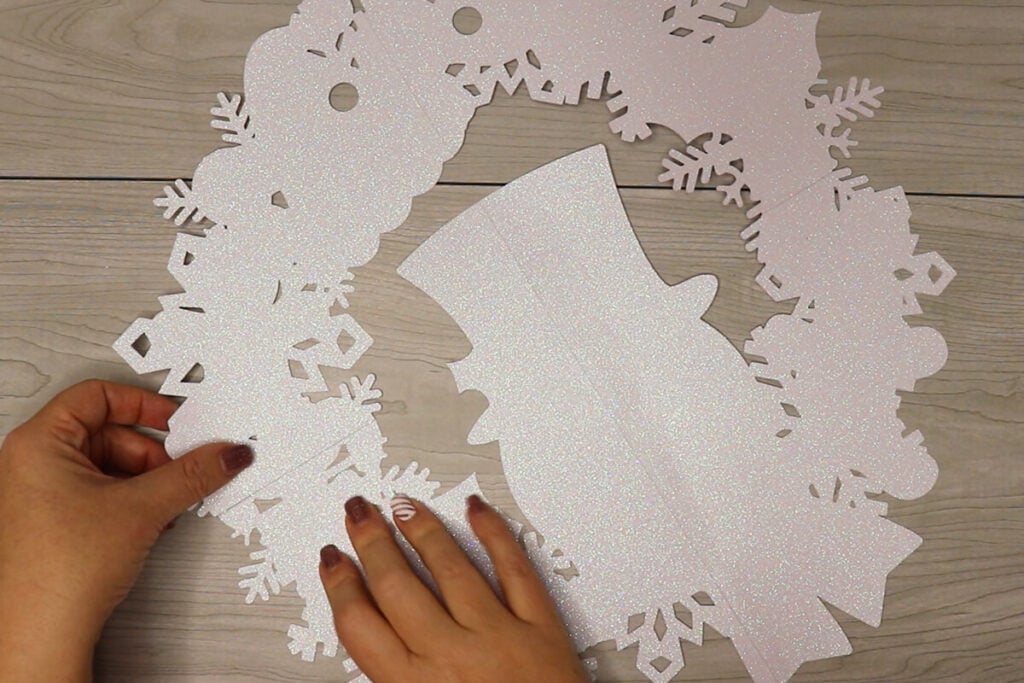
Step 3: Assembling your Christmas wreath
Start by attaching your 4 base pieces by gluing them together on top of the extra tab piece. If you used the scoring tool, then you will use that score line to line the pieces together. The lines will be covered so don’t worry about the way they look when the pieces are glued together.
Flip the wreath over and add a string through the 2 holes. Tie this off on the back of the wreath. You will use this to easily hang your Christmas wreath. I recommend fishing string, but if you don’t have this, any string will do. The thinner, the better so it doesn’t create bulk in the front of your wreath.

Next, glue on your black snowman layer and the 3 white layers on top. Make sure to line everything up before adding glue so you don’t add glue to the wrong side. The pieces won’t line up 100% because the snowflakes are meant to stick out. But, as you line them up, it will be easy to tell which piece goes where.
If you are using a glitter cardstock for the bottom layer and you are having trouble gluing these on, use hot glue instead. The white glitter I am using does glue just fine with regular glue, but a lot of glitter cardstocks don’t.

Glue your red pieces on top next. And go ahead and assemble your now man by adding the scarf, face, nose and hat accessories. Everything lines up perfect so it’s easy to know where each piece goes.
If your seams don’t line up perfectly for the white or the red layer, it’s not a big deal because these will soon be covered.

And then glue on the rest of your pieces. Everything has a specific spot so you won’t be able to glue anything to the wrong place because it won’t line up right. So do make sure you are lining pieces up before gluing them down.
To assemble the bow, add glue to the middle circle and fold in one of the sides to glue the circle on top. Add glue on top of that circle and and fold in another side to attach on top. Repeat this for all 4 sides. I find it’s easiest to use hot glue for this part, but a regular craft glue will work as well. Don’t forget to wrap the middle part of the bow around after your bow is ready.

Attach your bow and poinsettias to your Christmas wreath last. For the poinsettias, you can give them more dimension by folding in on each petal before gluing it down. And if you prefer, you can use rhinestones in the middle instead of the circle cut outs provided in the Christmas wreath SVG file.

This Christmas wreath is meant for hanging indoors since it is made out of cardstock. But it’s perfect for decorating classroom doors, office doors or any door in the house. And looks just as great hanging on the wall. When you’re done, make sure to post these in my crafting group here. I absolutely love seeing your crafts and can’t wait to see how you style these.
If you’re looking for other Christmas crafts then make sure to check out these popular Cricut Christmas crafts ideas here.