
DIY Cricut Christmas Light Box with Free SVG File
The holiday season is upon us, and what better way to add a touch of magic to your home than with a 3d Christmas light box made with your Cricut. In this step-by-step tutorial, I’ll walk you through the process of creating a festive light box that will surely become one of your favorite Christmas decorations.

Christmas Light Box
This Christmas Light Box comes with 2 different SVG templates. Choose from the elf gnome with an outdoor winter scene. Or go with the Santa gnome with the indoor Christmas magic. You can also mix and match and combine either light box design with either gnome.

Supplies Needed:
This post contains some affiliate links for your convenience (which means if you make a purchase after clicking a link I will earn a small commission but it won’t cost you a penny more)! Read my full disclosure policy.
To make these Christmas light boxes, you will need:
- 12×12 inch or letter size Medium or heavy weight Cardstock in white, black, red, green, yellow and light pink – I highly recommend this 80lb white cardstock for the base pieces which is what I am using. Using 12×12 inch for the white will make the cutting much faster.
- Cricut Maker or Explore Cutting Machine and your light grip cutting mat.
- A glue with a fine point to it – This Bearly Art craft glue is what I am using.
- Scoring Stylus (which is what I will be using in this tutorial) or Scoring Wheel (Maker only). If your cutting machine doesn’t have the scoring feature, this scoring board and stylus is great to use.
- Fairy Lights – these are the fairy lights that I am using.
- Christmas Light Box SVG
Download the Free Christmas Light Box SVG
To get this free Cricut Christmas light box SVG, enter your name and email into the form below and then click the “Get It Now!” button! If you have any issues with the form, then click here to open the form in a new window.
Please remember these are for personal use only. If you’re looking to sell products using these designs, please purchase a Commercial Use License here.
Save for Later!
Make sure to share this on Pinterest so you can come back to it anytime! Plus, it makes a HUGE impact to keep SVG Nation’s designs free to you. Just hover over the graphic and click the pin icon.

Christmas Light Box Step-by-Step Tutorial
Watch the full step-by-step video tutorial to learn how to make these Christmas light boxes with your Cricut here:

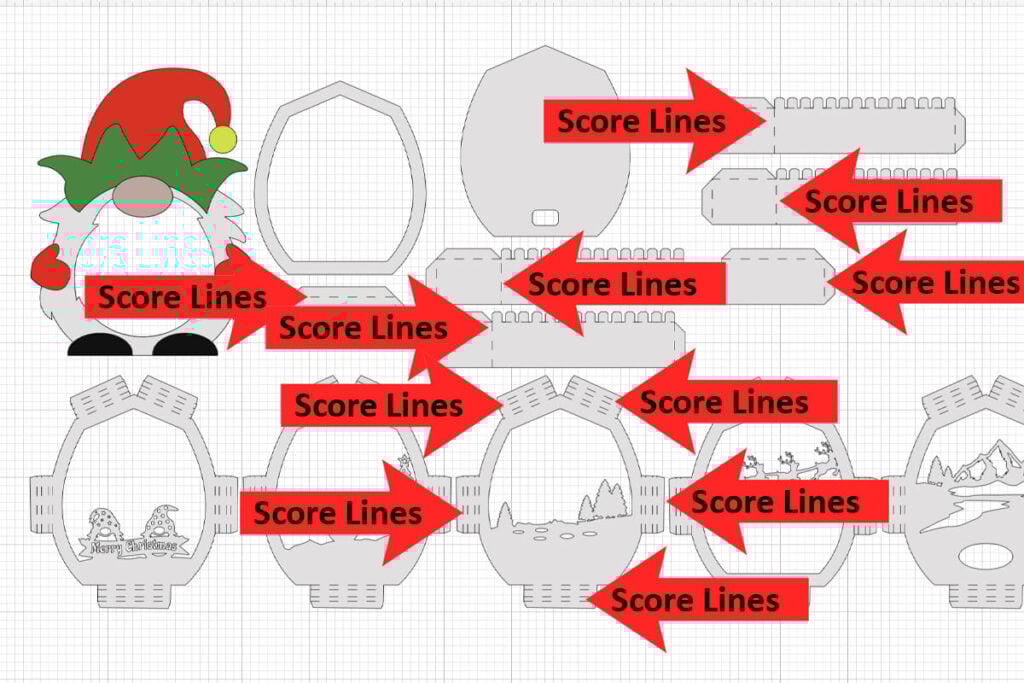
Step 1: Modify Your Design in Cricut Design Space
Create a new project in Cricut Design Space and then upload the Christmas Light Box SVG and add it to your canvas. Click on “Ungroup” to ungroup your layers. For help with uploading SVG files to Cricut Design Space, you can check out my tutorial here.
There are several lines that need to be changed to “score”. Make sure to change the operation of these lines to score and then attach them to layer they will score on. If you need help with this part, make sure to watch the video tutorial here.
Step 2: Assemble the Light Box Frame
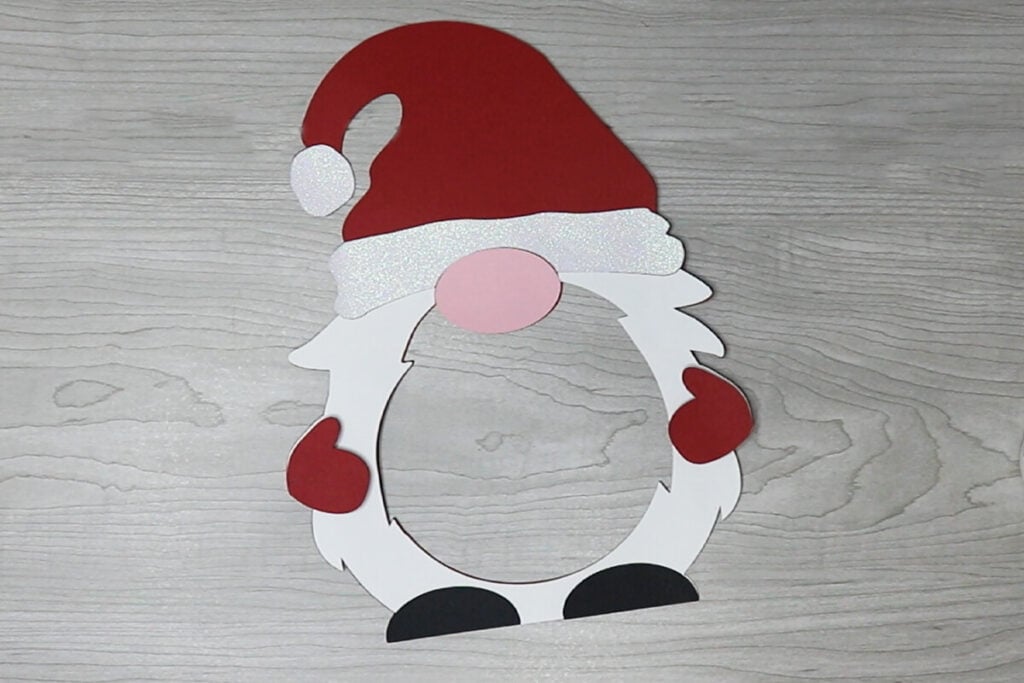
Start by gluing your gnome pieces together. You will layer these by gluing the beard on top of the red base. And then glue on the feet, the nose, hat pieces and hands. You can also use foam dots for the hands for added dimension like I am doing.
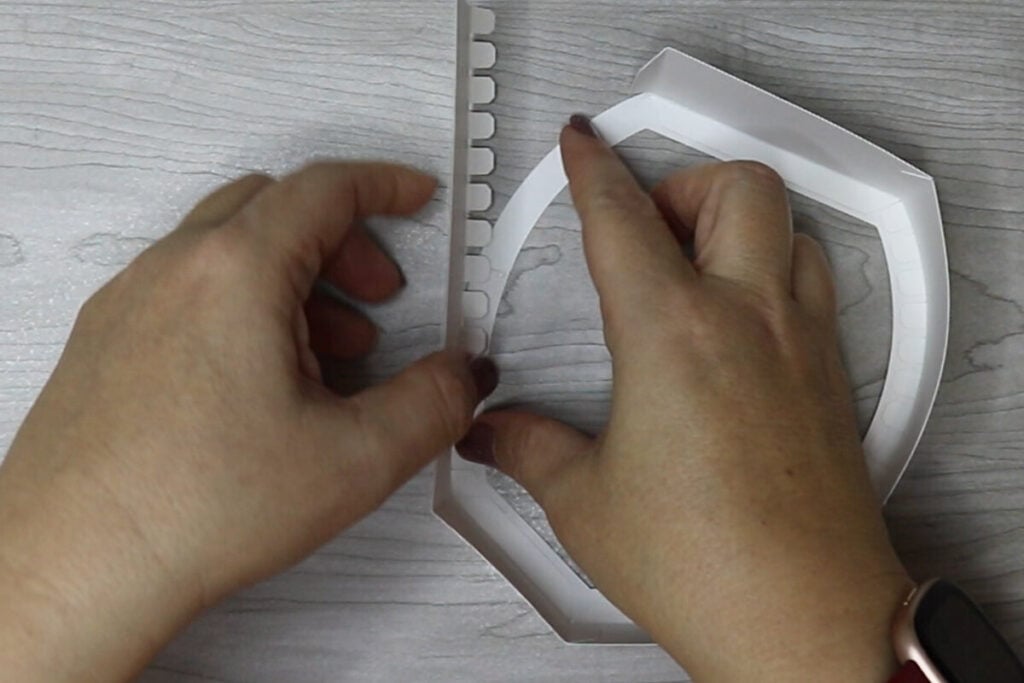
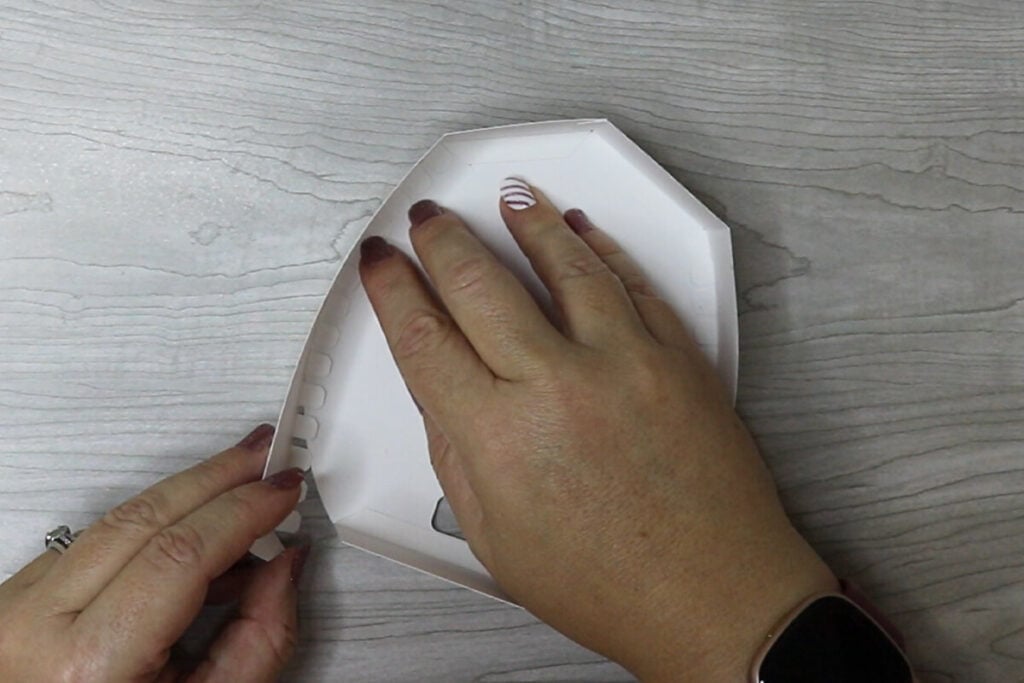
There are 3 sets of white rectangle pieces that are similar, but some are different sizes. Grab the 2 smaller rectangle pieces that look the same. One is slightly smaller than the other. Put the smaller one aside for later and keep the longer one. Then grab the 4 rectangles that look the same. Put the 2 slightly smaller ones aside for later and keep the 2 longer ones.
With the 3 rectangles that I mentioned to keep, fold on all of the score lines. You will then use these to glue around the white circle(ish) piece that has the center cut out. Glue the bottom tab piece down first. Then glue each side down by lining the tab pieces up with the outside of the circle shape. Think of this like gluing the bottom of a box together. Close it all together using the tab pieces.
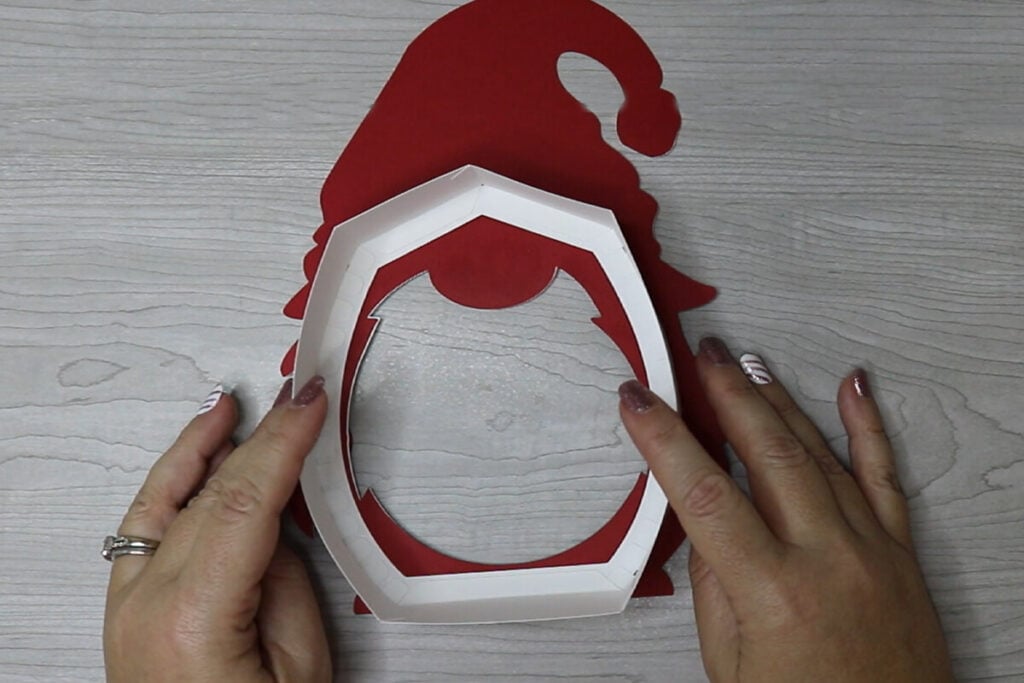
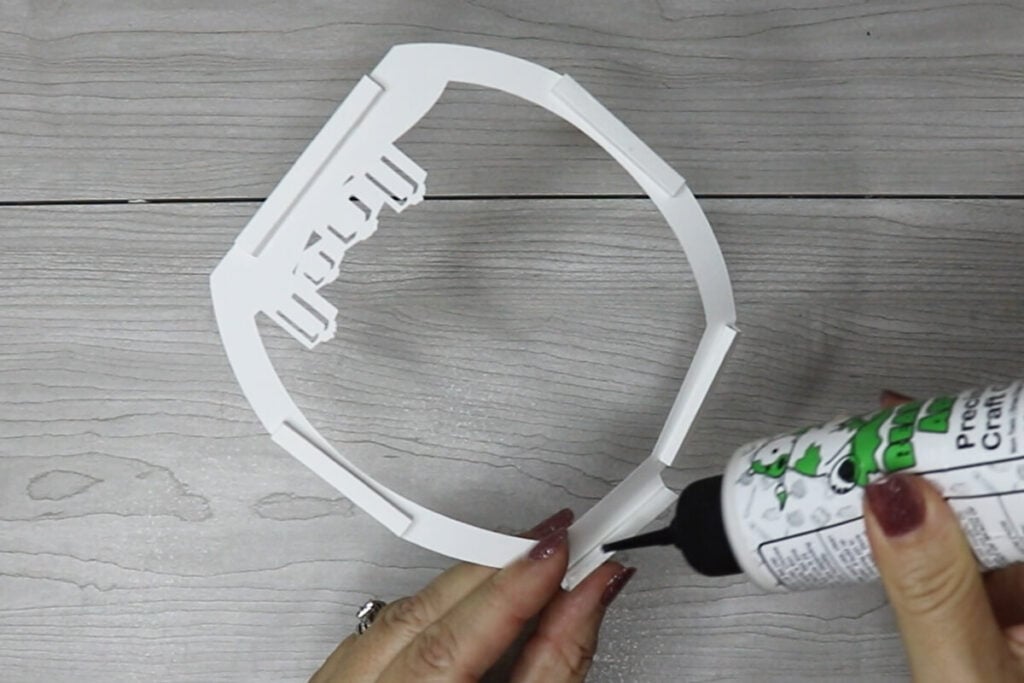
Then glue this piece to the backside of your Christmas gnome. You can line the bottom part up with the bottom of your gnome. But, I like to glue this on just slightly higher as this provides a little more stability.
Repeat these same steps for the other pieces that you put aside earlier. Once this part is assembled, this should fit into the other piece like a box. It will be a tight fit, so you will have to push it down a bit.
Step 4: Assemble the Light Box
To assemble the inside of the light box, grab all 6 of your shadow box pieces and line them up so they are all face-up. Then for each piece, flip it over so that you are folding on all of the score lines away from the front.
There are 4 lines for each side. Fold on all 4 of these and then glue it down by folding it over and gluing down the top fold. Repeat this for all 6 sides on the 5 shadow box pieces that have these. The bottom piece doesn’t have these.
Use the square spacers that you just created to glue the shadow box pieces together. Layer them on top of each other from the top to bottom. To know which order they go in, look at the design in Cricut Design Space. They are in order from left to right with the left image being the top.
Once the shadow box pieces are assembled, place them into your light house with the front facing the opening.
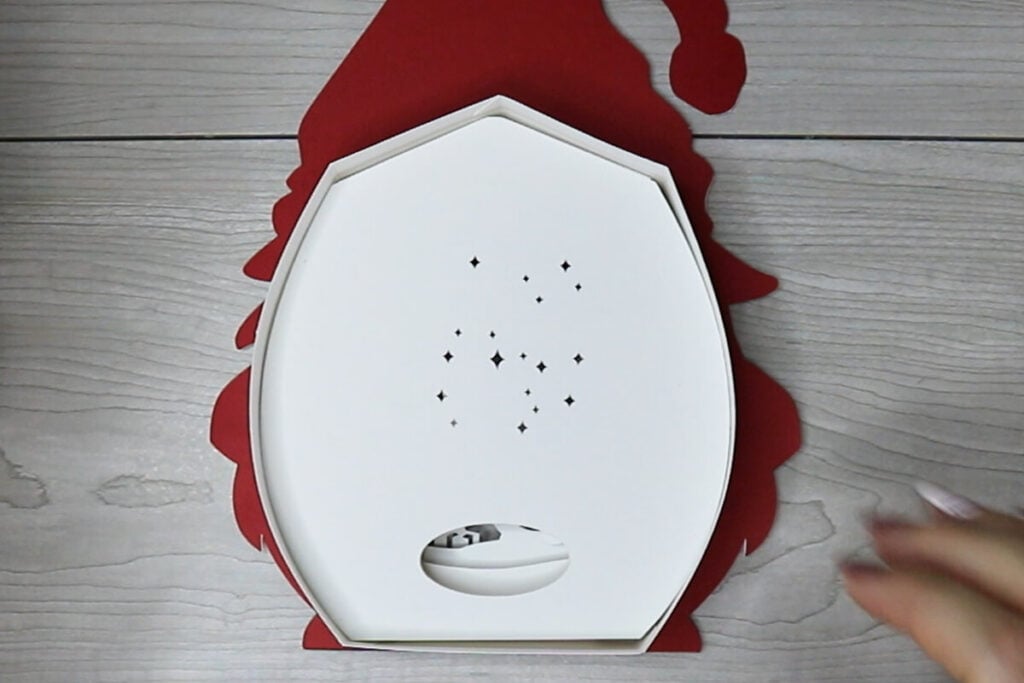
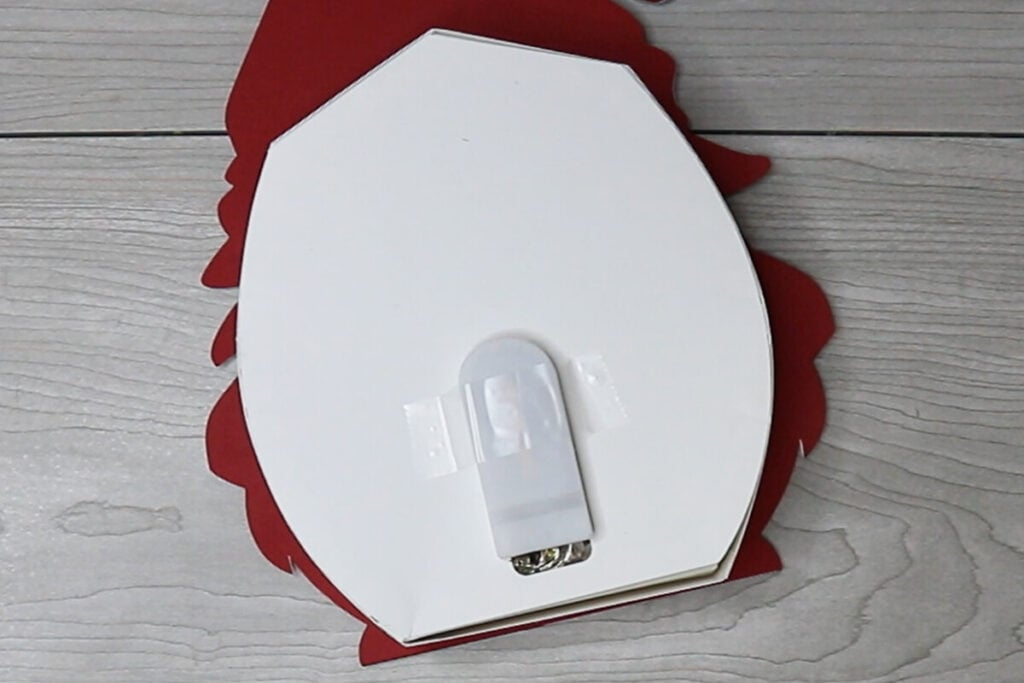
Place the lid on top. The lid will go on the inside. And this should be a tight fit because this holds everything together this way. Place your fairy lights through the hole on the back and then tape the battery pack down to the back.
Creating a Christmas light box with your Cricut adds a personal touch to your holiday decor, making it truly one-of-a-kind. Experiment with different paper colors and lights to switch things up a bit to fit your personal style. When you’re done, make sure to post these in my crafting group here. I absolutely love seeing your crafts and can’t wait to see how you style these.
If you’re looking for other Christmas crafts then make sure to check out these popular Cricut Christmas crafts ideas here.