
How to Make Scratch Off Cards
If you’ve ever wanted to add a little surprise to your handmade cards, scratch off cards are the perfect DIY project. They’re fun, customizable and incredibly easy to make – especially with your Cricut.

This post contains some affiliate links for your convenience (which means if you make a purchase after clicking a link I will earn a small commission but it won’t cost you a penny more)! Read my full disclosure policy.
If you enjoy making your own handmade cards, then make sure to check out all of my card SVG templates for more unique card ideas.
Learn how to Make Scratch Off Cards
In this tutorial, you’ll learn how to make scratch off cards at home. Whether you’re crafting for birthdays, holidays, classroom rewards, or party favors, scratch off cards are an interactive way to make your message unforgettable.
Learn how to make scratch off cards in this video tutorial or keep scrolling if you prefer a step-by-step tutorial.

To Make Scratch Off Cards, You will Need:
- Medium Weight Cardstock – this is a great variety pack of cardstock if you need to stop up.
- Scratch Off Sticker Paper
- A good craft glue – this Bearly Art craft glue is what I am using.
- Scoring Stylus (which is what I will be using in this tutorial) or Scoring Wheel (Maker only).
- Cricut Maker or Explore Cutting Machine and a cutting mat.
Download The Scratch Off Card Template
You can download this free Scratch Off Card Template from my members only free library (design #1 under Card Templates or search “Scratch Off Card SVG”).
Don’t have a password? Unlock my free members library here.
Share the love and easily come back to this tutorial anytime just by saving this on Pinterest… Plus this helps to keep my SVG files and Cricut tutorials free!

Step 1: Upload the Scratch Off Card Template & Cut Out the Designs
Upload the Scratch Off Card Template to the cutting design software you use and cut out each of the layers.
Note: If you’re using the envelope template, change the operation of the lines to “score” and then attach them to the envelope so your Cricut will score these for you. You can also use your Cricut to write on the card for you if you want. Just add your message to the pink layer before cutting.
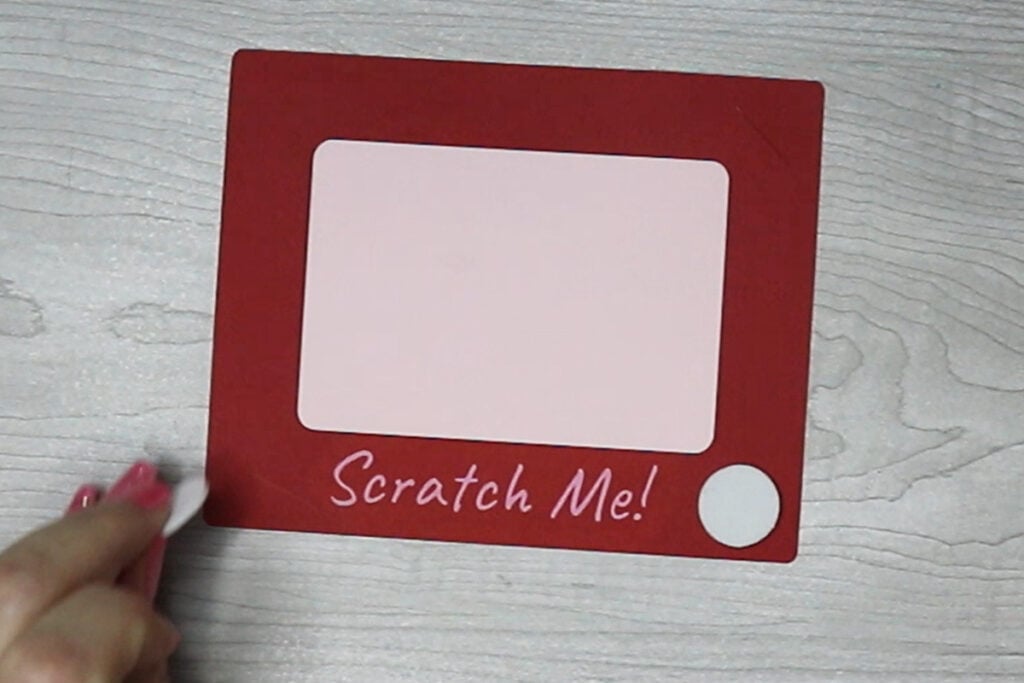
Step 2: Attach the “Scratch Me” Text
There are multiple way you can add the text “Attach Me” to your card. You can use your Cricut Pens to write this. Or you can attach it using iron on vinyl or heat transfer vinyl. You can also cut this out with cardstock and glue it on.
The slot for the penny should be in one of the top corners with the “scratch me” at the bottom when you attach this on.

Step 3: Glue the Card Together
Glue the front of the card to the back layer. Avoid adding glue in the area where the penny goes because you want this area open to be able to slide the penny in for scratching the card. It’s best to use a lighter color paper for the back of the card since this is the layer you will be writing on.
Then glue on each of the button pieces to the bottom of your card. Try using craft foam for a fun 3D effect!
Step 4: Add in Your Message
Add a message to the empty space on your card if you didn’t already write on it with your Cricut. Then cover this with the scratch sticker paper. Include a penny in the penny slot and your card is ready to go!

When you’re done, make sure to post these in my crafting group here or tag me if you post them on social media. I absolutely love seeing your crafts and can’t wait to see your scratch off cards.